The following three tests come from the fourth edition of “The Complete Glock Reference Guide” by Lone Wolf Distributors.
Before beginning the safety checks, make absolutely certain there is no live ammunition present in your work area. Remove the magazine, lock the slide rearward then visually and tactilely confirm the chamber is empty. After double- and triple-checking the pistol is empty, fieldstrip the pistol, set the slide aside.
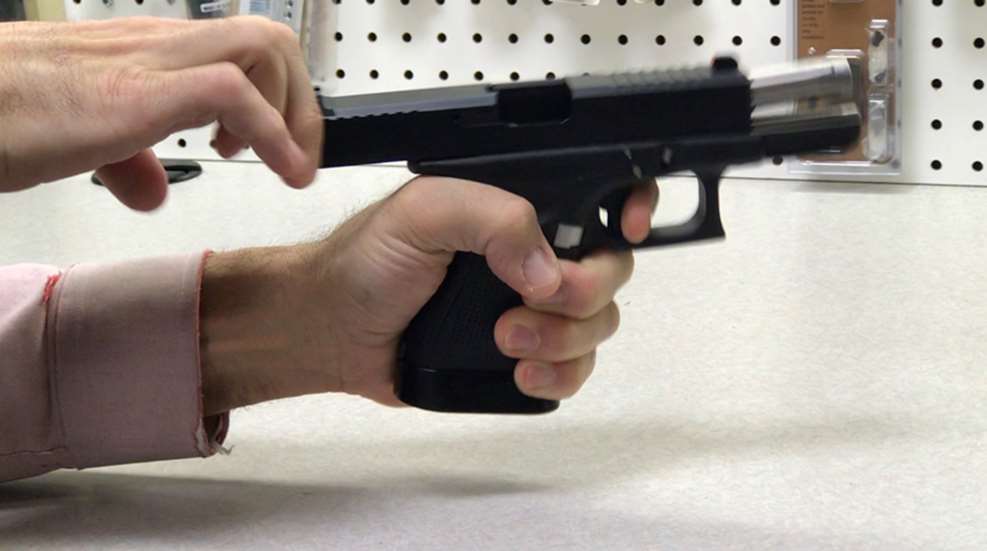
Trigger Safety Test
While gripping the frame in one hand, push forward on the on the vertical extension of the trigger bar. Doing so will cause the trigger forward and the trigger safety to engage. Gently pressing the outside of the trigger—without engaging the trigger safety—should cause the trigger not to move. The aforementioned reference guide sums it up sayings, “This confirms the first safety device of the Glock: the integrated trigger safety needs to be depressed simultaneously with the trigger to fire the pistol.” Next, return the trigger to the fired position by gently pushing against the vertical extension of the trigger bar once more while pulling the trigger. Now, set the frame aside and test the firing-pin safety.
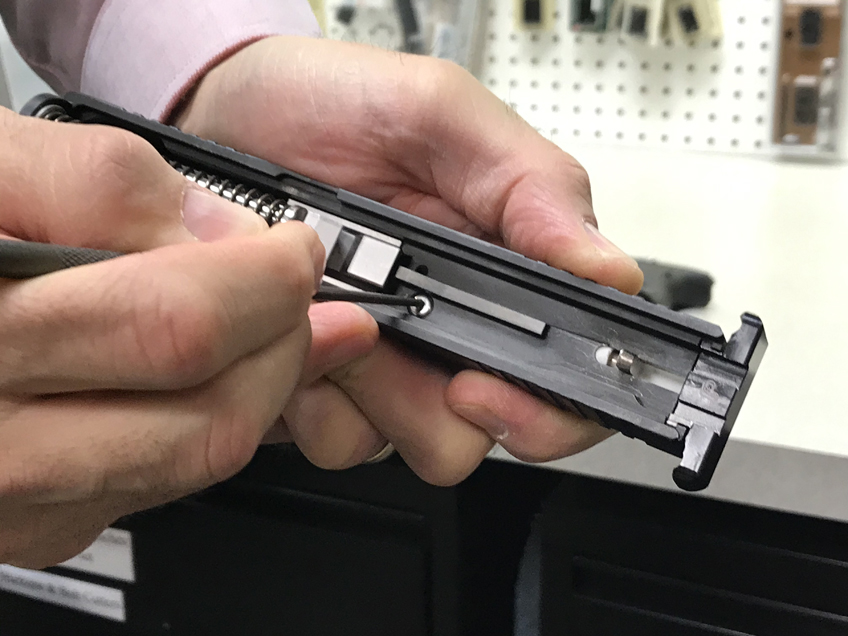
Firing-Pin Safety/Plunger Test
While holding the slide in the muzzle-down position, depress the firing pin safety/plunger with your finger, Glock Tool or punch. Doing so should cause the firing pin/striker to move forward in the slide until the tip of the firing pin/striker protrudes from the firing-pin hole located in the slide’s breechface.
An alternate method to test this safety method is to depress the firing-pin safety/plunger while shaking the slide. You should hear the firing pin/striker assembly moving freely inside the slide.
After performing either test, reset the firing-pin safety/plunger by pulling the firing-pin/striker lug to the rear approximately 1/8 to 1/4 inch. Warning: Don’t pull the firing pin/striker back to the rearmost position and release it, allowing it to snap forward under spring tension, as doing so may damage the firing-pin/striker and/or the firing-pin safety/plunger. Having successfully tested the firing-pin/plunger, it’s time to test the recoil spring.
Recoil Spring Test
According to the aforementioned Guide, your recoil spring may begin to lose tension after firing 2,500 to 5,000 rounds through your pistol. To test the function of your recoil spring, make your pistol safe, remove the magazine, lock the slide rearward then visually and tactilely confirm the chamber is empty. After double- and triple-checking the pistol is empty, slingshot the slide forward, then pull the trigger and hold it down.
While keeping the trigger to the rear, pull the slide completely back and slowly ease it forward— almost all the way forward—and the let it go. The slide should rebound fully and go totally into battery. If not (or if the motion is hesitant or sluggish) it’s time to replace the recoil spring.
The American Gunsmithing Institute (AGI) Glock Armorer’s course cites a similar safety test:
Begin by making your pistol safe, remove the magazine, lock the slide rearward then visually and tactilely confirm the chamber is empty. After double- and triple-checking the pistol is empty, slingshot the slide forward, then pull the trigger and hold it down. Now, slowly allow your trigger finger to ease forward. You should hear and feel the trigger reset. (If, however, the doing this also causes the striker to fall forward, and either the connector and/or firing-pin/plunger needs to be replaced.)
Assuming your Glock passes all of these safety checks, your Glock is safe to shoot and it’s time to send rounds downrange.
The next entry will discuss various practical shooting protocols designed to put my new Glock through its paces.