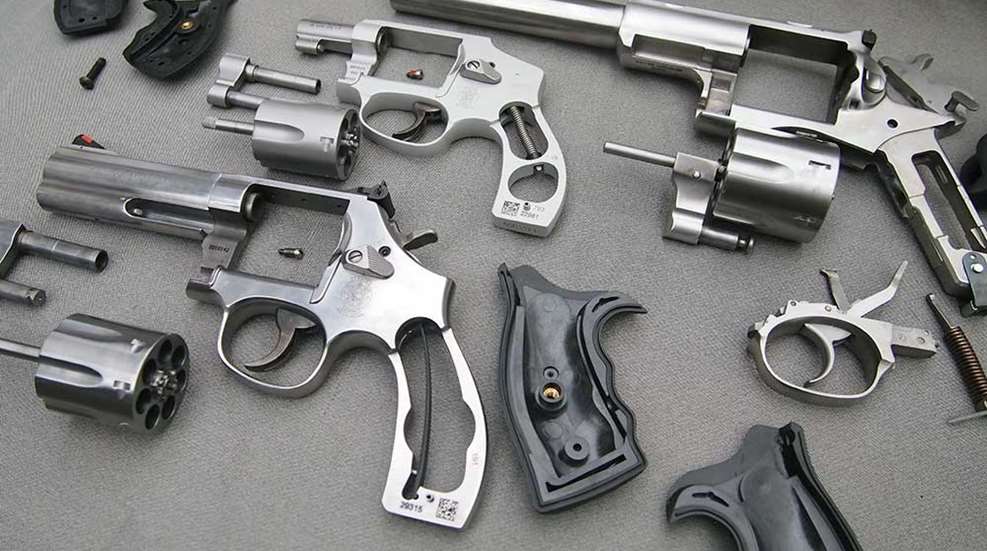
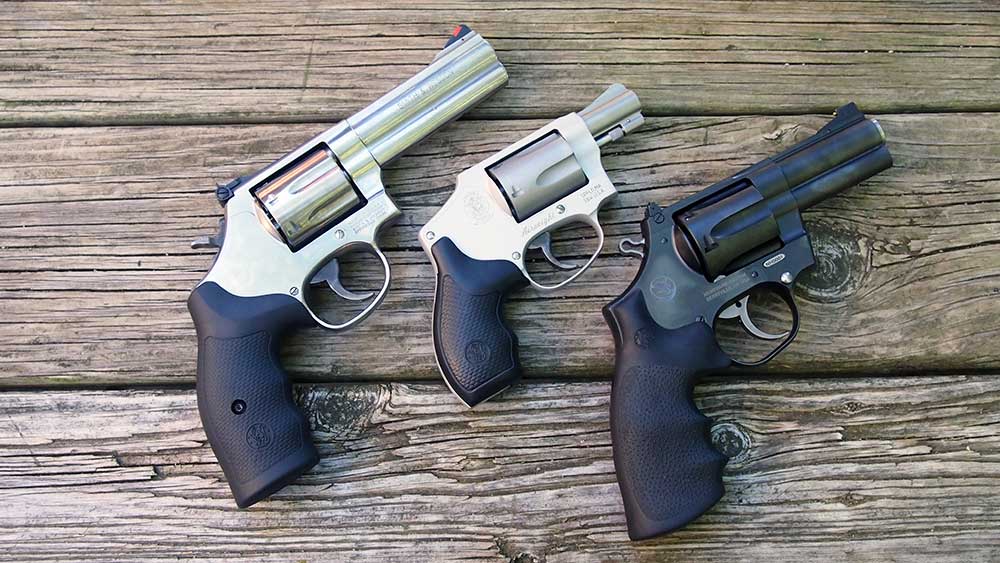
When it comes to cleaning firearms, gun owners tend to fall into one of two categories: the “I’ve never cleaned it and never intend to” group and those who clean whether the gun needs it or not. How often firearms should be cleaned depends on frequency of use and what they’re used for, but that’s a discussion for another time. The purpose here is to go over a few of the common revolver designs on the market and how to field strip them for maintenance.
Disassembling your revolver to this extent is not necessary on a regular basis but is meant for repairs, parts upgrades and annual in-depth cleaning. Armed with this knowledge—pun intended—you’ll be able to clean and maintain your revolvers.
Supplies:
- Manual and/or revolver assembly and maintenance guide (just in case)
- Gun mat or towel
- Non-marring hammer (check out Brownells 1-inch Nylon/Brass Hammer)
- Magnetic-tipped gunsmith screwdriver set (try Brownells Magna-Tip Screwdriver Set)
- Allen key/hex wrench set, if applicable (try this Bondhus Gorilla Wrench Set)
- Rebound slide tool (S&W Rebound Slide Spring Tool)
- Tweezers (try the Tweezer/Magnifier pack from Brownells)
- Pin punch (try the Starrett Pin Punch Set)
- Safety glasses (check out SSP Eyewear)
- Gun CLP or lubricant
- Kit with cleaning rod, jags or loops, patches and brushes
- Rag or paper towels
- Q-Tips (handy for small areas)
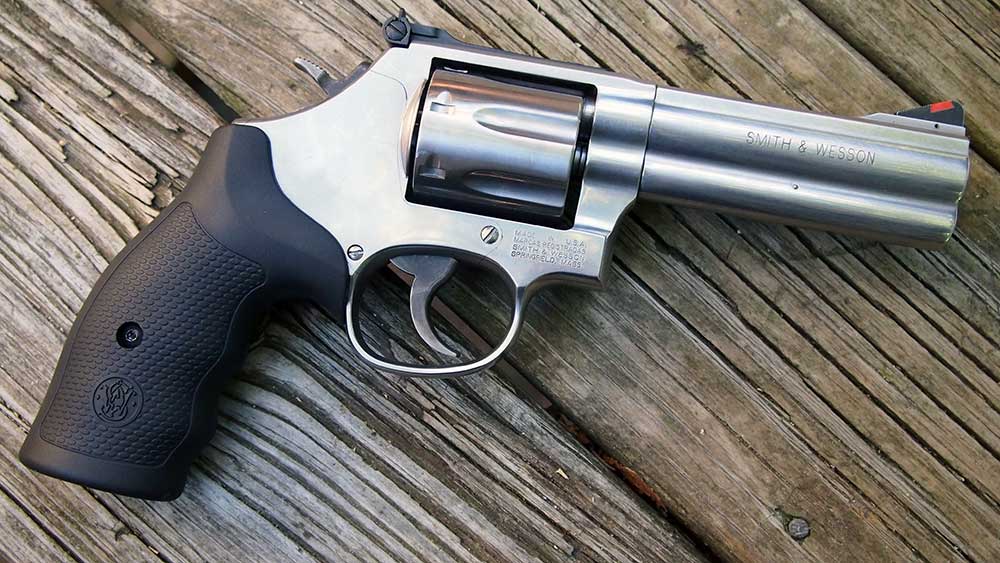
I'll illustrate the disassembly and cleaning procedures with a Smith & Wesson Model 686, which is built on the company's L-frame.
Step One:
As always, make sure your revolver is unloaded. Follow the four golden rules of gun safety when checking: keeping your finger off the trigger, aim the gun in a safe direction and open the cylinder. Empty the cylinder, if need be. Also take the time to ensure the barrel isn’t obstructed in any way.
Step Two:
Remove grip panels or sleeve. This step is one reason why it’s important to use gunsmith-specific screwdrivers. When the screwdriver bits do not precisely fit the screw, they can easily slip and damage the gun. On the other end of the spectrum, if they’re too large, the overhang could scrape at the edges, causing damage. Oversize bits also will not fit if the screw is recessed.
If a grip panels sticks after screws are completely loosened, use the tip of your finger or a soft, non-marring tool to gently nudge the panel loose. Prying at the edges of the panel with metal implements might scratch or gouge the panel itself or the frame beneath.
Step Three:
Remove side plate screws. Depending on its age and model, your revolver may have three, four or five screws, the fifth of which is located at the front of the trigger guard. Between 1905 and 1955, many revolvers were manufactured with five screws. The uppermost side plate screw—the “bug screw"—was discontinued around 1956 and after approximately 1961, the screw in front of the trigger guard was also eliminated. Today, most Smith & Wesson revolvers are made with three screws, although there are some being produced with the “classic” five-screw design.
As you remove the screws, lay them on your mat in specific order to ensure they are replaced in the correct location. Some screws are different sizes and only fit in certain holes but with time even screws that are supposedly the same size might fit more precisely in the space they’ve occupied for so long. Hold the gun securely while working with the screwdriver to avoid slipping and scratching the revolver’s side plate.
When the side plate screws are removed, it’s time to remove the side plate itself. Holding the grip in one hand, use your non-marring hammer to tap the trigger guard and grip frame until the side plate loosens (use the nylon end of the hammer). Once it is loose, lift the side plate free and set it aside.
In the process of removing the screws and side plate, it is possible to remove the cylinder. Open the cylinder and slide it forward to remove it. Certain newer revolvers—typically DA models such as the pictured Smith & Wesson 686—have a hammer block. The hammer block is used as an internal safety mechanism and can fall out once the side plate is removed. Lift the hammer block free from the gun and set it aside with the other parts. Do not disassemble the cylinder. There is rarely a need to do so. You may clean the cylinder and related parts without separating them from one another.
Step Four:
Remove strain screw from grip. After removing this screw, which is found at the bottom of the grip, the main spring will also come free. Set strain screw and main spring aside. In some models and variants, the main spring assembly will include an actual spring and require different removal methods. For those cases, please refer to Ruger Super Redhawk summary below.
Step Five:
Remove the hand. This can be accomplished by levering the upper end out of the frame and working the lower end up and out of the trigger. In some models, the hand is removed as a part of the trigger assembly rather than separately. In such cases, the hand should stay within the trigger assembly, in part because its pins are holding a spring in place within the assembly. Pulling the hand free could result in the spring coming free and launching itself across the room.
Step Six:
Remove the hammer. Do this by using your support hand to pull the cylinder release back. Continue holding the cylinder release back and pull the trigger. This allows you to lift the hammer free from the revolver’s frame, a process that may require carefully wiggling the hammer up over the hammer stud holding it in place. On models like the pictured Smith & Wesson 686, the main spring stirrup will be hooked onto the hammer but not attached. In those cases, be sure you pay attention to the direction in which the mainspring stirrup is mounted to the hammer, since it can easily fall off during removal. Having done so, slowly release the trigger.
Step Seven:
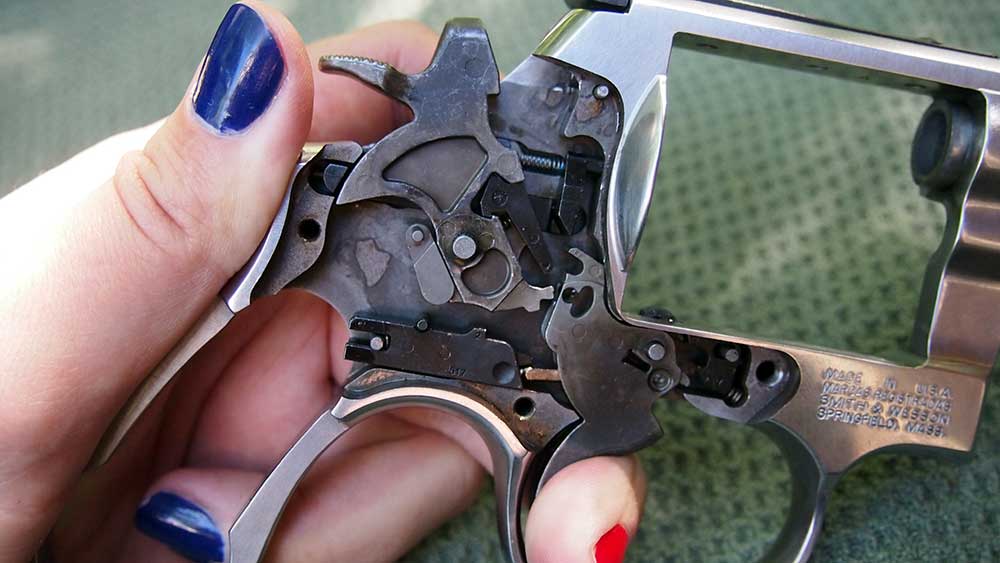
Remove rebound slide and internal spring. The rebound slide is a small rectangular bar containing a spring located behind the trigger and below and behind the hand. This part must be removed with caution, not only because of its internal spring but because it works in tandem with the trigger lever. Do not force the rebound slide straight up or you might damage the lever. Work slowly.
If you picture the hand and rebound slide as a backwards upper-case “L,” the rebound slide would be the base. Cover the open end of the rebound slide with the finger of one hand to contain the spring within during removal and use the flat of a standard screwdriver to carefully lift and remove it. When setting it aside, leave the spring inside for safekeeping.
Be cautious when removing or replacing springs. I once had a moment of mad ninja skills and snatched a spring from midair as it attempted to escape but since those instances are rarer than we all wish, take the time to ensure your springs stay where you want them.
Step Eight:
Remove the trigger. Be aware there is a small spring in this area that is quite difficult to replace if it is removed or flies free. Be attentive and deliberate as you work.
Step Nine:
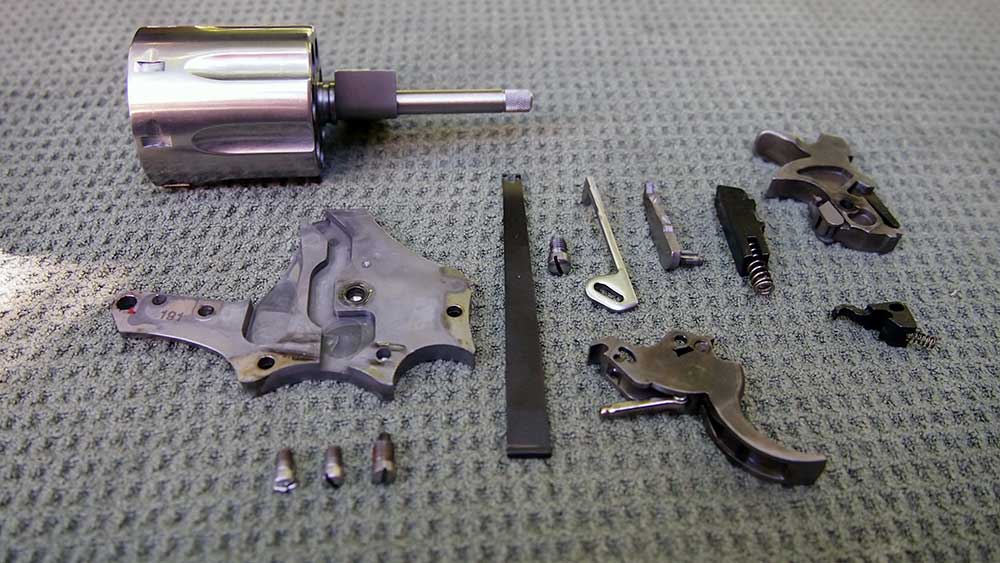
If your revolver is a 4 or 5-screw model your next step will be to remove the fourth screw which is located on the face of the trigger guard. The cylinder stop and spring are part of this step, so proceed with caution. The spring is small and under significant pressure.
If applicable, remove the fourth screw. Then, using either the edge of a screwdriver or a punch, slowly push the edge of the cylinder stop down through the opening in the frame so it can be removed. It is helpful to use tweezers to assist in the removal of the cylinder stop, but do not use pliers because it is too easy to accidentally squeeze and damage the small part. Keep the finger of one hand over the spring to stop it from coming loose and flying off, never to be seen again. Set aside cylinder stop and spring.
Reassembly Tips:
Cylinder stop: Use a prick punch or other slender tool to press the spring into the frame to allow you to install the cylinder stop.
Rebound slide: The task of replacing the rebound slide and spring becomes much less daunting with a rebound slide tool, which is slotted to allow for compression of the spring around the rebound slide stud. A standard screwdriver can also be used.
Side plate: To replace the side plate, simply press it into place with your hands. It won’t be completely flush with the frame yet but when you put the screws in, it should finish the process.
Cell phone: Remember, taking pictures as you go is an excellent way to ensure you do not forget where something goes or what direction it should be facing. (It also lets you know what happened if you finish the job with mysteriously left-over parts.)
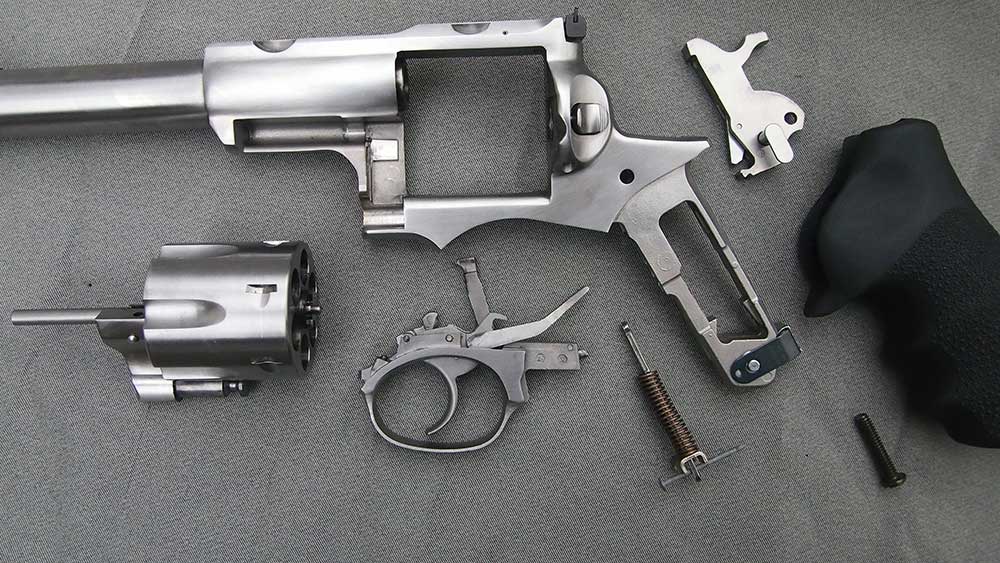
Summary of field-stripping the Ruger Super Redhawk, a large-frame magnum revolver:
1) The main spring assembly is removed by cocking the hammer and placing an appropriately-sized disassembly pin or nail into the hole at the base of the hammer strut. Controlling hammer with thumb, slowly pull trigger and remove main spring assembly. Do not remove the pin or nail from the strut.
2) Pull trigger and hold in rearward position to remove hammer pivot from base of hammer and then lift hammer from frame before carefully releasing trigger.
3) Use the rounded end of the strut from the main spring assembly to press the trigger guard lock plunger. Plunger is located within the gun’s frame at the top of the grip, behind the trigger guard. Once plunger is depressed fully, lever trigger guard assembly from frame. (If the strut is too difficult to maneuver you can use a screwdriver, punch, or other object to depress the plunger.)
5) Press cylinder release to swing cylinder assembly open and remove entirely from frame.
If you count every revolver model and variant on the market, your numbers will reach not into the dozens but into the hundreds. If you have one of the countless Smith & Wesson L, J, K, or N-frame revolvers, this guide will be a complete resource for you. If you have another model entirely, no worries. Think of this guide as a starting point, and go from here. Manuals and properly executed revolver books are your friend. Go forth and field strip, and learn to maintain and fire your revolvers from the inside out.


