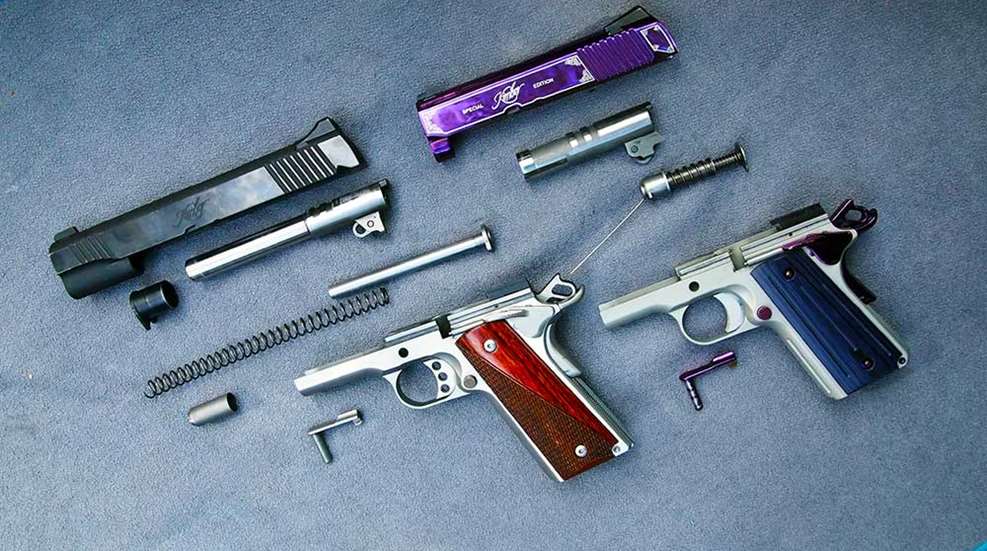
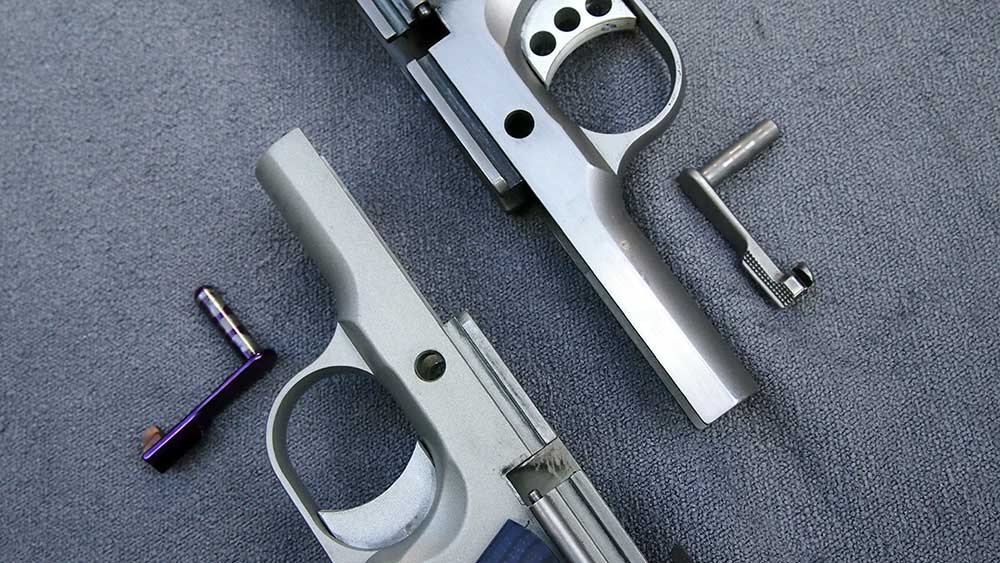
Pictured above: A disassembled Kimber Ultra Carry II Two-Tone in .45 ACP and Kimber Amethyst in .45 ACP.
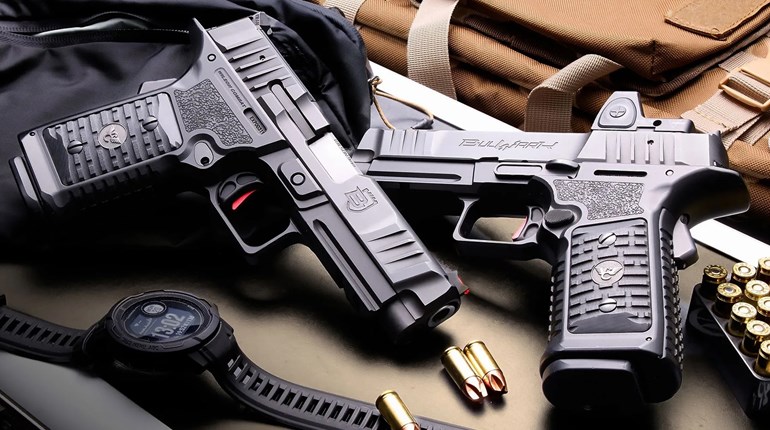
From the year that John Browning's famed M1911 pistol was adopted by the U.S. military, its fan base has been growing steadily (as has his). Although there are some naysayers who prefer their pistols in plastic and without multiple external safeties, there are many gun owners who espouse the benefits of owning and carrying 1911s. They are, after all, handguns with more than a century of heavy use and meticulous crafting behind them. If you want a gun built on a platform that’s already undergone every possible method of torture testing, you want a 1911.
If you do own a 1911 – or if you don’t but are curious what exactly field stripping one entails – this tutorial is for you. Here I’ll go over the basics of field stripping your 1911 for basic cleaning and maintenance. We won’t go so far as disassembling the safeties or trigger because, unless you are quite experienced, those particular components are best left for your gunsmith.
Tools and Materials:
- Manual and/or 1911 assembly and maintenance guide (just in case)
- Gun mat or towel
- Non-marring hammer
- Magnetic-tipped gunsmith screwdriver set (try Brownells Magna-Tip Screwdriver Set)
- Allen key/hex wrench set, if applicable
- 1911 Auto Bushing wrench
- Disassembly pin or paper clip to make your own (for bull barrel 1911s)
- Safety glasses
- Gun CLP or lubricant
- Kit with cleaning rod, jags or loops, patches and brushes
- Rag or paper towels
- Q-Tips (handy for small areas)
Step One
Follow Col. Jeff Cooper’s golden rules of gun safety:
- All guns are always loaded.
- Never allow the muzzle to cover anything you are not willing to destroy.
- Keep your finger off the trigger until your sights are on target.
- Be sure of your target (and what is beyond it).
With your gun aimed in a safe direction, drop the magazine and lock the slide back to be sure it is empty. Do not rely on a visual check alone; take the time to run your finger in and around the barrel, chamber and magazine well. When you are certain it is empty, check it again. Then move on to step two.
Step Two
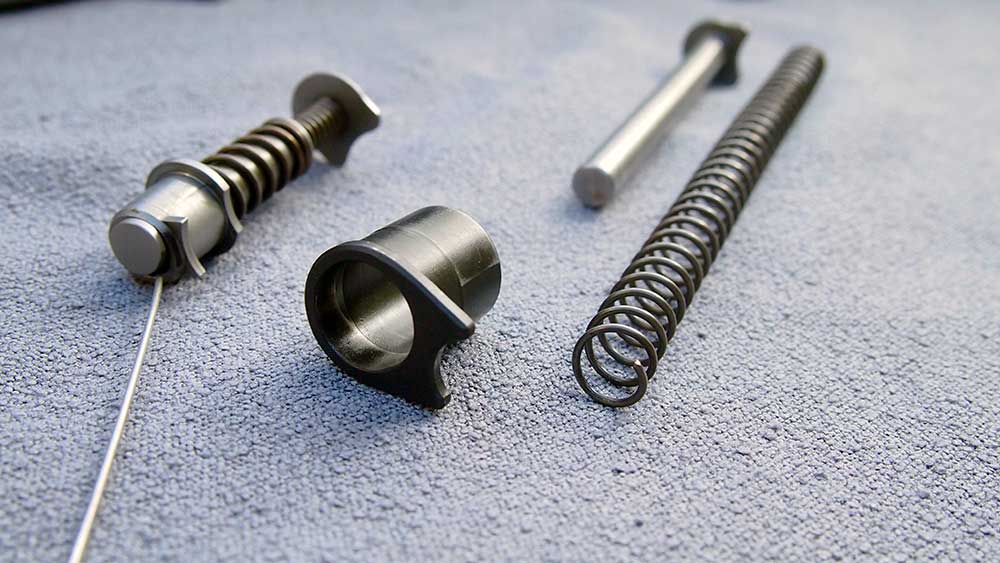
Using a barrel bushing wrench or comparable tool, depress the recoil spring plug. The plug is located directly below the barrel bushing. After depressing the plug, rotate the barrel bushing to one side. Take care with this step because the recoil spring plug holds the recoil spring back tightly. If you are not careful, the spring will eject the plug into whatever dark, impenetrable corner exists in the room you are working in. When the spring is loose, the recoil spring plug can be removed from the end of the spring and set aside. The spring itself will still be held in place within the slide.
Step Three
Turn the gun right-side down. Hook your thumb against the front of the trigger guard – without touching the trigger – and wrap the fingers of the same hand over the slide. (Hooking your thumb inside the front of the trigger guard rather than around the grip safety allows you better access to the slide for the remainder of this step.)
Push the slide back and align the rearward, raised portion of the takedown lever with the disassembly notch in the slide (the first notch is the slide stop notch and the second, smaller one is the disassembly notch). Holding the slide in this position, use the fingers of your other hand to begin pushing the takedown lever pin free from the receiver. If you need a visual aid, simply continue to hold the slide back and rotate the gun so you’re looking at its right-hand side. You will see the circular, raised pin located centrally above the trigger guard.
Once the takedown lever pin has been pushed partially free of the receiver, you should be able to remove it entirely from the left-hand side of the receiver. Set the takedown lever aside and slowly release the slide.
Re-assembly tip: When replacing the takedown lever, be sure the barrel link is upright and lined up with the corresponding hole in the slide. Otherwise, the pin will not fit.
Step Four
Remove the slide from the frame by pushing it forward. Set the frame aside.
Step Five
Remove the recoil spring and recoil spring guide rod from the slide. The easiest way to accomplish this is by pulling the recoil spring free from the front of the slide. Once the spring has been removed, lift the guide rod up away from the barrel and pull it towards the rear of the slide. Set them aside.
Re-assembly tip: Replace the guide rod first – taking care to fit the curved edge against the barrel - then slide the spring back onto it from the front end of the slide. Then replace the receiver and takedown lever before moving on to replacing the recoil spring plug and barrel bushing.
Step Six
Rotate the barrel bushing in the other direction. You may need to wiggle it slightly but you should be able to easily remove the bushing from around the barrel. Set the barrel bushing aside.
Step Seven
Push the barrel link down and lift the barrel free from the locking notches within the slide. Move the barrel forward to remove it from the slide. Set the barrel aside.
Step Eight
Your 1911 is now ready to be cleaned and lubricated. If you would also like to clean dirt from beneath the edges of the grip panels, remove the panels by using a properly-fitting Allen key or screwdriver bit, whichever is needed.
Re-assembling your pistol is simply a matter of reversing the steps.
Field-Stripping a 1911 Equipped with a Bull Barrel
Before you get started: Your bull barrel 1911 probably came with a disassembly tool: a slim, bendable piece of wire in the shape of an “L”. If it did not, you can make your own disassembly tool with a paper clip. Simply use a pair of needlenose pliers to straighten the paper clip and bend the bottom quarter-inch into an “L”.
Step One
Follow step one as detailed above (thoroughly check that your gun is empty).
Step Two
Hook the thumb of your left hand under the beavertail grip safety and wrap the fingers of the same hand around the slide with the gun’s muzzle facing away from you. Pull the slide back until the raised end of takedown lever is lined up with the disassembly notch (the second, smaller notch in the bottom edge of the slide). Use the fingers of your other hand to push the takedown lever pin through the receiver (right-to-left). Once it is slightly pushed away from the receiver on the left-hand side, pull the takedown lever free from the receiver and set it aside.
Step Three
Remove the slide from the receiver by pushing it forward. Set receiver aside.
Step Four
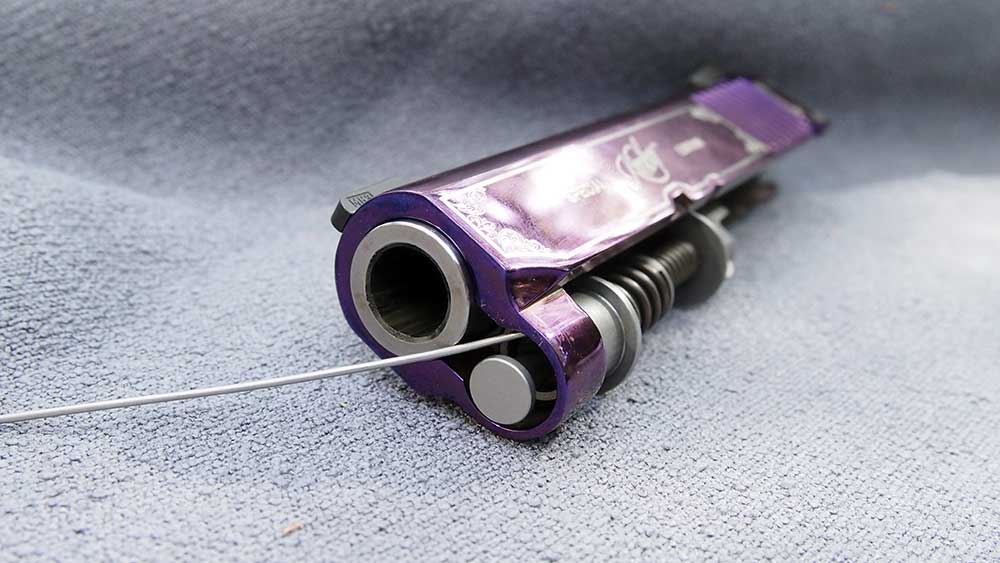
Holding the slide in your left hand, use your thumb to compress the guide rod and recoil spring. Push them forward until the tiny hole in the front portion of the guide rod is visible. When you see the hole, insert the disassembly tool/paper clip. Do not push it through too far; the guide rod must be able to retract back into the slide with the wire tool in place. Wire sticking out too far on either side will prevent the guide rod from returning to its original position.
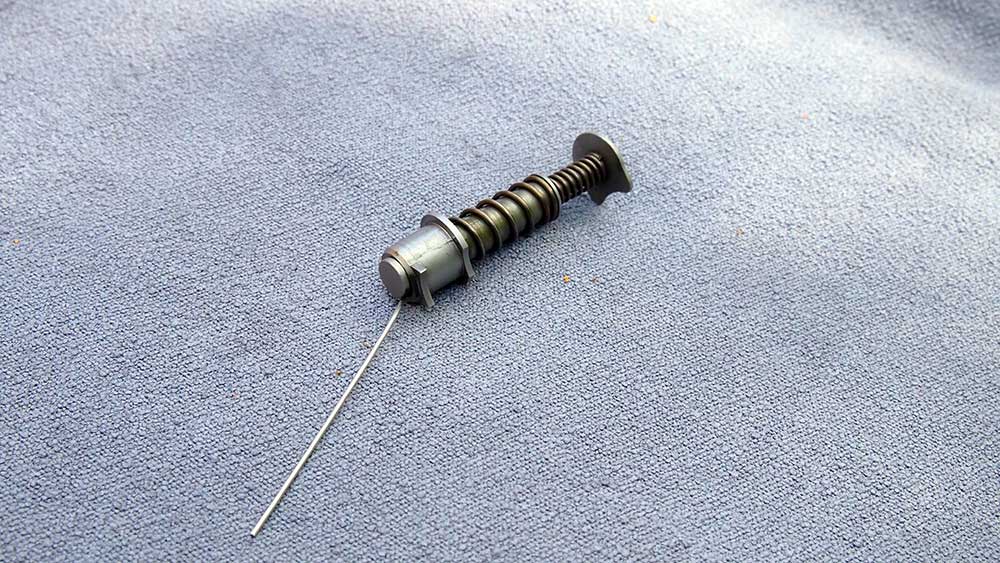
With the guide rod and recoil spring released back into place – with the wire inserted – you can now remove them from the slide. Lift the guide rod up and back to remove. This step may require some finesse.
Do not remove the wire tool from the guide rod. Leave the tool in place for re-assembly.
Step Five
Push the barrel link down and lift the barrel free from the locking notches within the slide. Move the barrel forward to remove it from the slide. Set the barrel aside.
Step Six
Your 1911 is now ready to be cleaned and lubricated. If you would also like to clean dirt from beneath the edges of the grip panels, remove the panels by using a properly-fitting Allen key or screwdriver bit.
Re-assembling your pistol is simply a matter of reversing the steps.