Note: Before fitting the your barrel's locking grooves, make curtain your frame and slide are properly fitted, because any further fitting to those parts will affect lowering the barrel with respect to the frame. Therefore, if you attempt to fit a frame and side after fitting a barrel to them, the end result will leave your barrel-fitting process in ruin.
The process of fitting your barrel's locking grooves is to create a second point of contact: the upper/radial grooves to the slide, which is accomplished by deepening the barrel groove that the rear-most groove of the slide fits into. So, without the aid of Superman-like X-ray vision, how can you tell when the lug is resting deep enough inside the groove? According to "The M1911 Complete Assembly Guide," the easiest way is when firing-pin hole is centered in the barrel's chamber. Why is this necessary? If lug engagement is too shallow, there is not enough metal-to-metal contact to resist the inertia of the barrel as it yanks backward upon firing, which will cause unnecessary distortion/wear on the lug and groove and ultimately lead to eventual failure. Like every other aspect of 1911 barrel installation, this is an instance where thousandths matter. Thanks to a conversation with Kevin Greeley of Greeley Custom, I learned another method for gauging the appropriate locking-groove depth. (But, I'm getting ahead of myself.)
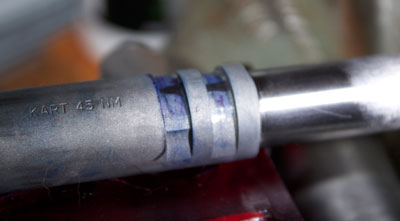
Begin the process by inking the barrel-locking grooves. Once they're dry, install the barrel in the slide with a bench/slave bushing then, with the slide inverted in hand, tap the barrel's lower lugs (or feet) with a nonmarring mallet for the purpose of driving the barrel's locking grooves into the slide's locking lugs. Disassemble and inspect the ink and see where the ink is scraped off.
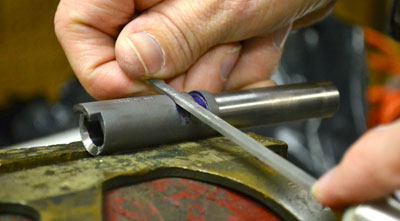
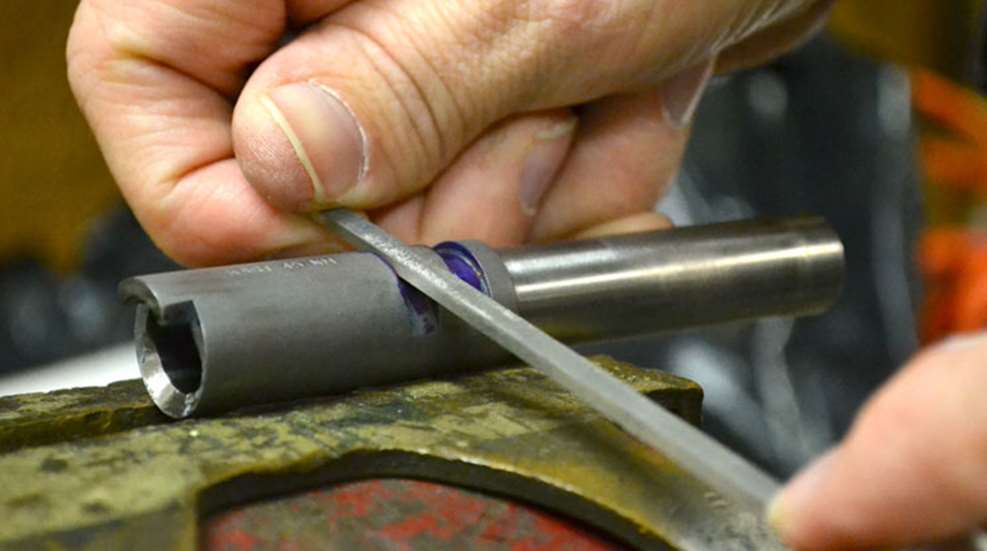
Now, using the barrel locking-lug file offered by Kart or a Brownells 1/8-inch file (with safe edges) gradually deepen the groove—but only one or two, light file strokes at a time—Reink, reassemble, tap, inspect, rinse and repeat until the you reach a satisfactory engagement depth. How will you know when you're close to reaching this shooter's equivalent of Shangri la? In addition to periodically peering through the firing-pin hole until it's centered with the barrel, Greeley's suggested an alternative method that provides definitive results.
Using a piece of brand-new or once-fired, unprimed .45ACP brass that's been sized, pack the primer pocket with a small piece of clay cord weatherstrip, drop it in the chamber and reinstall the barrel in the slide with a bench/slave bushing then, once the firing pin is installed [spoiler alert regarding a not so distant future topic] simply depressing the firing pin with drift punch will dimple the clay and reveal whether or not your reach your goal of a perfectly centered firing-pin strike.
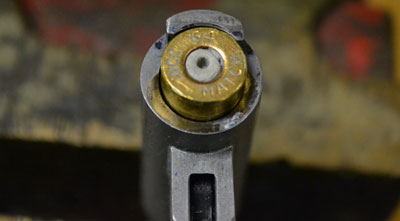
By taking the time to prepare a handful of .45 ACP brass in this fashion, you can sneak up to the proper firing-pin-hole alignment as work through the process. If the pin strike appears a little high in the clay, continue to gentle file the grooves until strike is perfectly centered.
In the next entry, I'll progress to fitting the barrel's the third point of contact: the barrel's lower lugs.