The highly popular wide grip safety—commonly known as a beavertail—enables a shooter to place their dominant hand as high on the grip frame as possible, which results in less of a "moment arm" (the perpendicular distance from an axis to the line of action of a force) so, once fired, the pistol is less affected by the forces of recoil. Therefore, what began as a comfort-based enhancement, lent itself to a much more practical purpose with multiple dividends.
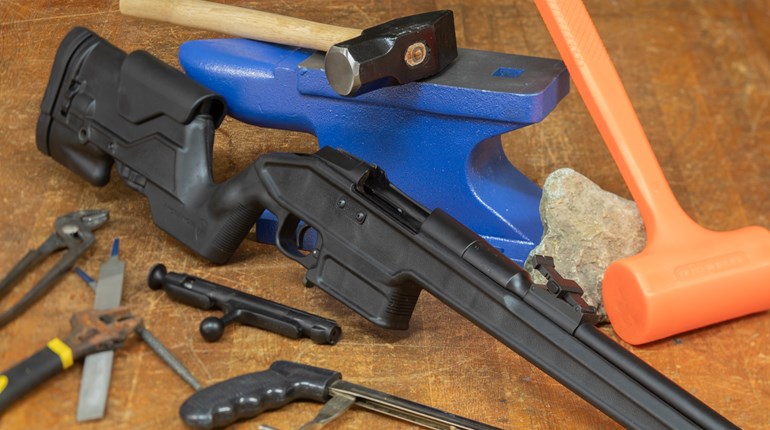
Why choose to install a high-ride beavertail at this stage of my build? In their book "The M1911 Complete Assembly Guide," authors Walt Kuleck and Dave Oldham elucidate by pointing out that installing it early on helps protect your hands from the many sharp edges residing along the frame's backstrap. Since significant handling of the frame is still required, it seemed like a logical means to avoid unnecessary bloodshed.
Getting the shooter's hand closer to the bore requires altering the frame tangs. Such alterations can range from 0.220 inch to 0.250 inch, depending upon the brand of beavertail you choose. The variance makes installation far from drop-in easy. However, fitting one to your 1911 is more tedious than difficult and regardless of the necessary contour or radius, the procedure consists or three steps: 1) Rough out the tangs, 2) slowly massaging/recontouring them until your thumb-safety pin will easily side into the frame holes and the corresponding hole in the beavertail and 3) blend the beavertail's edges to the frame tangs so the contours flow together, without any unsightly gaps.
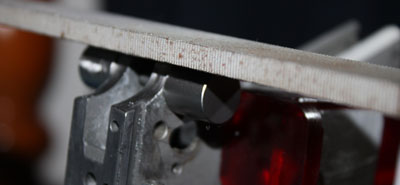
Fortunately, many manufacturers produce file-hard jigs (which I consider a must.) In addition to helping to maintain the proper contour while recontouring the frame tangs, a jig leaves a little extra tang surface. So, there's no need to fret over removing too much metal while it's installed. Before beginning, make sure the pin of the thumb safety to plan on using will pass through the holes in the beavertail and the frame. Then, install the jig in the frame's thumb-safety-pin hole and chuck the frame in a padded vise with the tangs facing up.
Now, get your large bastard file and start filing across the tangs, switching to a smooth file as you get closer to the jig. Go slowly, and take care not to let the file stray, which could cause multiple dings in the frame and are a challenge to remove. (Trust me, I know from experience.) If you have access to any chalk, consider rubbing some into the file beforehand to reduce the build-up of metal in the teeth, which will result in cleaner cuts and easier clean-up.) Or, for those who have access to a belt sander or Dremel tool with sanding drums… Once the tangs are filed even with the jig, remove the jig and try to install the beavertail using your chosen thumb safety pin. Chances are you'll find its holes and the ones corresponding with the frame are offset. Be advised, the jig will not remove enough metal from the bottom of the tangs to allow the grip safety to remove freely. This is where people dig themselves into a hole by removing too much metal too fast—so take things slow. Making a beavertail grips safety move freely is a byproduct of blending edges, which comes later.
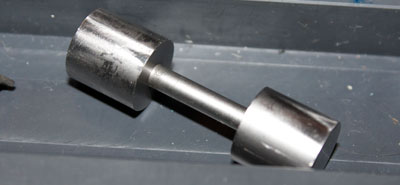
One of the easiest way for dealing with this offset is to substitute a pin with a smaller diameter—one that will pass through the grip safety holes, serving as makeshift pivot pin. (Kuleck and Oldham suggest using the shank portion of a numbered drill bit or plug gauge) that is smaller than the diameter of the pin of the thumb safety you're using and fits snugly. The Wilson Combat DVD suggests using a discarded thumb safety—in lieu of a drill bit set—and reducing its pin diameter so it is 0.001 inch less than the grip safety you initially chose.
This is the avenue I chose once my tangs were even with the jig. Why the change in strategy? The drill bits stopped being helpful. Worse yet, my thumb safety of choice (an ambidextrous Ed Brown Tactical model) still wouldn't fit, and the next-largest bit diameter proved too large. (The solution came in the form of a Colt single-sided thumb safety I unearthed from my spare 1911 parts box. By grinding off its sear leg and reducing the diameter of its pin so it was smaller than my chosen ambi model, I was able to continue onward.)
As the filing (and subsequent lapping) progresses, advance to the next-larger bit size until the holes in the beavertail and frame align. What's lapping, you asked? Don your track shoes and stay tuned.