
The first, involves an inexpensive tool made by Evolution Gunworks (EGW) called a hood-length gauge, which measures the distance between the slide's rear-locking groove and the breechface. Then, using your calipers, measure the corresponding area on the barrel. The difference (which should only be a few thousandths—read: a few light file passes with a file) is how much material needs to be removed from the back of the hood. For those of you who wish to forego the gauge, that's fine, the "file and try method" works just as well. The secret to it—as with any other DIY-style project—is to go slow, and to use light, soft file strokes, or else you'll wind up with an overpriced paperweight.
Begin this process by inking the edge of the hood. (Kart supplies a tiny vial of Dykem, which its literature states is enough to, be used sparingly and is enough to fit several barrels and still have plenty left over to paint your house. I found a Sharpie marker just as effective, less costly and not nearly as messy. Once the ink is dry, reinstall the barrel/bench bushing in the slide and replace the barrel-alignment gauge.
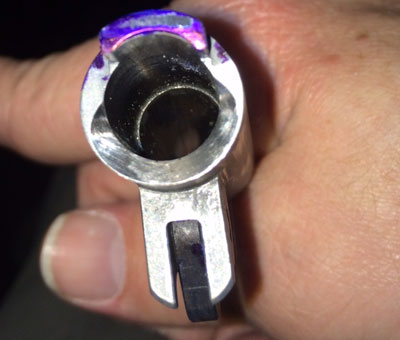
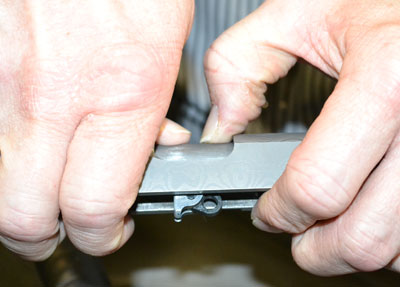
Then, while using thumb pressure against the barrel-alignment gauge to press the hood against back of the breechface of the slide, rap the barrel's muzzle with a nonmarring mallet. Now remove the barrel from the slide, and check the hood to see where the rear of the hood is impacting the slide's breechface. The offending area, will appear as a bright spot on the hood, because the ink will have rubbed off.
Using a smooth-cut file, or one wrapped in fine-grit sandpaper, sparingly remove a slight amount of material from the length of the hood—just a few strokes at a time between inkings—taking extreme care to keep your file square while making even cuts. Note: there is a very slight angle to the end of the barrel. This is because a 1911 barrel rest at a minute downward angle when in battery. Slight or not, strive to maintain that angle. Eventually, you'll need to use your thumbs to pop the barrel hood out of battery/engagement with the slide. In fact, it may be extremely tight and require rapping it with the mallet to unlock the parts, but it's a sign you're headed in the right direction. During the assembly/disassembly—and filing—process, it's imperative to make sure the barrel remains perpendicular and not allowed to roll to either side while filing.
After quite a few cycles of inking, tapping and popping, you'll see a trace of where the hood is barely touching the breechface. That is what you want. Having completed your barrel's longitudinal fit, in the installment I'll describe the process of fitting the barrel's locking lugs/grooves to the slide.