What makes the process so tricky? In their book, "The M1911 Complete Assembly Guide, Volume 2," authors Kuleck and Oldham explain saying, "The 1911 has three points of contact in the `properly' fit pistol: the barrel bushing, the locking lugs, and the barrel (lower) lugs, often called the `feet.'" They go on to acknowledge some gunsmiths advocate adding the barrel hood as a fourth lockup point only to elude otherwise saying, "…this may not be the best idea. There is a greater potential for fouling of some sort of another interfering with barrel lockup, without that thousandth or two of clearance around the hood."
There are three types of barrels: Drop-in, Xact Fit (formerly E-Z Fit) and gunsmith fit. As with many things within the realm of 1911 parts, the installation process will differ depending upon the type you select. Made to USGI print, drop-in barrels are the easiest because, as the name implies, little to no fitting or dimensional changes required. Nonetheless, if you go this route, have a file and sandpaper handy, just in case. On the opposite side of the spectrum, installing a gunsmith-fit barrel involves fitting the shallow locking lugs, followed by cutting the lower lugs so they force the locking lugs into engagement when the pistol goes into battery. (Think of it as the gunsmith equivalent of walking and chewing gum while simultaneously rubbing your stomach with one hand and patting your head with the other.) Given the extreme variance between each type of barrel, it's easy to understand how someone could shun the loose tolerance of the former, only to be intimidated by the labor-intensive and mandatory skills needed to install the latter. Luckily, there's an alternative for middle-of-the-road folks like me.
Fred Kart's patented Xact Fit 1911 barrel differs from most aftermarket offerings in many ways. The lower portion of Kart models ship with the bottom lugs pre-contoured to the slide-stop pin. The proper link already installed (and it's sized so a cartridge's primer receives a centered firing-pin strike). A precision-grade bushing is included. So, the only fitting required pertains to the barrel-hood length, the removing a small amount of metal from the two pads, located 45 degrees from the center of the locking-lug recesses. Designed too shallow to allow the barrel to interface with the slide, the fitting procedure involves lowing the pads evenly, thereby deepening the recesses so the lugs can engage the locking lugs on the underside of the slide to go into battery.
Fortunately, Kart offers the proper tools to make the job easier. Among them is a barrel-locating block that aids in guiding the fitting of the barrel's headspace extension by making sure it isn't tilted during the fitting process. It orients the barrel's bottom lug perpendicular to the bottom of the slide rails, so each lug interfaces properly with the slide-stop pin. This creates equal contact by barrel's lower lugs (or feet) along the slide-stop pin.
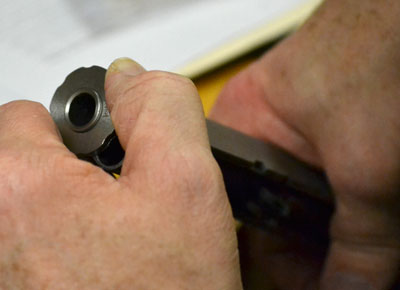
Kart also offers a bench bushing with a handy outer flange that allows for easy assembly and disassembly during fitting of the barrel's locking-groove pads. Company literature states the bench bushing's interior is, "made for a close but free fit to our barrel. The outside is made for a close-sliding fit to the slide barrel hole." For me, the bench bushing wouldn't fit until I turned it down with sandpaper. Either way, the outer flange made barrel removal (a process that's done quite often during the locking lug/groove fit stage) quite easy.
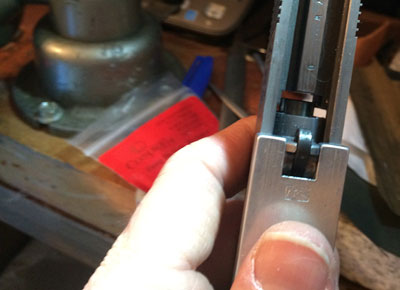
Lastly, Kart offers a custom .125-inch Swiss-pattern file with safe edges of both sides that is just wide enough to fit the locking grooves on top of the barrel, so the whole surface is filed flat to provide even contact with the corresponding upper portion of the slide.
Fundamentally, fitting a barrel is accomplished in four steps: The lateral fit, the longitudinal fit, the locking lug/groove fit and the bottom lug fit. In the next installment, I'll break the process down by describing fitting the barrel's rear-most or lateral portion, near the ejection port, in detail.