Most easy-fit or gunsmith–fit barrels have extra material around the hood to ensure a snug fit. Check this by installing the bench bushing on the barrel, then insert the barrel into the slide and lock the bushing into place. Now, slide the barrel as far back toward the breechface as it will go. (The rear of the hood should be too long and wide, preventing the barrel from dropping into the lockup position.) The best way to verify this is to ease the barrel forward, so the entire length of the hood is forward of the slide's hood recess. Next, rotate the barrel link backward (toward the breech) so it's between the feet of the link lug and install the barrel-locating block so the link lug is held securely in the notch of the block. With thumb pressure holding the barrel-locating block firmly against the rails of the slide, slowly push the block and barrel toward the breechface. As the hood starts into the recess, verify there is clearance on both sides of the hood. If there isn't, remove the barrel from the slide and gently file material away from the side of the hood that's binding against the recess until there is a minimum of .003-inch clearance. (Kart literature specifies no maximum clearance, but suggests no more than.010-inch.) Is there and easy way to take the guesswork out and tell you exactly how much material you need to remove?
Of course: Using your calipers, measure the area where the rear of the barrel hood engages your slide. Write the number down, then measure the corresponding portion of the barrel hood. Subtract the difference, and that number tells you how much material needs to be removed from each side of the hood. Since most of us don't own a milling machine, the best way to accomplish this is to use smooth-cut files (or better yet, fine-grit sandpaper backed by a file—remember, we only need a couple thousandths clearance.)
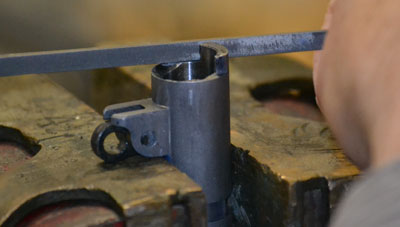
It's simply a matter of unlocking the bench bushing to remove the barrel, chuck it in a vise, slowly remove the necessary material from the hood, reinstall the barrel/barrel-locating block and ease it upward to check for clearance on each side of the breechface. (Rinse and repeat this process as required.) Remove material from one or both sides of the hood until the back of the hood slides into the notch, or barrel-hood recess, in the slide, just above the breechface. How do you know when to stop? Easy: You'll be able to see daylight on either side of the hood during the trial-fit process.[insert detail shot of daylight and the feeler gauge being used.] (Kart sells a feeler gauge specifically for the task.) Having clearance gap on each side of the barrel hood lessens the likelihood of excess malfunction-inducing friction. Plus, it keeps fouling and other debris from interfering with proper lockup. In the next installment, I'll tackle fitting the length of the barrel, or its longitudinal fit.