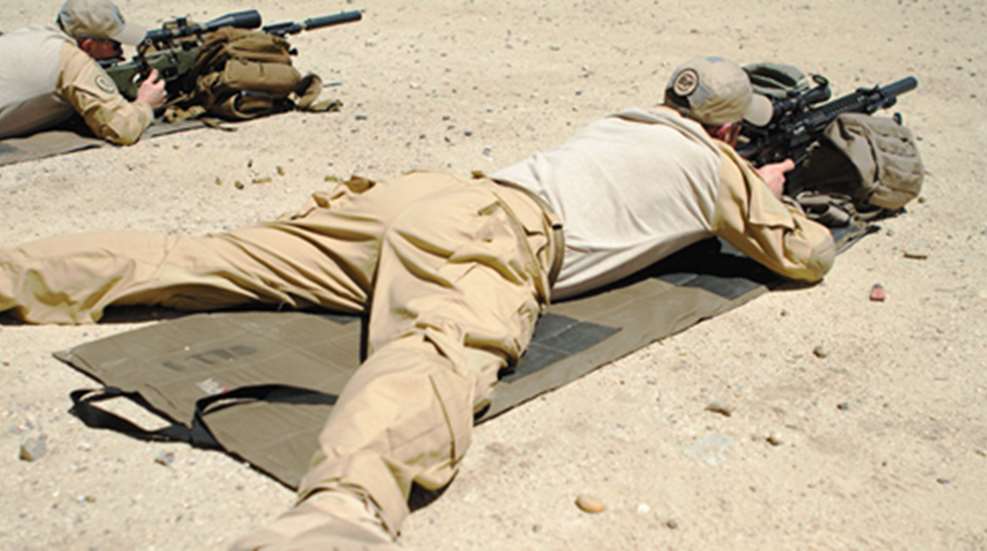
All precision rifle training should begin with the most basic and stable of all shooting positions: the prone position. The prone position should be mastered first, as it serves as the one position where all factors common to shooting can be isolated and addressed. Even though it seems to be the easiest position to assume, there are several steps required to properly mount a rifle in the prone position. Breaking these steps down, there are three major points on which to focus: Proper orientation, maximum body contact with the ground and firearm manipulation.
The first step is to extend the legs of your bipod and lay your rifle in on target. Assume the pushup position behind your rifle. It is important to point out that your body must be inline with your rifle, not canted out to one side. This is imperative for recoil mitigation, especially on larger rifles with brakes. Next slowly lower your body to the ground so the rifle's stock is sitting on the top of your shoulder next to your head.
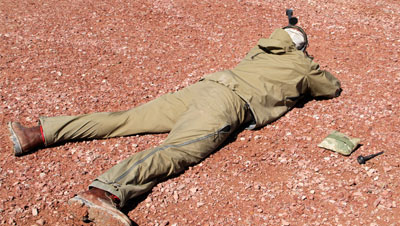
At this point, it's time to start grabbing as much ground with your body as possible. Spread your legs apart to comfortable position, point your toes outboard, and get those ankles as flat on the ground as possible. If you have hip or knee problems, this might prove to be challenging. (An alternate position is to keep your legs straight and roll your toes inboard and try to get as much contact on the laces of your boots with the ground as you can).
The next step is to load the bipod. Arch your back at the waist and push up, keeping your lower half locked into the position on the ground you just established in the previous step. Assuming you are right handed, pull the buttstock of your rifle into the pocket of your right shoulder with your left hand. At this point you and your rifle should look like a "bridge" from a side view. Now go ahead and sink into position by relaxing your body. The bipod legs of the rifle should slide forward while your lower body should maintain position and hold ground. Keep sinking into place until your muzzle is back on target, and you have some forward pressure against the bipod. You now have a properly loaded bipod. This takes the "slack" out of the bipod and ensures that the path of the rifle during recoil is consistent.
Now it's time to start manipulating the rifle to get it to deliver some precision fire. The front of the rifle is supported by a bipod, so now you need some sort of rear support to go under the stock. The most popular choices are a factory produced monopod or a "rear bag" which is similar to 6-inch by 6-inch beanbag. This bag will be manipulated with your left hand. Place it under the buttstock and squeeze to depress the muzzle and loosen your grip to elevate it. Go ahead now and place the full weight of your head on the rifle stock in a natural position. You may find at this point that you can't see through your scope without scope-shadow. In this case simply build up or lower your cheek rest and adjust the fore or aft placement of your scope until you have a maximum field of view.
Finally, it's time to place your firing hand on the firearm and assume a firing grip. There are many schools of thought on how to achieve a proper firing grip, but I'll leave you with what someone once told me about trigger control, and its relation to grip: "Trigger control is the skillful manipulation of the trigger to the rear so that this process doesn't disturb the relationship between the shooter's eye, the sights and the target." In other words, however you pull that trigger is good to go, as long as you don't move the crosshair off the target. I prefer to keep my thumb on the same side of the grip as the rest of my fingers, but that is just a personal preference.
The prone position has many uses on the range to include zeroing, establishing the fundamentals, collecting data and shooting in high winds. That being said, I have never taken a shot from the prone in combat because the conditions have never existed for it. But all alternate and field firing positions apply the same principles of proper orientation, maximum body contact with the ground and weapon manipulation. In the next installment, we will start to cover the shooting fundamentals and how they are applied to precision rifle shooting in the field. But for now, practice getting into the prone in ideal conditions. When you think you have mastered that, go ahead and get on the clock. Start with this drill: one 1-inch target engaged from 100 yards in a time limit of 1 minute, starting from the standing. Keep repeating the drill, subtracting 5 seconds every time until you find your limit. Remember, it's only the hits that count, and don't sacrifice any of the steps needed to achieve the proper shooting position.