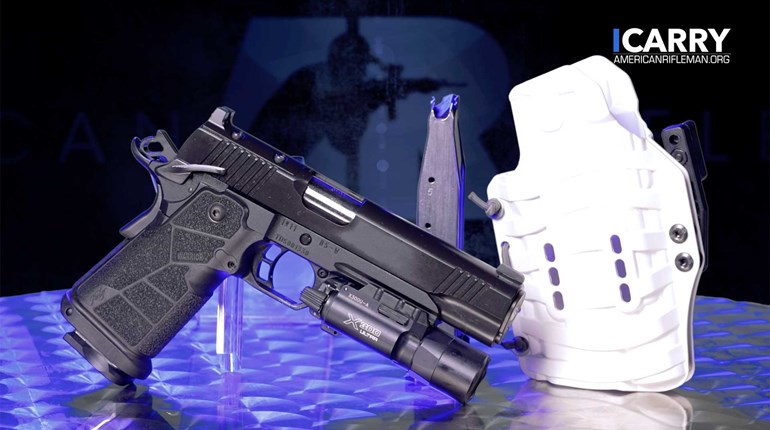
There are many dangers we face in many different forms. The self-defense world has changed dramatically throughout the last 10 years, with those changes leading to huge advancements in equipment. One of the most notable is the miniaturizing of pistol-mounted optics, or micro-red-dot sights (MRDS). Their popularity is growing and shows no signs of slowing down. While there is tremendous fanfare for them, I remind students that aiming is one of the easiest of shooting skills. When you transition from iron sights or start off using a MRDS, there will be some growing pains. One of the biggest complaints with the MRDS is what happens when you can’t see the dot. Here are three tips to help you in this situation: corrective strategies, backup iron sights and down optic.
Earlier, I said aiming was the easiest shooting skill of the five marksmanship fundamentals. Once the student understands how to aim, we generally don’t have to revisit aiming. The most difficult of the five to learn and master is trigger control—once you understand proper trigger control cognitively, you work on developing the skill practically. It’s a fine motor skill to squeeze the trigger with minimal disruption to the sights. Aiming using a red dot will not cure poor trigger control. What it does is help see the error more prominently, thereby creating the opportunity to learn and correct. The student can literally see a smoother slope to their learning curve once they have mastered aiming with a red dot. However, if you cannot see the dot, you’ve got bigger problems to solve.
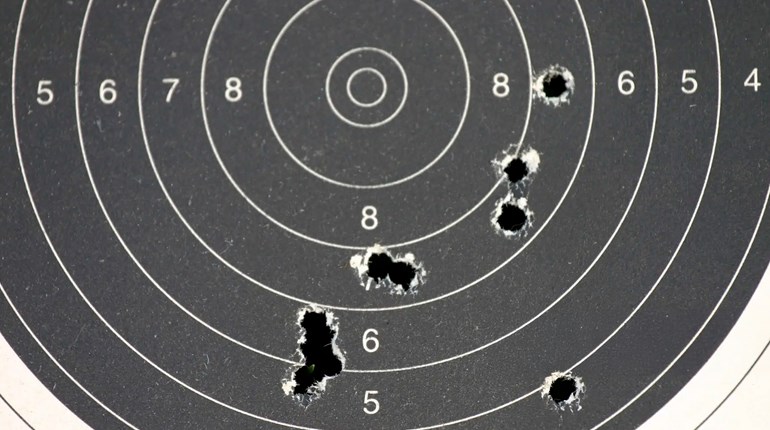
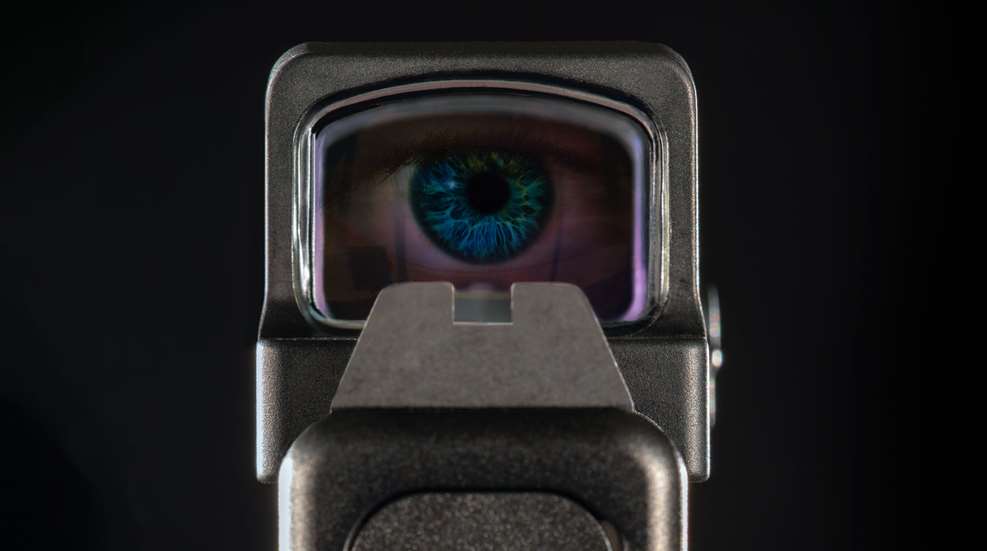
From time to time, you will mount the pistol and not immediately see the dot. This can happen with any skill level, but particularly with new shooters or anyone shooting under stress. They mount the pistol in preparation to fire a shot, only no dot shows up. They start moving their head, the pistol or both to bring the dot into view. At first, the movements may be subtle, but become more intense the longer it takes to find the dot. I jokingly call this fishtailing, and generally it is a result of a few shooting errors. It gets its name from the driving scenario where the vehicle fishtails in one direction. The driver’s steering input overcorrects and sends the vehicle fishtailing in the opposite direction. Then, in a panic they overcorrect even more, sometimes leading to a total loss of vehicle control. Our goal is to have a system or process to correct the reliability, and to minimize the occurrence in the first place.
When we teach an MRDS training course, we begin by shooting-assessment drills. These drills allow us to see how prominent fishtailing is and where we need to begin. Regardless of skill level with a red dot, there is an advantage to having a system for when the dot is not immediately seen. For this, we use corrective strategies to provide a framework or roadmap for how to solve the problem and acquire the dot. It starts with the pistol’s position, your position and the firing grip. Correcting one of these actions generally leads to seeing the dot. In addition, it also helps reduce the situation from happening in the first place by reinforcing proper technique.
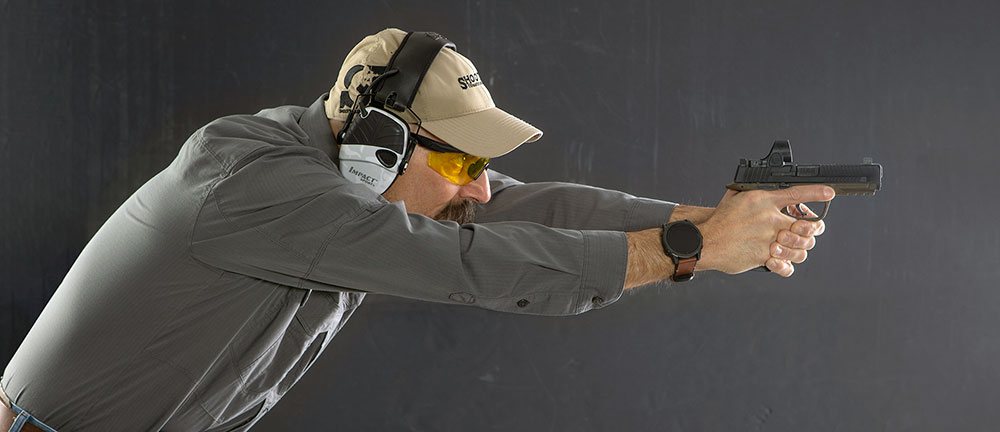
The pistol should come to rest in front of the shooter’s master eye. This would be the same side the shooter holds the pistol. When shooting with an MRDS, we basically must align and see through a small tube to see the dot. If you cannot immediately see it, check to make sure the optic is directly in front of your master eye. If not, move the optic. If you move the optic into correct position and still don’t see the dot, move the body position—specifically head position. In this case, we are talking about excessive shoulder shrugging that leads to craning your neck forward or tilting your head down. You can crane your neck forward without shrugging your shoulders, but they generally go together, a remnant from the old days where it looked tactical to be in this hyper-aggressive stance. Move your head to a more natural and upright position. If you move your head into the correct position and still see no dot, examine the firing grip. You want to ensure you are squeezing equally with both hands, but make sure you are squeezing your pinkies. Most mounting errors end with the dot being slightly high, outside your view. The moment you apply correct grip pressure, it brings the dot into your view.
As mentioned before, this system accomplishes two tasks: It allows you to correct the problem in a systematic process as well as reinforcing correct technique. You might be tempted to correct out of order. Resist that temptation. You will miss out on training correct technique and potentially still have the bad technique lurking around. Even with corrective strategies, you may still not see the dot: batteries die, sights can turn off or break or lighting conditions may be too bright to see the dot. There is also a difference between training to correct a problem and dealing with a problem in the real world. If you have updated your technique with these corrective strategies, it greatly reduces their occurrence. So, if you’re in a gunfight and don’t see the dot you should immediately transition to your backup iron sights (BUIS).

Practicing with backup iron sights is smart and part of a good training plan. I try to practice with my optic powered off for at least one magazine in my practice sessions. I work ready positions and draw stroke to cover the bases. I must fool myself into not seeing the dot. I mount the pistol as if the dot is on and look through the center of the window as usual. Then, I transition to my iron sights—specifically to my front sight. After a while it becomes hard not to look for my BUIS right out of the gate. One thing I’ve observed having done this for years is an unintended consequence of fine-tuning the mount. When I go straight to the irons, I obviously pick them up faster. When I go back to using the optic, the dot comes into view cleaner and more consistently. Don’t mistake this for meaning you should mount the pistol looking for the iron sights first. This is just an observation of when I practice not seeing the dot.
While all dot-failure causes are possible, they are not probable with a good maintenance plan such as replacing your battery regularly and keeping the optic window clean. Even then, you may run into one final problem to solve, which is when you cannot see through the optic’s window.
If you go to mount the pistol and you see a fogged, obstructed or cracked window, you need an immediate response, of which there are several, and I’ve tried them all. To be honest, it will depend on what is happening at that moment. If I’m in the middle of rapid-fire, high-round-count drill and I miss seeing the dot after recoil, I may center the optic’s body over the target and send it. This works decent at close range when you are already in the shooting sequence. If I can’t see through the window, I use a method that places the top of the optic level with the shoulders of the silhouette target, so the head sits above. It almost looks like you are chopping the head, off hence the name “guillotine.” I’m pretty accurate or accurate enough in extreme situations to about 7 yards. If I slow down, I can push this distance a little farther. The other method I like to use is when I take the corner of the optic’s housing and use it as an improvised bead sight. To do this, you rotate your hands slightly and yes, it feels a little weird. It does work, so it is something to practice for down-optic drills.
In the beginning, the biggest worry with the MRDS was how well they would hold up to hard use—whether they were durable enough to withstand the punishment of a reciprocating pistol slide. Over time, they have evolved and are more robust. That doesn’t mean you’ll always be able to see the dot, though. When training, use a process such as the aforementioned corrective strategies to methodically remedy and train. If you cannot see the dot because the battery died, or the optic is powered off, then transition to your iron sights. Practice makes the transition seamless over time. But, if you cannot see through the optic’s window because it is obstructed then either use the whole window as a ghost ring or chop the head off with the guillotine method.
Not seeing the dot when training is an inconvenience; not seeing in a real gunfight could be potentially catastrophic. Yet, practicing with a simple system will go a long way toward preventing the problem from happening and knowing how to deal with it when the chips are down.