The second installment of this series will use the Louisiana Concealed Handgun Permit Qualification Course as the basis for structuring a live-fire practice session. The Louisiana course itself is fairly simple, as most CCW qualification courses are. Some variations are included in this article to increase the course’s value as practice for self-defense and personal protection.
The basic Louisiana requirements are to shoot a live-fire range session of a minimum of 12 rounds each at distances of 6 feet, 10 feet and 15 feet, for a total of 36 rounds. The shooter must complete at least one safe reload of the handgun at each distance. The target is the NRA B-27 and the shooter must score 100 percent hits within the silhouette portion. Having a 100 percent standard is what makes the Louisiana Course a little different from most states’ qualification courses. Typically, other states require a 70- to 80-percent hit standard.
To use the course as practice for self-defense, you can include some variations that go beyond the bare minimum requirements. The B-27 target is extremely large. To make it more challenging, accept only hits inside the 8 ring. An even more difficult variation would be to use a sheet of paper on the B-27 target as your acceptable hit zone.
 Additional variations are to break the 12 shots into shorter strings and include some one-hand shooting during the six feet phase. Hold something in your non-dominant hand to simulate a situation in which you are carrying something valuable and have to shoot with one hand only.
Six feet Phase
- Load with six rounds
- Two hand shooting
- Come to low ready. Any time you come to low ready, the pistol should point completely below the target.
- String 1 – Fire 1 shot. Return to low ready.
- String 2 – Fire 2 shots. Return to low ready.
- String 3 – Fire 3 shots.
- Check the hits on your target and cover your hits with masking tape.
Checking your hits regularly and then covering them with masking tape or pasters is a crucial part of marksmanship development. A target should have no more than 12 unmarked hits at a time.
Shooters often blast an entire box of ammunition at the target without checking and then marking it consistently. This is one of the worst mistakes that can be made when practicing for marksmanship development and self-defense.
Best practice is to check and mark your target after every string. When shooting this practice session, check and mark the target after every six shots.
- Reload with seven rounds
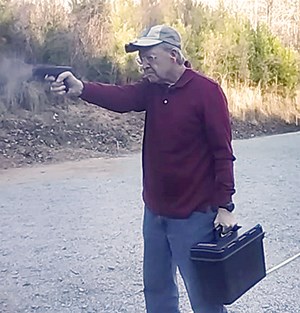
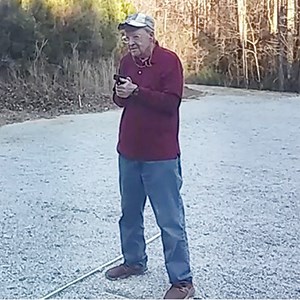
- Primary hand shooting
- Place the pistol in the primary hand only. This is the hand you write with. Hold something like a briefcase or range bag in your other hand. Come to low ready.
- String 1 – Fire 1 shot. Return to low ready.
- String 2 – Fire 2 shots. Return to low ready.
- String 3 – Fire 3 shots.
- Unload
- Remove the magazine.
- Work the slide at least 3 times.
- Visually and physically check that the pistol is clear of all ammunition.
- Check the hits on your target and cover your hits with masking tape.
Ten feet Phase
 At this distance, continue shooting shorter strings and include a malfunction clearance practice.
- Load with six rounds
- Begin at low ready
- String 1 – Fire one shot. Return to low ready.
- String 2 – Fire two shots. Return to low ready.
- String 3 – Three shots.
- Check the hits on your target and cover your hits with masking tape.
- Remove the empty magazine.
- Let the slide go forward but do not press the trigger. Leave the pistol cocked.
- Reload with seven rounds and nothing in the chamber.
- Begin at the mid-point of the drawstroke. At the mid-point, the pistol is at chest level, the line of the sights is underneath the dominant eye, and the bore is parallel to the ground.
- String 4 – Aim at the target.
- Press the trigger to get a click. Work the slide to put a round in the chamber. This simulates either empty-chamber carry or having a malfunction. At the click, notice if the sights bounce around when encountering the empty chamber. If they do, it’s a sign of flinching.
- Fire one shot.
- Return to the mid-point.
- String 5 – Fire two shots. Return to the mid-point.
- String 6 – Fire three shots.
- Unload
- Remove the magazine.
- Work the slide at least three times.
- Visually and physically check that the pistol is clear of all ammunition.
- Check the hits on your target and cover your hits with masking tape.
Fifteen feet Phase
- Load with six rounds
- Begin at low ready
- String 1 – Fire one shot. Return to low ready.
- String 2 – Fire two shots. Return to low ready.
- String 3 – Three shots.
- Check the hits on your target and cover your hits with masking tape.
- Remove the empty magazine
- Let the slide go forward but do not press the trigger. Leave the pistol cocked.
- Reload with seven rounds and nothing in the chamber.
- String 4 – Aim at the target.
- Begin at the mid-point of the drawstroke.
- Press the trigger to get a click. Clear the malfunction just as you did at 10 feet.
- Fire one shot.
- Return to the mid-point.
- String 5 – Fire two shots. Return to the mid-point.
- String 6 – Fire three shots.
- Unload
- Remove the magazine.
- Work the slide at least three times.
- Visually and physically check that the pistol is clear of all ammunition.
- Check the hits on your target and cover your hits with masking tape.
Additional Practice
At 10 feet
- Load with six rounds
- Aim at a specific spot on the target
- Shoot the smallest group you can at the spot.
- Unload and check that the pistol is clear.
- Check the hits on your target and cover your hits with masking tape.
At 15 feet
- Load with six rounds
- Aim at a specific spot on the target
- Shoot the smallest group you can at the spot.
- Unload and check that the pistol is clear.
- Check the hits on your target.
Total: 48 rounds for the session.
In this session, you will have fired almost a box of ammunition and included several additional tasks relevant to self-defense. Firing short strings of fire and marking your target regularly will accelerate your marksmanship development. The mid-point starting position is acceptable at ranges that do not permit drawing from a holster, but starting from the mid-point builds the skill of acquiring the sights as early as possible in the drawstroke. Beginning the strings from different positions and practicing clearing malfunctions are important self-defense skills that go beyond basic marksmanship. You will also have practiced unloading your pistol with a round in the chamber and ensuring that it is clear. The one-sheet pump-target is available at thetacticalprofessor.net.