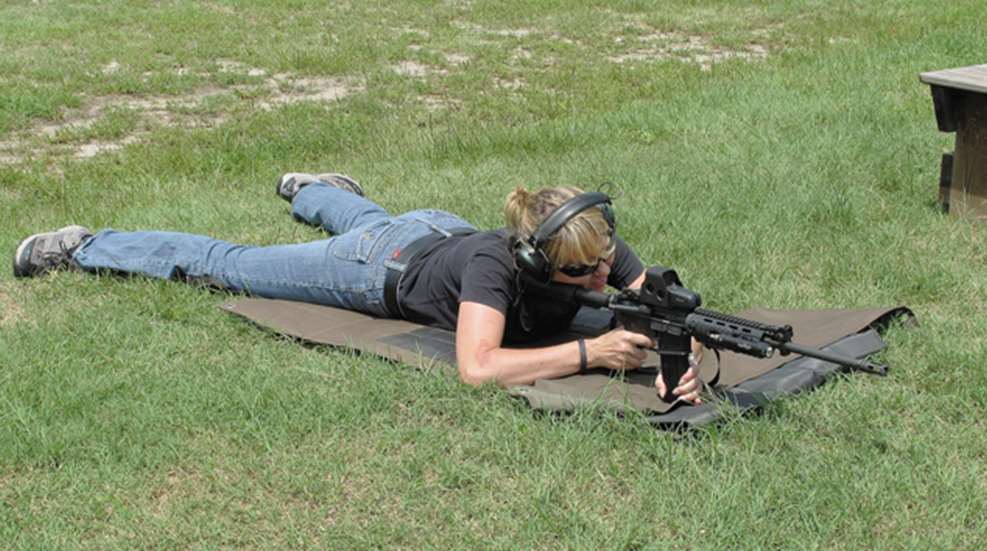
I'll take prone firing over bench support whenever I have the luxury to take my time, simply because I shoot better that way. Tactically speaking, close-range, dynamic combat requires mobility on the hoof and many environments have too much vegetation for a prone line of sight. But when the situation allows or demands it, effective prone firing can turn misses into hits. Fighting from your belly has the added advantage of making you harder to detect and hit, which I distinctly recall is a good feeling on two-way ranges—especially when someone is actually taking the time to aim at you.
Prone shooting's utility extends well beyond combat environments. It's required in several precision competitions and it's also a great way to fire accurately at mid- to long-range furry targets. I first learned to fire prone in Basic Training, just like generations of Americans before and since. Sniper training in the mid-1990s drastically refined my technique, and I've been honing it ever since. The following tips mostly pertain to slow-fire shooting. While some are also relevant to rapid work, many are impractical in fast-moving realms. However, just as with any discipline, a firm grasp of the basics is applicable to any environment. I'll explain things working from feet to head.
• Placing your toes and heels flat on the ground—pointing both feet to the same side or opposite—reduces body movement.
• Canting or offsetting the body toward the weak side will help reduce stress and fatigue on the shoulders, arms, neck and back.
• Sharply bending the strong-side knee can lift your midsection off the ground, reducing body-to-ground contact and increasing instability. However, a moderate knee bend may help by raising the torso and reducing some of the rise and fall that is created by breathing.
• Breathing control limits excess movement. Fire during the natural respiratory pause that occurs after you exhale or while holding a partially inhaled breath. This is strictly a slow-fire technique. As you relax and slow your breathing, your heart rate should slow a bit too, which will help limit micro movement. I fire between heartbeats once I'm settled into my shooting groove.
• Don't wait more than a few seconds without breathing. Lack of oxygen will cause your eyesight to deteriorate faster than you realize, resulting in hazy or tunnel vision. The rushed shot that follows will be the one that ruins an otherwise nice group. Resume breathing before the burn sets in, and then continue your firing sequence.
• If your stock lacks a monopod or butt-spike, use a padded shooting glove or beanbag under the stock's toe to steady the rifle and control elevation. Squeeze or release the bag with your weak hand to lower or raise your point of aim.
• Ensure bipod legs are stationary by either digging them in or pinning them against a low ledge.
• Avoid the fulcrum effect when using a bag rest by placing the rest as far forward under the fore-end as possible.
• Don't let a free-floated barrel (or gas block) touch any type of rest. If using a non-free-floated barrel, try to position the rest under the same section of fore-end for all shots to maintain consistent pressure.
• Once in position, relax and close your eyes. If your sights are off target when you open your eyes, use your lower torso and feet to get on target. Toes push or pull to control elevation and moving the legs left or right controls windage adjustment.
• Straining the upper body to keep the gun on target will cause your point of aim to wander as soon as recoil begins—long before the bullet leaves the barrel. Relax your firing shoulder and arm, positioning the stock high in the shoulder pocket. Your natural hold while aiming should be somewhat relaxed.
• Your head-to-stock union should be consistent. Find a comfortable index point for your cheek so your firing eye will be in exactly the same place for each shot.
• Concentrate on pulling rearward on the pistol grip exclusively with your middle and ring fingers. This allows the trigger finger to relax, providing maximum control.
• Pull the trigger straight to the rear deliberately, but without jerking it. Don't be too proud to dry-fire. Use snap caps if shooting a rimfire so you don't damage the firing pin and breechface.
• Remember to follow through after each shot. Resist the urge to see where a round went as soon as it's fired.
• If using an effective muzzle brake, relax forward body pressure on the stock. Let the brake do its job and you'll get back on target faster. Conversely, if the rifle is "jumpy," drive your firing shoulder into the stock, pinning the rifle between your shoulder and the bipod legs or a bag rest.
• Finally, relax your eyes between shots. Looking at natural colors (think green) helps. Glance to either side out of the scope's field of view without coming off the stock for a few seconds between shots during a slow-fire group.