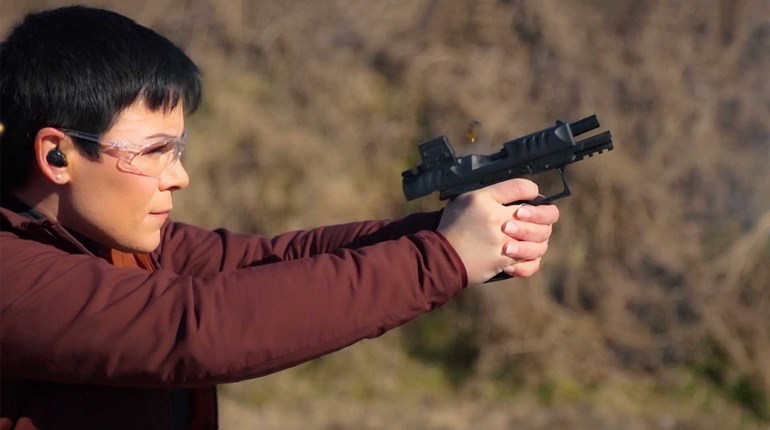
When it comes to using pistol-slide-mounted red-dot optics for sighted fire, there are some tricks of the trade that can help increase your overall control and shot placement. One of these tricks is to dial in your visual process to eliminate any wasted body movement or lag time.
Our drill this month is designed to train you to develop visual-processing efficiency, purging lag time (aka over-verification), preventing unnecessary and detrimental input while augmenting your overall fire-control skills.
Using a pistol-mounted optic in sighted fire is subject to the three most common dot-awareness scenarios requiring a sound visual process. One of these is the highly technical shot: a target set at 50 yards or greater (long range). Another is a mid-level technical shot: a target set at 25 yards (mid-range) and the third is the least technical: a target set at 5 yards or closer (close range).
Here’s the Drill
Set up three paper targets with a designated center mass, one at the 50-yard line (T1), one at the 25-yard line (T2) and one at the 5-yard line (T3). Those of you seeking more of a challenge may increase this drill’s technical difficulty by either reducing target size, increasing distance or setting a greater penalty for a miss.
Apply recommended dot-awareness as part of your visual process at each yard line specific to the difficulty of that shot and commensurate with your shooting skill. “Fixed” for long range. “Float” for mid-range and “Flash” for close range.
Fixed
The term “fixed” applies to the observation of your dot movement being minimal, briefly hovering inside those precise margins needed for an extremely technical shot.
Start with a holstered pistol, hands below your gun belt. On the buzzer or “go signal,” draw from the holster to T1. Bring stability to alignment using sufficient hold control. The dot will always be moving, of course, but you can develop a good-enough hold to corral your arc-of-wobble (AOW) between those margins needed for such a technical shot. When your eyes verify (less than a tenth of a second), work the trigger for a precise press.
Try it again, this time establishing hold control quicker, making your dot hover where you need and executing the same precision press. Try it again. This time with even less “get-to-the-hover” time. Run it three times.
Float
The term “float” applies to observing your dot movement looking like a streak of lightning—that is, bouncing around inside the somewhat more relaxed margins needed for a mid-range shot.
Start with a holstered pistol, hands below your gun belt. On the buzzer or “go signal,” draw from the holster to T2. Bring stability to alignment and with sufficient hold control. The dot will be moving more erratically between the acceptable margins necessary for a less technical shot. When your eyes verify (less than a tenth of a second), work the trigger for a precise press.
Try it again, getting to hold control more quickly, making your dot float between the requisite margins while keeping the same precision press. Try it again. This time with even less “get-to-the-float” time while maintaining your precision press. Run it three times.
Flash
The term “flash” applies to observing your dot movement so quickly that all you can barely make out is its color. It’s bouncing around so fast that you don’t have the time to determine any pattern or fixed position.
Start with a holstered pistol, hands below your gun belt. On the buzzer or “go signal,” draw from the holster to T3. Bring stability to alignment and with enough hold control. The dot will be moving so fast that you’re barely going to be able to ascertain the color streak ripping across the visual center of your target. But, when you do, that’s all that’s needed. With a flash dot picture, there is zero verification other than “Oh hey, there’s the red flash right where I want it.”
Try it again, getting to hold control more quickly, watching your dot flash while keeping the same precision press. Try it again in even less “get-to-the-flash” time, again maintaining your precision press. Run the drill three times.
The purpose of this drill is to discover, by feel and experience, each of the three visual-processing scenarios required to make good hits in acceptable times at varied distances. It facilitates the coveted “let your eyes press the trigger” skill set with fewer detrimental inputs, minimal lag time and greater marksmanship at optimal speed.