** When you buy products through the links on our site, we may earn a commission that supports NRA's mission to protect, preserve and defend the Second Amendment. **
A combination of baffles, different-size holes and ports disperse gases in a more even flow, thereby lessening felt recoil and muzzle rise to promote greater muzzle control and accuracy. Fortunately, once a decision has been made, putting one on your rifle is easy. The necessary parts and tools are listed below:
Parts
Compensator flash hider or muzzle brake
Crush washer (depending on the type of device selected).
Tools
Barrel wrench or related multi-tool
Brownells upper receiver action block with insert
Bench-mounted vise
At the recommendation of Shooting Illustrated Rifle Editor, Steve Adelmann, who builds custom ARs for a living, I selected a JP Compensator from JP Enterprises. Besides contributing to the rifle’s super-swank aesthetics, it features an internal expansion chamber, along with four top-rearward ports to minimize muzzle lift during recoil. Similarly, two larger holes at the three- and nine-o’clock positions vent even more gas to lessen felt recoil. All of these features are designed to promote greater accuracy and control, so what’s not to like?
Note for those who select a muzzle device that contains ports: Consult the manufacturing instructions to verify the ports don’t need to be oriented or “clocked” in a certain direction prior to installation.
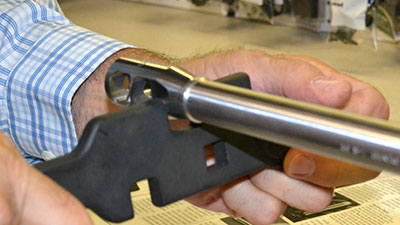
Prior to installation, take a moment to verify the exit hole of your muzzle device is the correct diameter, such as passing the bullet of a live round through each end of the device. (Lest you run the risk of a “spontaneous separation of parts” while attempting to send your first round downrange.) Next, verify the thread pitch.
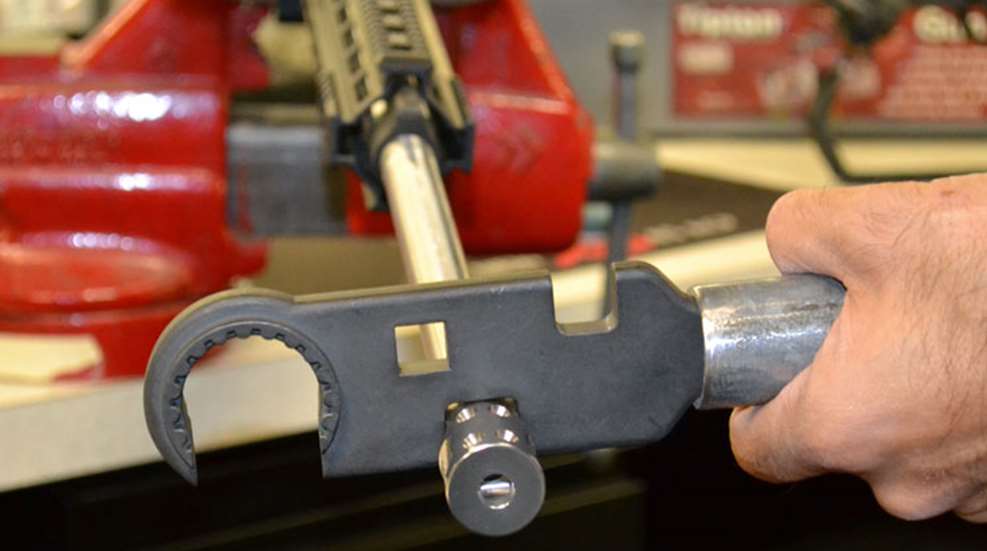
 Slide the crush washer on the threaded end of the barrel with the narrow end to the barrel. Put a bit of No. 242 Loctite on the cleaned threads and install the flash hider or muzzle brake. Use a barrel wrench to tighten the flash hider or muzzle brake until it is properly oriented.
The flash hider should have the solid section facing down. The muzzle brake should be level, with the ports to the side (or slightly clocked to counteract twisting under recoil as the shooter prefers). Of course, it wasn’t that simple for this gimpy gunwriter. Despite having expended more than a modest amount of effort, elbow grease and myriad of curse words I couldn’t attain the necessary 1/8 turn for the device’s ports to be properly “clocked”—with or without the crush washer.
 Being wheelchair bound, also worked against me, in that the inability to stand over the rifle resulted in an insufficient amount of leverage from the armorer’s wrench to do the job. Then, after Jay added the piece of galvanized pipe he used earlier to tighten his barrel nut—only to have the JP Compensator fall just shy of success—I didn’t feel so bad.
Fortunately, American Rifleman Assistant Editor, Christopher Olsen, a bear of a man who could easily moonlight as an NFL linebacker, saw us struggling and, in an almost effortless gesture, he torqued the wrench just enough to make the device budge the scosche we needed.
Congratulations, your upper receiver is complete, But, before to take off to the range to test your work, read the next entry, which will cover a simple but crucial safety check to verify it’s safe to shoot before the first round goes downrange.
Parts
Compensator flash hider or muzzle brake
Crush washer (depending on the type of device selected).
Tools
Barrel wrench or related multi-tool
Brownells upper receiver action block with insert
Bench-mounted vise
At the recommendation of Shooting Illustrated Rifle Editor, Steve Adelmann, who builds custom ARs for a living, I selected a JP Compensator from JP Enterprises. Besides contributing to the rifle’s super-swank aesthetics, it features an internal expansion chamber, along with four top-rearward ports to minimize muzzle lift during recoil. Similarly, two larger holes at the three- and nine-o’clock positions vent even more gas to lessen felt recoil. All of these features are designed to promote greater accuracy and control, so what’s not to like?
Note for those who select a muzzle device that contains ports: Consult the manufacturing instructions to verify the ports don’t need to be oriented or “clocked” in a certain direction prior to installation.
Prior to installation, take a moment to verify the exit hole of your muzzle device is the correct diameter, such as passing the bullet of a live round through each end of the device. (Lest you run the risk of a “spontaneous separation of parts” while attempting to send your first round downrange.) Next, verify the thread pitch.
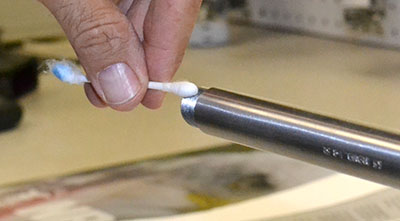
Barrel threads should be degreased prior to installing a muzzle device. Consult the instructions about adding such things as crush washers or thread-locking compound.
The flash hider should have the solid section facing down. The muzzle brake should be level, with the ports to the side (or slightly clocked to counteract twisting under recoil as the shooter prefers). Of course, it wasn’t that simple for this gimpy gunwriter. Despite having expended more than a modest amount of effort, elbow grease and myriad of curse words I couldn’t attain the necessary 1/8 turn for the device’s ports to be properly “clocked”—with or without the crush washer.
To minimize muzzle climb and felt recoil some brakes/compensators require being "clocked," or oriented so their chambers/ports face a certain direction.
Fortunately, American Rifleman Assistant Editor, Christopher Olsen, a bear of a man who could easily moonlight as an NFL linebacker, saw us struggling and, in an almost effortless gesture, he torqued the wrench just enough to make the device budge the scosche we needed.
Congratulations, your upper receiver is complete, But, before to take off to the range to test your work, read the next entry, which will cover a simple but crucial safety check to verify it’s safe to shoot before the first round goes downrange.