** When you buy products through the links on our site, we may earn a commission that supports NRA's mission to protect, preserve and defend the Second Amendment. **

Begin by placing the trigger in the frame trigger-bow tracks (making sure oriented properly) and completely seated, (Holding the frame vertically with the dustcover facing downward prior to dropping the trigger in will allow gravity to work for you, while making sure the trigger is in place.)
Next, place the magazine catch flush inside the frame then, with it partially depressed, turn the magazine-catch lock clockwise until you hear it snap and lock into place.
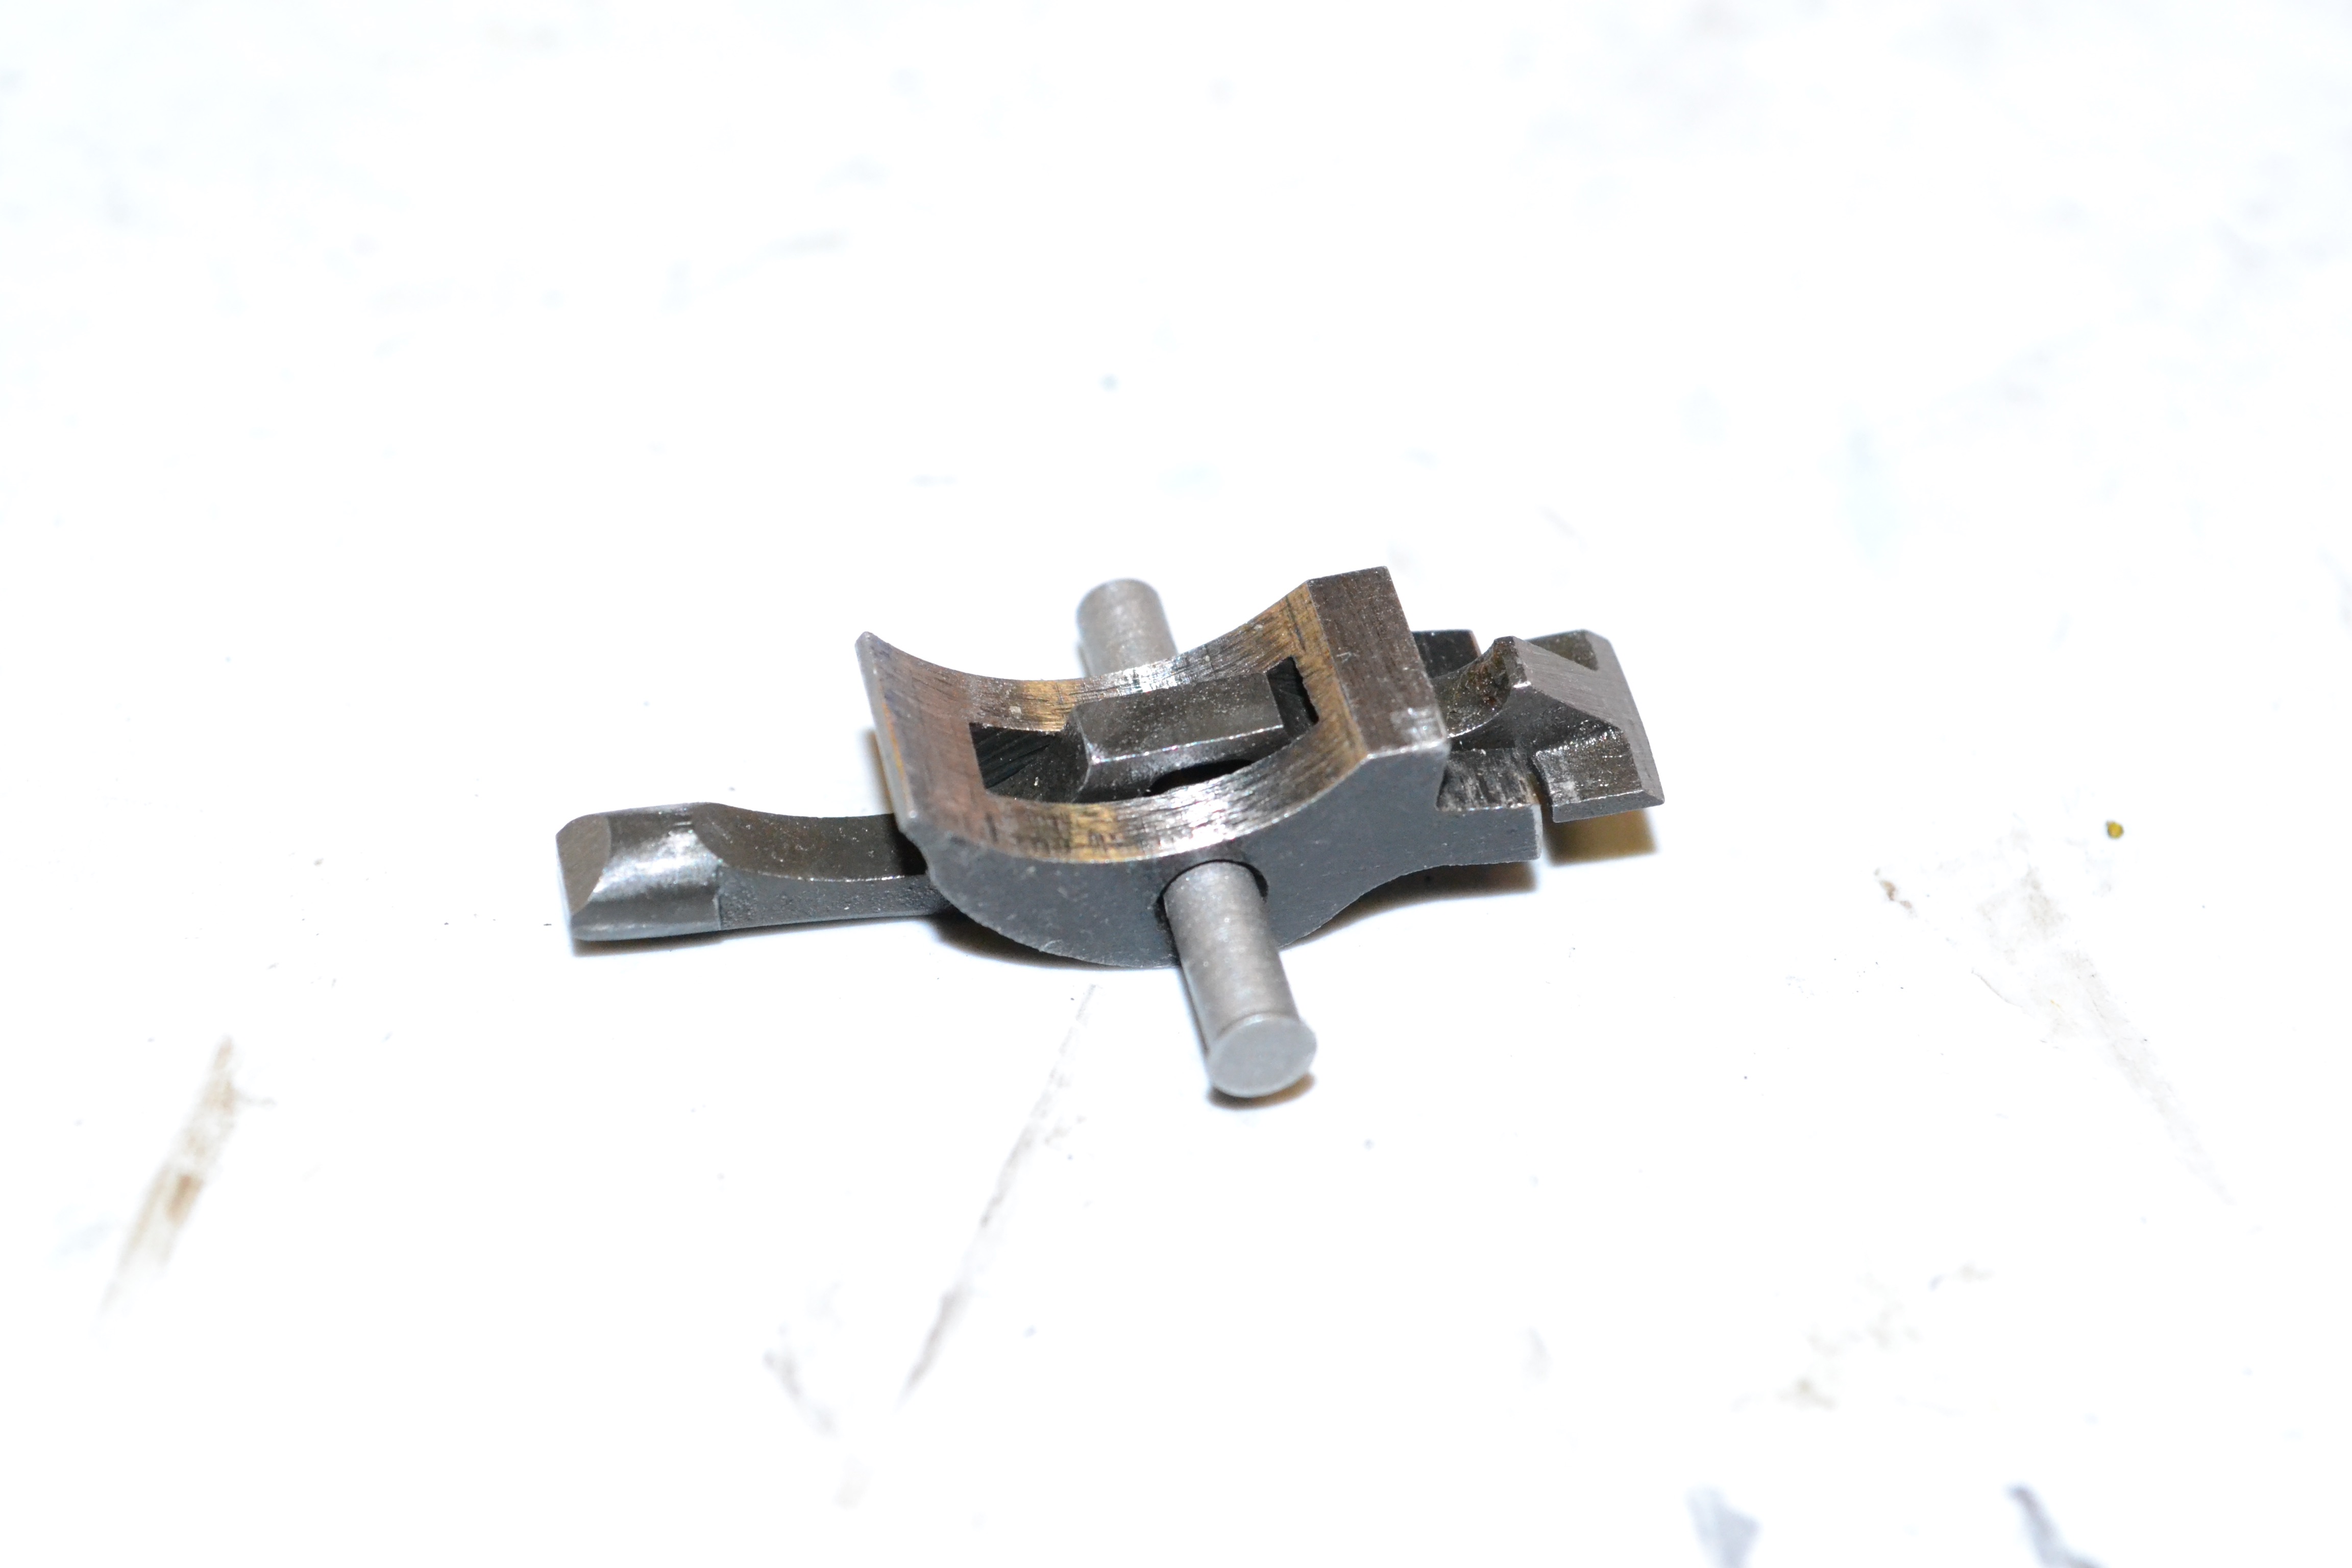
Now, it’s time to install the sear and disconnector, which should be installed as a single unit. Properly oriented, the sear straddles the disconnector (the sear nose curves rearward toward the hammer with the curved end facing up) and the disconnector goes in with the round end facing up and the flat end down and resting against the trigger bow. Place them in the frame so the round end of the disconnector is slightly protruding up through the frame. Now, install the sear pin.
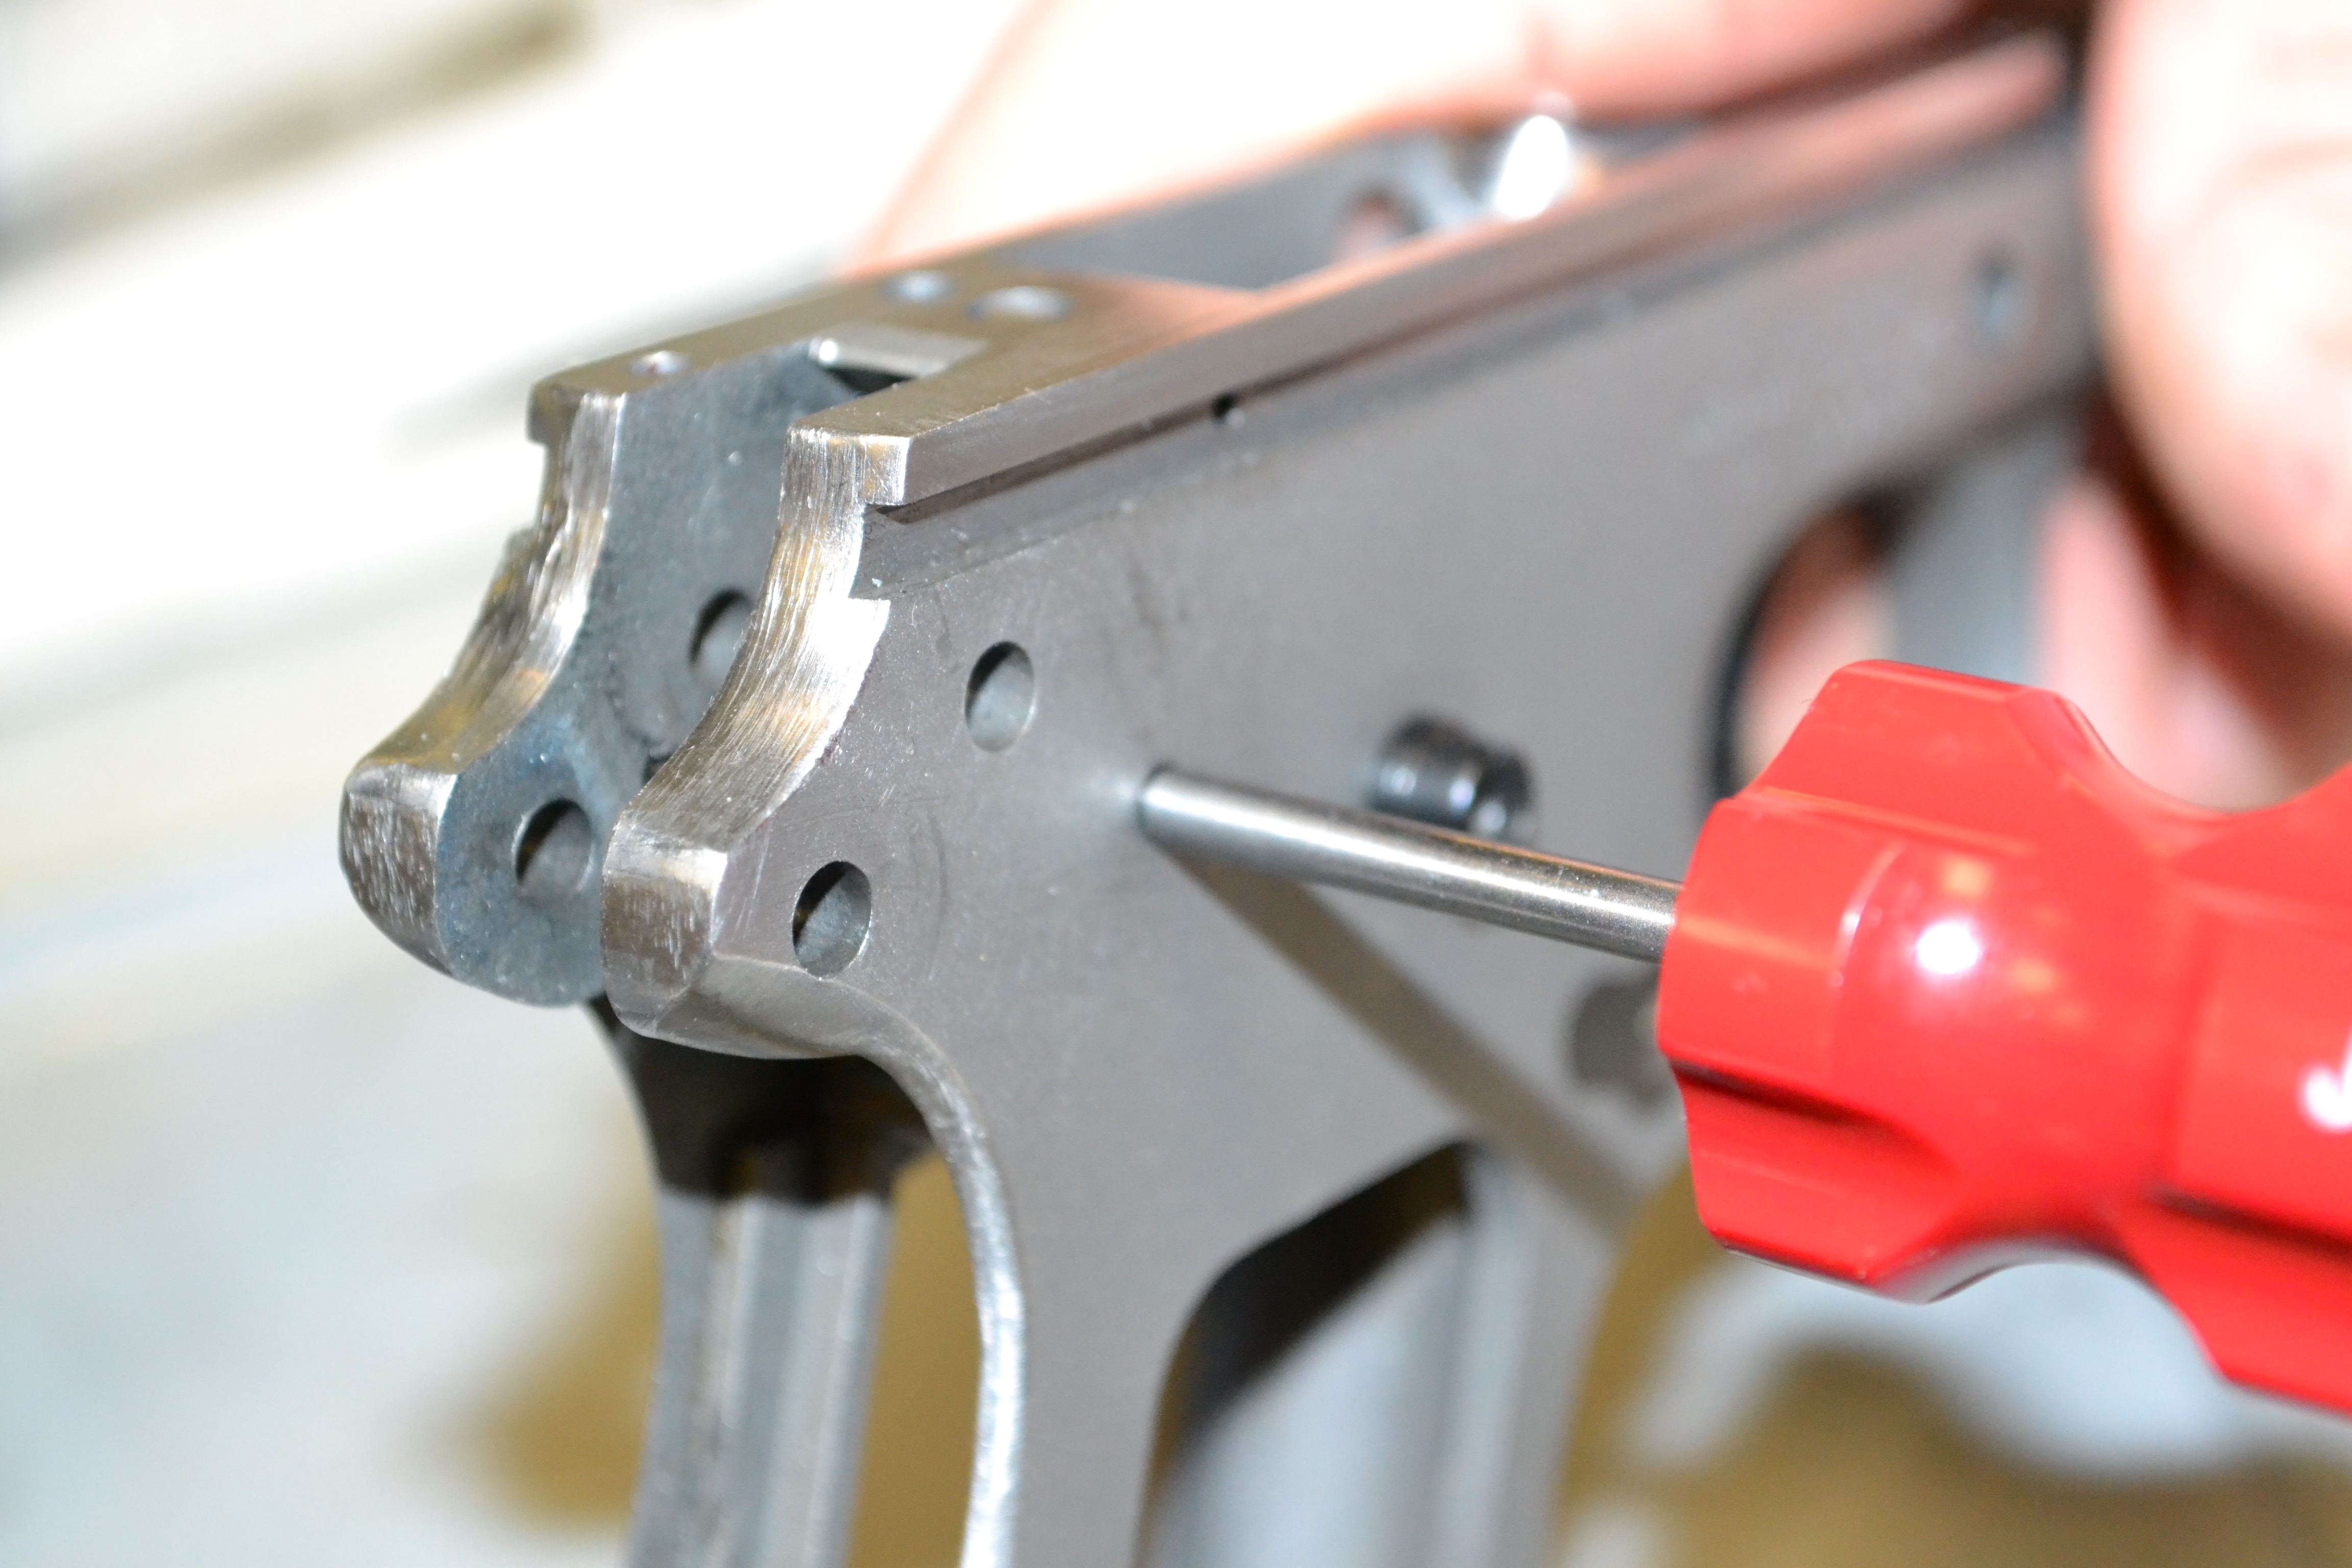
Doing so can be tricky, because in addition to passing through the holes in frame it must also intersect with the holes in the disconnector to successfully anchor them in place. This is one of those tasks where you need a third hand. For me, that extra is the Present Arms Gunners Mount M1911 Armorers Plate. When used in conjunction with the company’s Swivel and Pistol Post and the 1911 Fixture block, this unique and extremely versatile third hand holds the frame at a 45-degree angle—freeing up both hands—making sear and disconnector installation way easier. (The company offers all those components under its special package.)
For those purists who prefer the old-school method, I find it easiest to either hold the frame on its side—left side up and parallel to the floor—or to lay the frame on the edge of the workbench while aligning the part. (Using an Allen wrench drift punch, or the Al Marvel Safety Plunger Tool as makeshift slave pin helps to align each of the parts until you can see enough daylight through the frame in order to successfully install the pin.) The methods may not be for everyone, but they work for me.
In their book, Kuleck and Oldham suggest an alternative writing, “One way to get the frame, sear and disconnector lined up is to point the frame downward, place the disconnector and sear, and use a finger pressed through the mag well or a small tool to gently lift up the legs of the sear. This will cause the sear to pivot upward, counter-clockwise. At some point in this movement the hole(s) will line up with the pin.”
If you haven’t done so already, install the hammer strut to the hammer using the hammer-strut pin. (The strut should curve outward from the hammer.) Note: the fit should be tight. But you can make the less challenging by chucking the pin in a drill—with just the tip of one end protruding—and put a slight taper into the end by holding it against a file. In addition, you can slightly countersink (or chamfer) the hole in the hammer with a hand-twirled drill bit, which will ease starting the pin into place. Once the strut is installed, you may want to stake the pin in place to prevent it from backing out while in use. Use a center punch just at the edge of the pin hole to displace a little bit of metal against the pin.
Install the hammer, hooks forward, into the frame using the hammer pin. Next, install the sear spring, taking care to swing the hammer strut up and out of the way beforehand. When installing the sear spring, make sure the tab at the bottom of the spring is inserted into the slot provided for the tab, located in the frame’s mainspring-housing channel.
Speaking of mainspring housings, set your frame aside and prep the housing by partially chucking it upright in a vise. Thread the endcaps on to opposite ends of the spring and drop all three pieces inside the housing, pointed endcap first. Now, don your safety glasses, and using a drift punch, screwdriver of similar tool, compress the mainspring until you can install the pin to capture the spring under tension.
Kuleck and Oldham recommend another method in their book: Place the mainspring assembly (spring, cap and housing-pin retainer in the order listed above) sideways in a vise and use something to compress the mainspring, such as the slid-stop pin. Slowly cinch the vise tighter until you the mainspring-cap pin can be inserted from the rear of the mainspring housing. When the pin is fully inserted, simply loosen the vise and the mainspring is ready to be installed.
By now, you’re probably tempted to see what your trigger pull actually feels like. Here’s how: Add the mainspring housing (the mainspring-housing pin goes in the left side of the frame, convex end first) to the frame to permit cocking the hammer and measuring the trigger-pull weight. Just be sure to protect the frame with some sort of fixture or pad that prevents the hammer from impacting the frame under mainspring tension and potentially causing unnecessary damage to the frame. Take preventative measures by either riding the hammer up with your thumb or, if you insist of dry-firing the pistol, take a moment to install the slide (without the firing pin present) and slide stop (Never dry-fire a bare 1911 frame.)
Note: At this point it is possible for the pistol to fire. Safety is critically important. Make sure there is no live ammunition in proximity to your workspace. Using easily identifiable dummy round is paramount—For added safety, remove the firing pin to render your pistol inert.
The entries that follow will cover completing assembly of the frame with the installation of the external components.
Next, place the magazine catch flush inside the frame then, with it partially depressed, turn the magazine-catch lock clockwise until you hear it snap and lock into place.
Now, it’s time to install the sear and disconnector, which should be installed as a single unit. Properly oriented, the sear straddles the disconnector (the sear nose curves rearward toward the hammer with the curved end facing up) and the disconnector goes in with the round end facing up and the flat end down and resting against the trigger bow. Place them in the frame so the round end of the disconnector is slightly protruding up through the frame. Now, install the sear pin.
The sear pin retains both the sear and disconnector. The bad news is proper assembly requires they be placed in the frame in the manner shown above, and maintain the same orientation until the pin can pass through each part.
Doing so can be tricky, because in addition to passing through the holes in frame it must also intersect with the holes in the disconnector to successfully anchor them in place. This is one of those tasks where you need a third hand. For me, that extra is the Present Arms Gunners Mount M1911 Armorers Plate. When used in conjunction with the company’s Swivel and Pistol Post and the 1911 Fixture block, this unique and extremely versatile third hand holds the frame at a 45-degree angle—freeing up both hands—making sear and disconnector installation way easier. (The company offers all those components under its special package.)
For those purists who prefer the old-school method, I find it easiest to either hold the frame on its side—left side up and parallel to the floor—or to lay the frame on the edge of the workbench while aligning the part. (Using an Allen wrench drift punch, or the Al Marvel Safety Plunger Tool as makeshift slave pin helps to align each of the parts until you can see enough daylight through the frame in order to successfully install the pin.) The methods may not be for everyone, but they work for me.
Though the Marvel Safety Plunger Tool was originally designed for depressing detents during the assembly process, it's just the right size to serve as a handy makeshift slave pin.
In their book, Kuleck and Oldham suggest an alternative writing, “One way to get the frame, sear and disconnector lined up is to point the frame downward, place the disconnector and sear, and use a finger pressed through the mag well or a small tool to gently lift up the legs of the sear. This will cause the sear to pivot upward, counter-clockwise. At some point in this movement the hole(s) will line up with the pin.”
If you haven’t done so already, install the hammer strut to the hammer using the hammer-strut pin. (The strut should curve outward from the hammer.) Note: the fit should be tight. But you can make the less challenging by chucking the pin in a drill—with just the tip of one end protruding—and put a slight taper into the end by holding it against a file. In addition, you can slightly countersink (or chamfer) the hole in the hammer with a hand-twirled drill bit, which will ease starting the pin into place. Once the strut is installed, you may want to stake the pin in place to prevent it from backing out while in use. Use a center punch just at the edge of the pin hole to displace a little bit of metal against the pin.
Install the hammer, hooks forward, into the frame using the hammer pin. Next, install the sear spring, taking care to swing the hammer strut up and out of the way beforehand. When installing the sear spring, make sure the tab at the bottom of the spring is inserted into the slot provided for the tab, located in the frame’s mainspring-housing channel.
Speaking of mainspring housings, set your frame aside and prep the housing by partially chucking it upright in a vise. Thread the endcaps on to opposite ends of the spring and drop all three pieces inside the housing, pointed endcap first. Now, don your safety glasses, and using a drift punch, screwdriver of similar tool, compress the mainspring until you can install the pin to capture the spring under tension.
Kuleck and Oldham recommend another method in their book: Place the mainspring assembly (spring, cap and housing-pin retainer in the order listed above) sideways in a vise and use something to compress the mainspring, such as the slid-stop pin. Slowly cinch the vise tighter until you the mainspring-cap pin can be inserted from the rear of the mainspring housing. When the pin is fully inserted, simply loosen the vise and the mainspring is ready to be installed.
By now, you’re probably tempted to see what your trigger pull actually feels like. Here’s how: Add the mainspring housing (the mainspring-housing pin goes in the left side of the frame, convex end first) to the frame to permit cocking the hammer and measuring the trigger-pull weight. Just be sure to protect the frame with some sort of fixture or pad that prevents the hammer from impacting the frame under mainspring tension and potentially causing unnecessary damage to the frame. Take preventative measures by either riding the hammer up with your thumb or, if you insist of dry-firing the pistol, take a moment to install the slide (without the firing pin present) and slide stop (Never dry-fire a bare 1911 frame.)
Note: At this point it is possible for the pistol to fire. Safety is critically important. Make sure there is no live ammunition in proximity to your workspace. Using easily identifiable dummy round is paramount—For added safety, remove the firing pin to render your pistol inert.
The entries that follow will cover completing assembly of the frame with the installation of the external components.