** When you buy products through the links on our site, we may earn a commission that supports NRA's mission to protect, preserve and defend the Second Amendment. **

Other than a wanting an uber-accurate pistol, the universal desire of 1911 owners is for a light, creep-free trigger pull. Over the ages, scores of tinkers and gunsmiths broke out their files and stones as part of the ongoing quest, only to learn along the way that it required a keen eye, a steady hand and multitudes of experience. Through the same collective experience and modern technological advancements today we know the geometry needed to achieve such a trigger pull begins with square hammer hooks, between .018- to .020-inches (or eighteen to twenty thousandths of an inch) in height. It continues with a sear-engagement surface possessing the proper primary and secondary angles and a .020-inch primary-angle width. Thankfully a multitude of fixtures and related tools exist to aid us in the endeavor. Yes, this is an added, expense, but these tools ensure such precise cuts are done properly. Plus, if you have more than one 1911 to do a trigger job to, think of the extra equipment as an ounce of prevention, and an ounce of prevention is worth more than a pound of cure every time. The peace of mind will pay dividends. If you’re unwilling to purchase the necessary fixtures and tools to safely do the work yourself, then pay a gunsmith to do it. Otherwise, stick with the pre-fitted components and leave them alone.
I ordered a Power Custom Series I Stoning Fixture, and the Brownells Hammer/Sear File and Stone Kit (though you may wish to order the Brownells 1911Auto Trigger, Hammer & Sear Kit en lieu of the latter because it contains some other useful tools such as a .020-inch shim stop and a trigger-adjustment pins and a stirrup die.) The major advantage to the fixture is the sear is stoned while held at the exact angle that the sear takes when in engagement with the prepped hammer that will be used. Kevin Greeley of Greeley Custom who has advised me throughout various stages of this project suggested the fixture because, unlike similar products, it allows you to set the stoning angles by counting the clicks the instructions specify in order to raise or lower the stoning guide before locking it into place—thereby eliminating the risk from what would otherwise be a potentially dangerous undertaking. This also allows for a gunsmith to consistently reproduce a specific setup or feel to the trigger, their style.
(The Brownells website also offers an article by professional gunsmith Jack Weigand who uses the aforementioned fixture exclusively.) I’m uncertain the Marvel sear jig contained in the Brownells 1911Auto Trigger, Hammer & Sear Kit can be adjusted and locked down.
When fitting the hammer, you must accomplish two things: To ensure the hammer hooks are square—meaning at a precise 90-degree angle at the point of let-off—and that the height of the hooks are between .018 to .020 or eighteen to twenty thousandths of an inch high. (Positively no lower!) Anything less is considered for competition use only, not recommended for safety reasons.
- To set up the Power Custom Series I Stoning Fixture install the vertical guide pins, select the 45 adapter, place it on the fixture and set the zero-index by aligning the mark on the adapter with the mark on the fixture then tighten the socket-head cap screw with the provided Allen wrench.
- Loosen the lock (the wheel on the right of the fixture) counterclockwise one turn.
- Rotate the elevation wheel to 20 clicks from the bottom of the base, which according to the manual is the approximate angle of the sear face.
- Place the sear on the adapter and orient it to stone the facing angle of the sear (with the sear’s crescent facing to the right) to cut the face angle of the sear. Make sure the sear rests flat against the adapter and is held firmly in place during the stoning process. (Consider useing a separate clamp to secure the adapter, taking care the zero-index mark doesn’t shift while putting it in place.)
- Be sure the lock wheel is hand tight before stoning. In order to track your progress, use Dykem or a magic marker to ink the face of the park to be stoned.This allows you to see the contact point and ensure it is consistent in a horizontal manner across the width of the sear. Place the oiled stone (from the aforementioned Hammer/Sear File and Stone Kit or the company’s ceramic stones is another alternative) on the sear and guide roller. Be sure to keep the stone flat and to apply even pressure to the stone when moving it flat across the guide area. To repeat: Keep it flat against the guide, and apply even pressure. Move the stone forward and backward making approximately 1-inch strokes with light pressure on the sear. The face of the sear’s surface must remain parallel to the stone in order to obtain a trued surface. All the Dykem/ ink should be removed. If not, recoat the surface and adjust the adapter the needed amount. Then reclamp/resecure the adapter in the correct location to duplicate the original face angle.
- Remove the sear from the adapter by lifting it off and turn it around (flip it with the sear’s crescent facing to the left) to cut the sear's other angle—making sure not to disturb or remove the clamp locking it in place and repeat as above. This creates the relief cut most pistolsmiths use to will give the proper angle for the relief in relation to the sear-engagement angle. Again, this is a preference by a gunsmith as to the amount of relief angle used, if any.
- To reduce the hammer hooks, index the 45 adapter on mark H for “hammer” and hang the hammer from it upside down. (Use a C-clamp to secure the hammer against the fixture and prevent it from moving while stoning the hooks.)
- Loosen the lock (the wheel on the right of the fixture) counterclockwise one turn.
- Rotate the elevation wheel to 20 clicks from the bottom of the base and use a .020-inch shim stop (also known as a feeler gauge) to ensure you don’t go any lower.
At this point, you should use a set of trigger-adjustment pens or a fixture similar to the Present Arms M1911 Fixture Block, which allows you to mate the each part’s engagement surfaces outside the firearm—for a clear unobstructed view—without repeated assembly/disassembly of the frame.
When you get the hammer and sear angles at the just proper angle, return the hammer and sear to stoning fixture and go over each of the surface with the white ceramic stone, which adds a final polish to each of the faces you worked on
In the next installment, I’ll discuss installing the firing-control components in the frame.
I ordered a Power Custom Series I Stoning Fixture, and the Brownells Hammer/Sear File and Stone Kit (though you may wish to order the Brownells 1911Auto Trigger, Hammer & Sear Kit en lieu of the latter because it contains some other useful tools such as a .020-inch shim stop and a trigger-adjustment pins and a stirrup die.) The major advantage to the fixture is the sear is stoned while held at the exact angle that the sear takes when in engagement with the prepped hammer that will be used. Kevin Greeley of Greeley Custom who has advised me throughout various stages of this project suggested the fixture because, unlike similar products, it allows you to set the stoning angles by counting the clicks the instructions specify in order to raise or lower the stoning guide before locking it into place—thereby eliminating the risk from what would otherwise be a potentially dangerous undertaking. This also allows for a gunsmith to consistently reproduce a specific setup or feel to the trigger, their style.
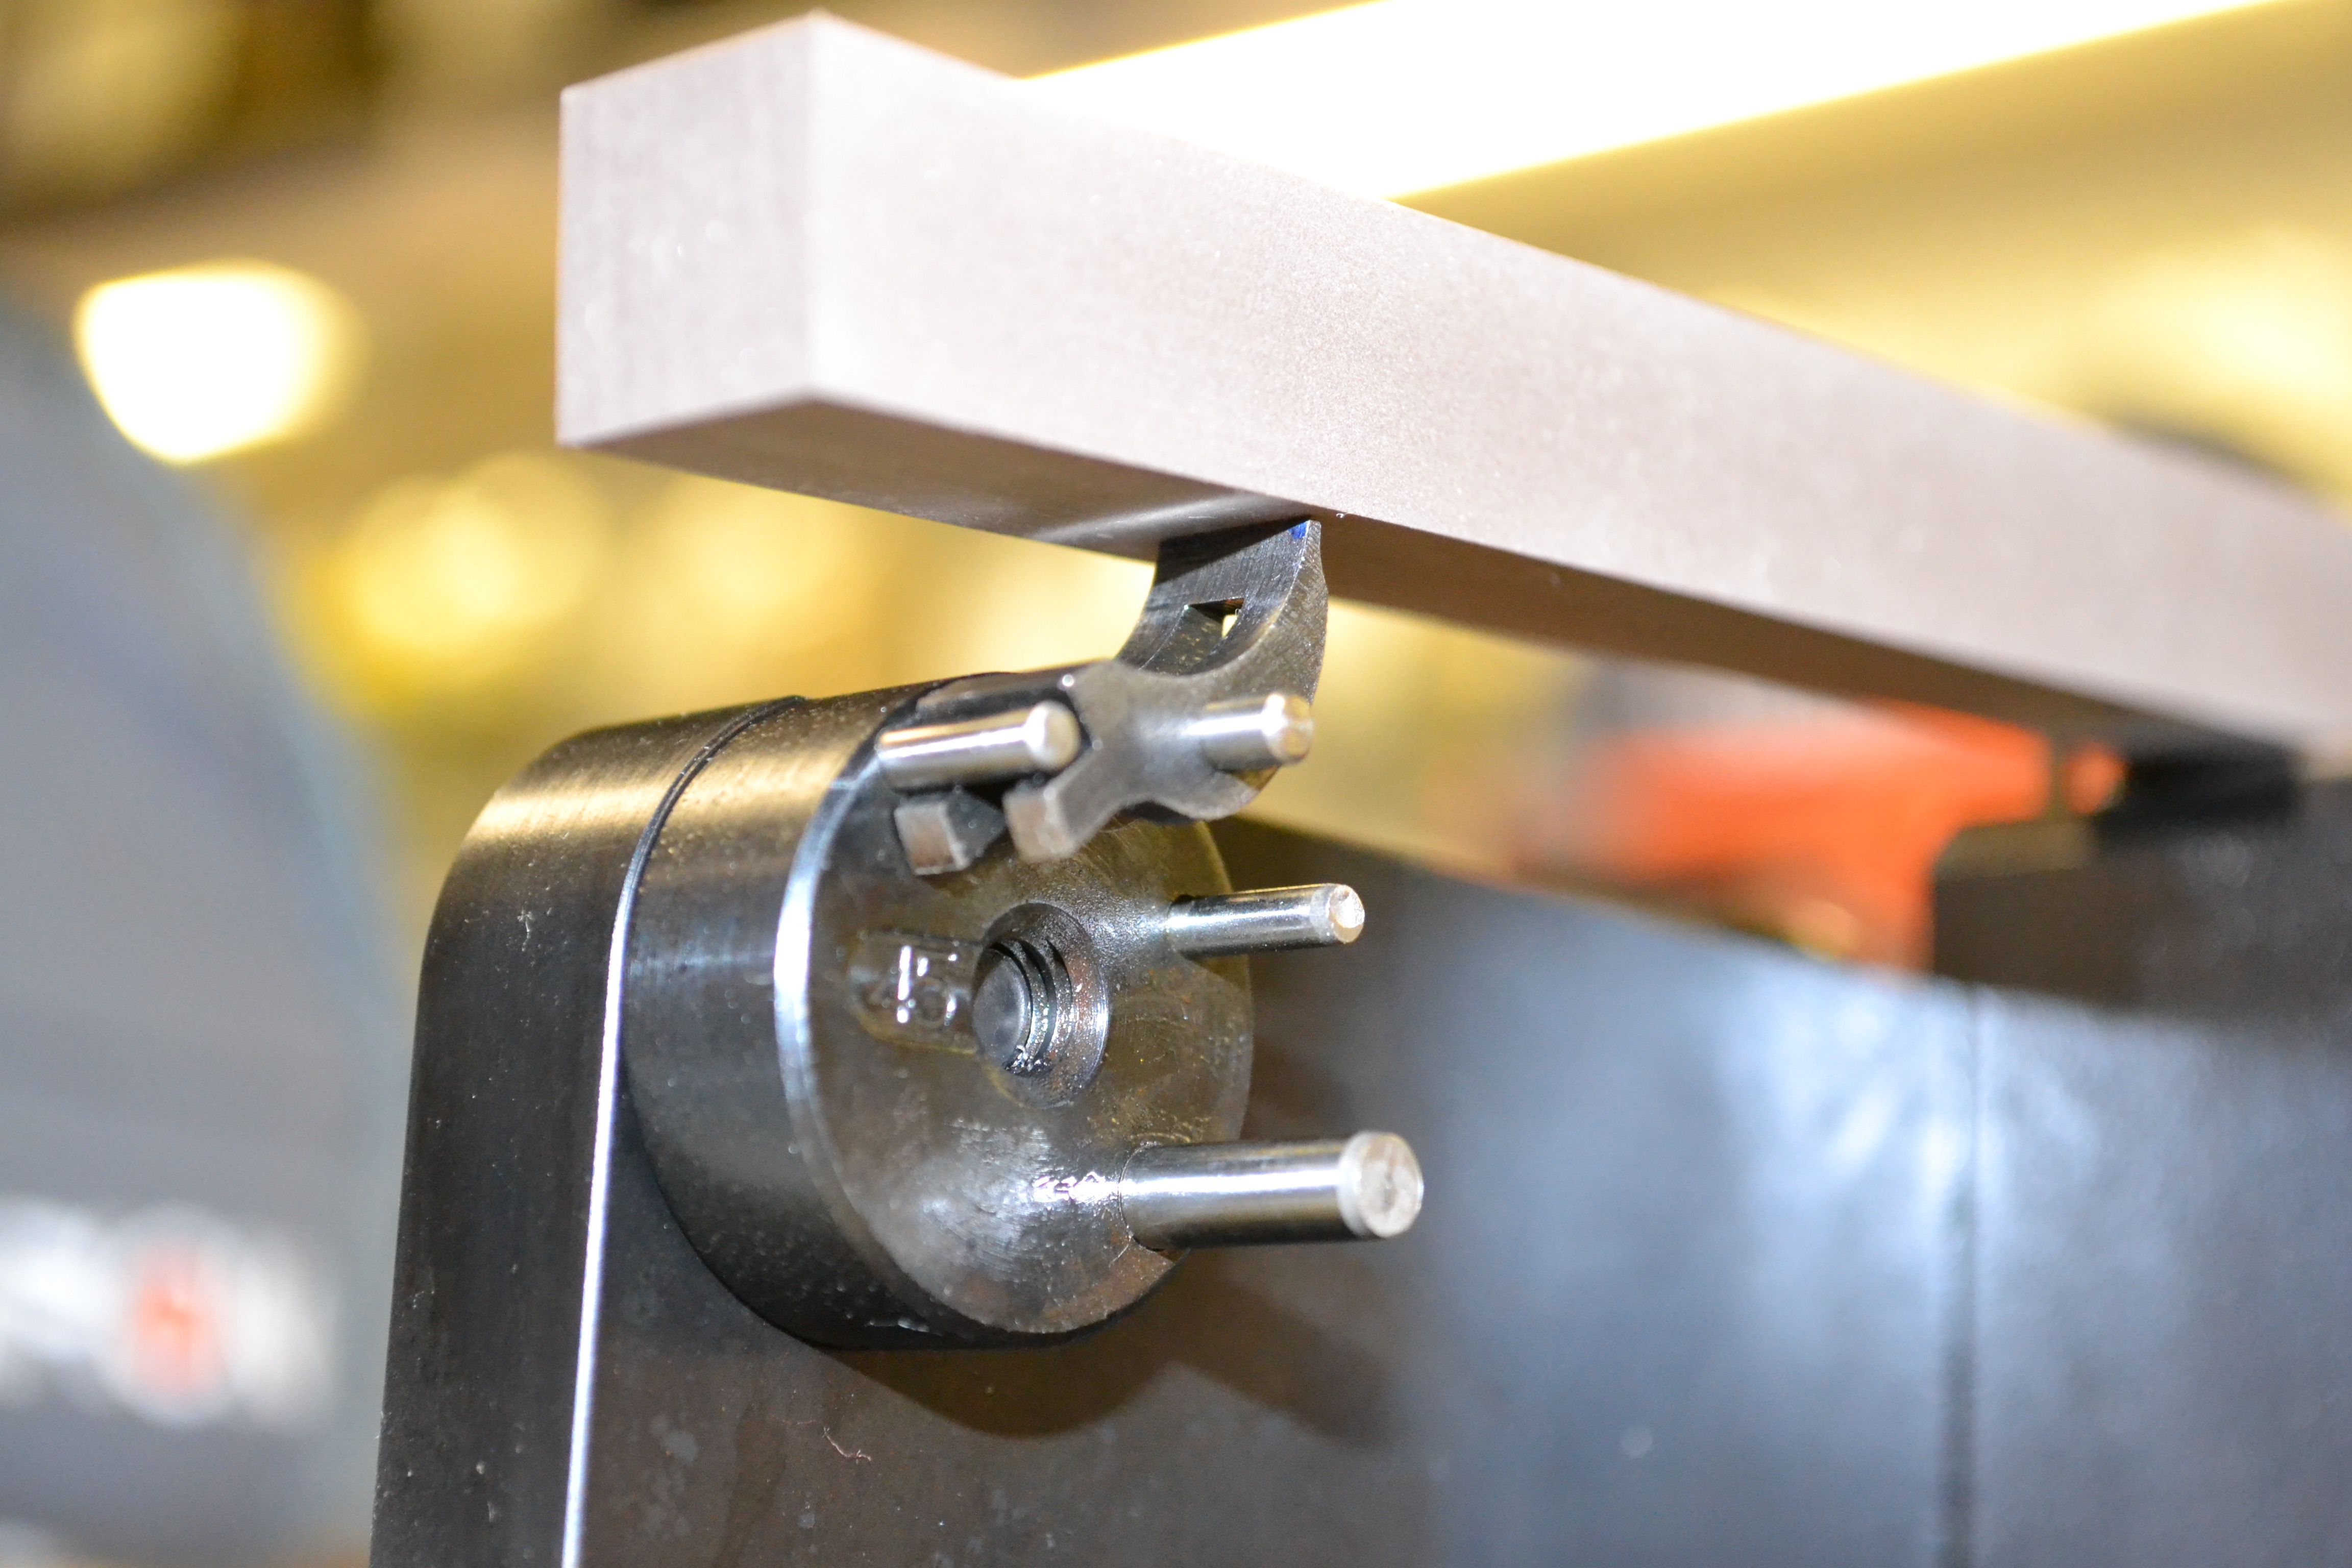
An essential tool for any 1911 gunsmith, this Power Custom Stoning fixture is a safe means of making each sear cut at the precise angle necessary for the crisp-breaking trigger pull everyone wants.
(The Brownells website also offers an article by professional gunsmith Jack Weigand who uses the aforementioned fixture exclusively.) I’m uncertain the Marvel sear jig contained in the Brownells 1911Auto Trigger, Hammer & Sear Kit can be adjusted and locked down.
When fitting the hammer, you must accomplish two things: To ensure the hammer hooks are square—meaning at a precise 90-degree angle at the point of let-off—and that the height of the hooks are between .018 to .020 or eighteen to twenty thousandths of an inch high. (Positively no lower!) Anything less is considered for competition use only, not recommended for safety reasons.
- To set up the Power Custom Series I Stoning Fixture install the vertical guide pins, select the 45 adapter, place it on the fixture and set the zero-index by aligning the mark on the adapter with the mark on the fixture then tighten the socket-head cap screw with the provided Allen wrench.
- Loosen the lock (the wheel on the right of the fixture) counterclockwise one turn.
- Rotate the elevation wheel to 20 clicks from the bottom of the base, which according to the manual is the approximate angle of the sear face.
- Place the sear on the adapter and orient it to stone the facing angle of the sear (with the sear’s crescent facing to the right) to cut the face angle of the sear. Make sure the sear rests flat against the adapter and is held firmly in place during the stoning process. (Consider useing a separate clamp to secure the adapter, taking care the zero-index mark doesn’t shift while putting it in place.)
- Be sure the lock wheel is hand tight before stoning. In order to track your progress, use Dykem or a magic marker to ink the face of the park to be stoned.This allows you to see the contact point and ensure it is consistent in a horizontal manner across the width of the sear. Place the oiled stone (from the aforementioned Hammer/Sear File and Stone Kit or the company’s ceramic stones is another alternative) on the sear and guide roller. Be sure to keep the stone flat and to apply even pressure to the stone when moving it flat across the guide area. To repeat: Keep it flat against the guide, and apply even pressure. Move the stone forward and backward making approximately 1-inch strokes with light pressure on the sear. The face of the sear’s surface must remain parallel to the stone in order to obtain a trued surface. All the Dykem/ ink should be removed. If not, recoat the surface and adjust the adapter the needed amount. Then reclamp/resecure the adapter in the correct location to duplicate the original face angle.
- Remove the sear from the adapter by lifting it off and turn it around (flip it with the sear’s crescent facing to the left) to cut the sear's other angle—making sure not to disturb or remove the clamp locking it in place and repeat as above. This creates the relief cut most pistolsmiths use to will give the proper angle for the relief in relation to the sear-engagement angle. Again, this is a preference by a gunsmith as to the amount of relief angle used, if any.
- To reduce the hammer hooks, index the 45 adapter on mark H for “hammer” and hang the hammer from it upside down. (Use a C-clamp to secure the hammer against the fixture and prevent it from moving while stoning the hooks.)
- Loosen the lock (the wheel on the right of the fixture) counterclockwise one turn.
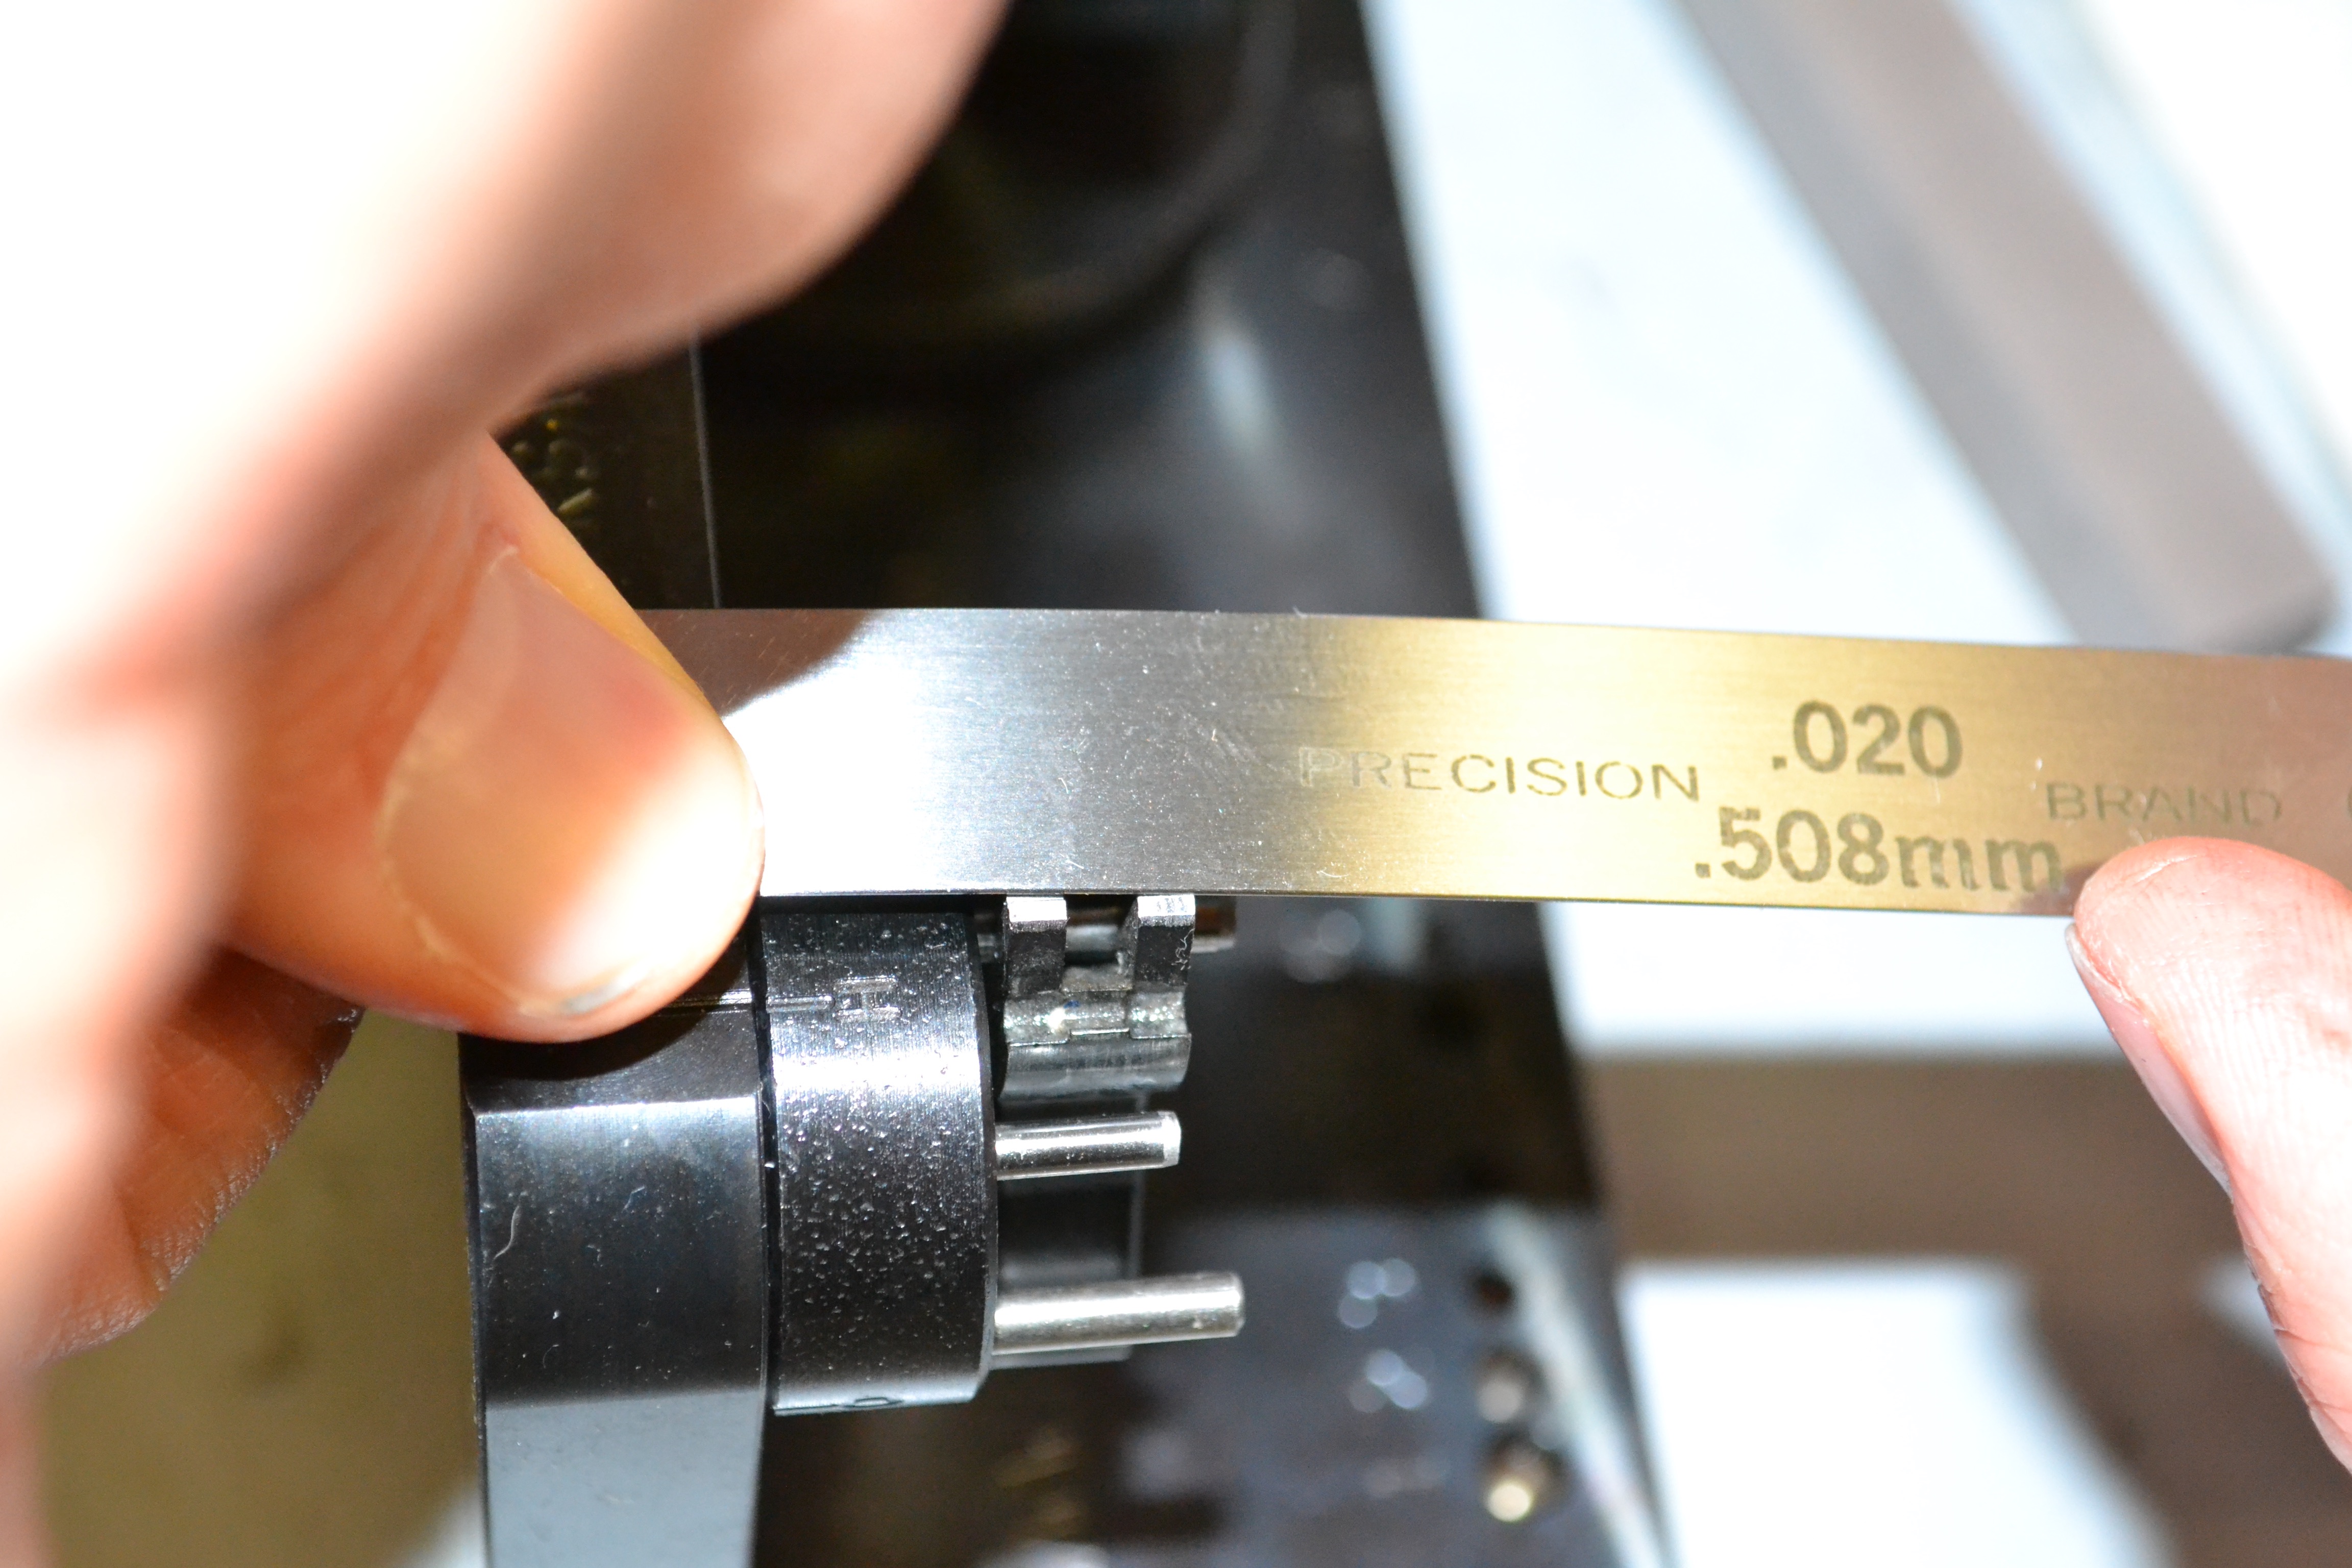
- Rotate the elevation wheel to 20 clicks from the bottom of the base and use a .020-inch shim stop (also known as a feeler gauge) to ensure you don’t go any lower.
When cutting the hammer hooks, it's essential to take periodic breaks to verify the height of the hooks with a .020-inch shim stop, also known as a feeler gauge.
At this point, you should use a set of trigger-adjustment pens or a fixture similar to the Present Arms M1911 Fixture Block, which allows you to mate the each part’s engagement surfaces outside the firearm—for a clear unobstructed view—without repeated assembly/disassembly of the frame.
When you get the hammer and sear angles at the just proper angle, return the hammer and sear to stoning fixture and go over each of the surface with the white ceramic stone, which adds a final polish to each of the faces you worked on
In the next installment, I’ll discuss installing the firing-control components in the frame.