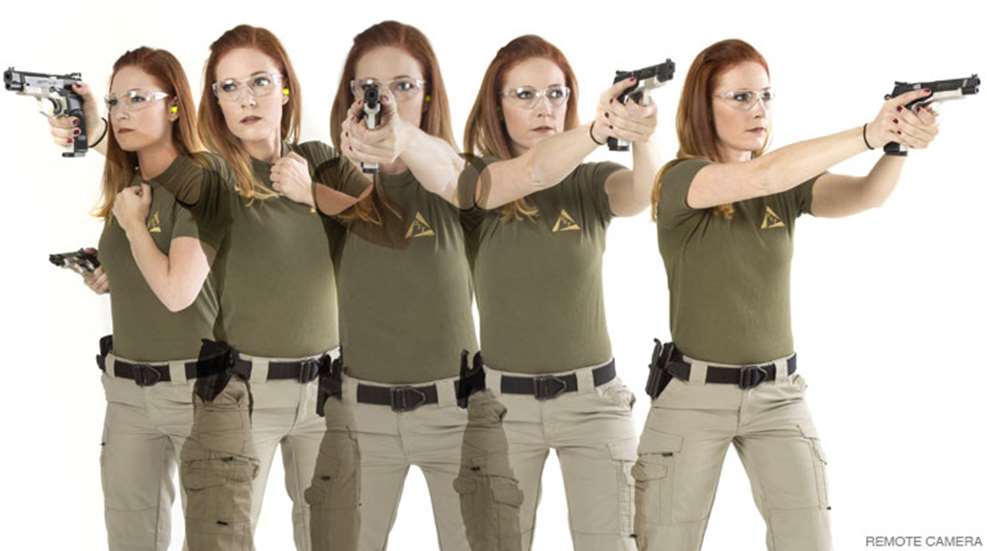
Fast and accurate shooting with a handgun requires a stable shooting stance that allows the shooter to exercise the proper degree of sight alignment, trigger control and recoil management.
There are a number of stances that can do that, but there’s no “one-size-fits-all” solution.
Not all shooting conditions are the same. One method may be superior to others in certain situations, and savvy shooters will want to explore those that work best for them. Here are five stances that are worth the time to learn.
Weaver Stance
The first two-hand stance to see widespread use, the Weaver Stance was developed by Los Angeles County Deputy Sheriff Jack Weaver for combat-style matches.
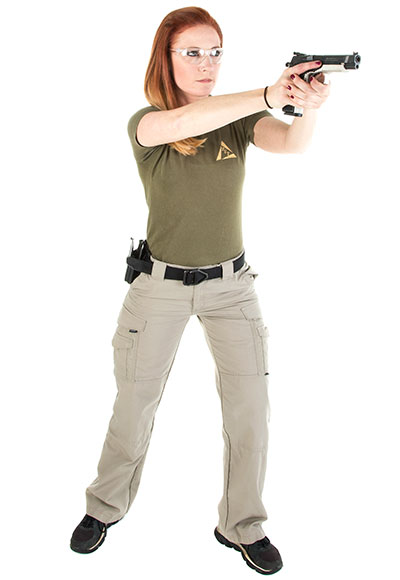
The Weaver is an aggressive, “boxer-type” stance. Assume it by bringing the support-side (non-shooting side) foot forward 8 to 10 inches with the toes pointing toward the target, with the strong-side (shooting side) toes canted 45 degrees outward. The gun is presented to the target in a two-hand hold, with the strong-side arm not fully extended. That elbow should be unlocked and angled slightly outward. The support arm has the elbow bent downward at a 45-degree angle. The support hand pulls into the shooter while the strong hand pushes outward and the support-side shoulder leans into the gun. This creates a very rigid grip on the gun.
It is very quick to assume, with practice, and it has some distinct advantages over other two-hand stances.
One is a fast sight picture. With the elbows unlocked and the arms not fully extended the sights are brought closer to the shooter’s eyes. This has the practical effect of making the rear-sight notch appear wider, which allows more light on either side of the front sight and brings it into immediate focus. It is one of the fastest two-hand stances to deliver accurate hits at close range, and can offer good accuracy at ranges stretching to 25 yards and beyond.

It also provides a wider swing arc to the shooter’s support side. In any two-hand stance the feet do not move when engaging targets: the upper body acts like a turret and pivots the gun. In the Chapman and Isosceles stances (discussed below), most shooters can comfortably pivot 90 degrees to their strong side and about 100 degrees to their support side before the torso locks up. The unlocked elbows of the Weaver Stance allow the support-side pivot to increase another 45 degrees while losing nothing on the strong side. That can be quite handy when an unexpected threat shows up on your blind side.
While the Weaver offers advantages, it also has drawbacks. One is in the area of recoil control. With both elbows unlocked, recoil forces are largely taken up by the wrists. Using this stance effectively requires a relative degree of upper body strength—something many females and smaller-stature males may lack, and they may find it difficult to control handguns with significant recoil. Even some powerfully built shooters may find magnum revolvers a bit much when using this stance.
Another drawback affects those who have cross-dominant vision (right-handed but with a left-dominant eye, or vice versa). They comprise an estimated 10 percent of the population. The Weaver Stance leans heavily on the strong hand having the dominant eye on that side. If not, shooters may have to cant their head awkwardly to achieve a proper sight picture, which renders the stance a poor choice for them.
Both of these drawbacks were corrected when legendary shooting instructor Ray Chapman modified the Weaver Stance.
Chapman Stance
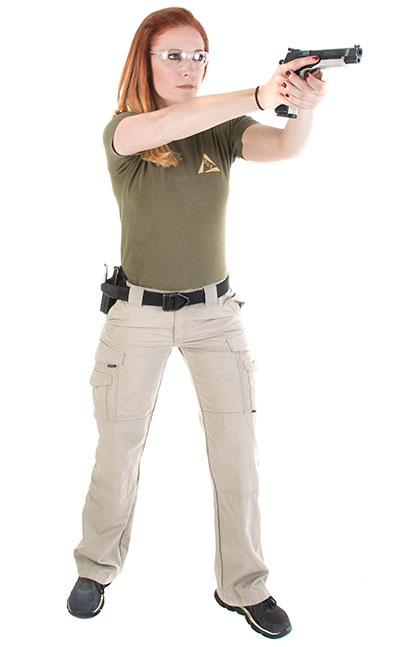
The Chapman Stance uses the same aggressive foot position as the Weaver, but the support-side foot doesn’t need to move quite as far forward, and the support-side shoulder doesn’t drive toward the gun. The stance is more relaxed and the major difference is the strong-side arm is now fully extended. While there is some pull back from the support arm hand, the strong arm exerts only minimal forward push. In affect, the strong arm becomes a steady “rifle stock,” and many Chapman Stance shooters actually drop their cheek to contact their bicep as they would with a rifle.
The Chapman Stance is slower to assume than the Weaver, but does offer a few advantages over it.
One is that the more-relaxed stance requires less upper-body strength to execute. Shooters who have upper-body strength issues and experience discomfort with the Weaver Stance often find the Chapman to be an excellent solution. Also, many with cross-dominant vision find the less-rigid head position of the Chapman allows them to get their eyes properly aligned quicker with just a slight shift of the head.
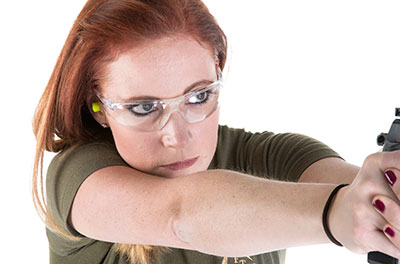
Recoil control is another major plus for the Chapman Stance. With the strong arm locked, and the support-arm elbow bent in a supporting position, a lot of the recoil is transferred from the wrists to the upper body and shoulders where body mass helps soak it up better than flexible wrists can. Shooting a .44 Mag. from the Weaver isn’t fun, but its much more tolerable from the Chapman, and it is a favored stance for handgun hunters using heavy calibers. They also appreciate the stance’s potential accuracy enhancement.
The full-arm extension into a “rifle-stock” position extends the sights beyond the Weaver and allows their finest alignment. Combined with the steady cheek rest position and the supporting hand, many experts consider the Chapman to be the most accurate two-handed stance available to a skilled shooter.
Power Isosceles Stance
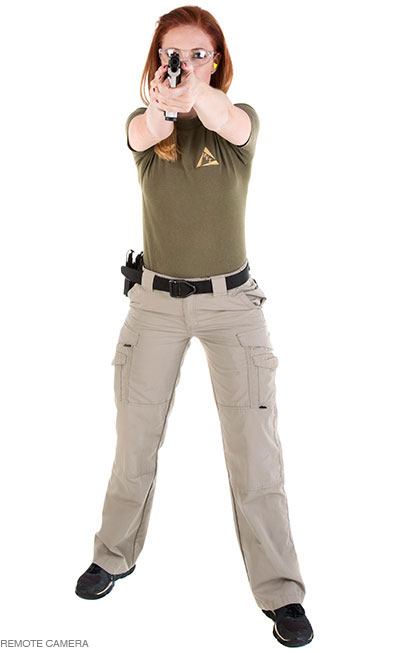
The original Isosceles Stance is the most natural and easy-to-assume two-hand stance a shooter can use. All that is required is to face the target squarely with the feet spread shoulder-width apart, and bring the gun up directly in front of the eyes with a two-handed grip and both arms at full extension. This keeps the head fully upright and allows maximum peripheral vision while naturally centering the pistol with the eyes.
It’s significantly faster than the Chapman, and every bit as fast as the Weaver, with far less practice. And it requires virtually no shifting of the head to achieve a clear sight picture for those with cross-dominant vision issues. It’s been around so long no one can truly point to its originator, but its popularity began to soar in the early 1980s with the rise of action-pistol competition.
Shooters found the upright head position and increased peripheral vision allowed them to move faster and more positively between multiple targets than the more-rigid Weaver and Chapman. It became the winning stance in action-pistol matches, but they were shooting light targets loads.
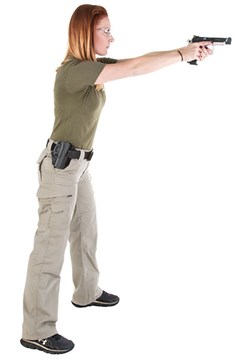 Shift to full-power loads and the original Isosceles Stance exposes its weakness: with the feet spread equally at shoulder width, it provides the least amount of recoil control among common shooting stances.
Massad Ayoob demonstrates this emphatically at his MAG classes. He picks the biggest, beefiest, student he can find and has them assume the Isosceles with a blue plastic training gun. He then stands in front of them and smacks the muzzle with his palm to simulate recoil. I have seen even large guys lose their foot position and take a step backward.
The Power Isosceles corrects that drawback, without losing any of its advantages, by making two slight changes: The gun-side foot is moved back 8 to 10 inches and the knees are unlocked to produce a slight degree of flex. The improvement in recoil control is dramatic and I have seen even petite female students properly maintain that stance with Ayoob forcefully smacking the muzzle.
Each of these two-handed stances has advantages and disadvantages for certain situations. It’s worth learning all three and being able to shift between them when needed. It’s commonly assumed that changing your grip or stance can significantly alter the point-of-impact on a handgun. But while the three stances above are noticeably different, a recent test I conducted showed they don’t alter it by much.
I put up a 4-inch diameter, black target with a clearly defined center-point at 20 yards. Using the 9 mm Smith & Wesson M&P I shoot in IDPA/USPSA competition, I fired three slow and deliberate rounds from the Weaver, Chapman and Power Isosceles stances, marking each three-round group for identification before firing the next. The three-round Weaver group measured 1.75 inches and group center was 1.5 inches low and one-inch left from the target center-point. The Chapman group measured 1.5 inches and was 1-inch high and right from center. The Isosceles group (for which the gun was zeroed) was 2.25 inches and centered. The nine-round group measured 3.78 inches. At 20 yards that is virtually no change in point-of-impact.
Power Point Stance
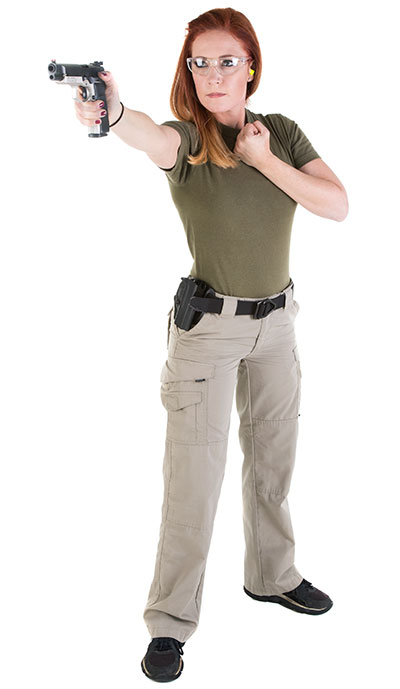
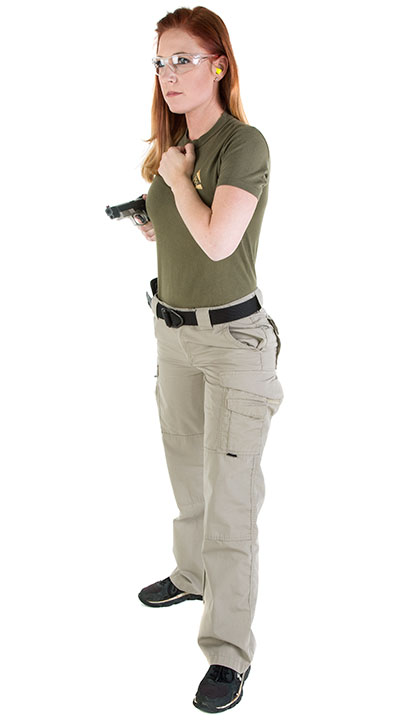
A two-handed stance is the best platform to deliver accurate handgun fire. But there can be times when both hands aren’t available. The Power Point Stance provides the capability to deliver fast and accurate close-range fire with either the strong or weak hand.
This is a far more aggressive one-hand stance than that used by bullseye competitors. With either hand, the gun-side foot drives forward 15 to 20 inches, with the shoulder pushing into the gun and the knees flexed. It is not much different than a boxer throwing a hard punch. You drive the gun to the target.
The non-shooting hand should be tucked tightly to the center of the chest, if possible. Massad Ayoob recommends the palm of that hand be facing upward and the fist clenched. That helps solidify the upper shoulder muscles and promotes better trigger control. It will provide the most-accurate stance, but if the non-shooting hand is occupied or injured, the aggressive “punch to the target” will still give you speed and all the close-range accuracy one would require.
Strong-Hand Retention Stance
There are personal-protection situations where extending the gun into one of the aforementioned stances is an invitation to have it taken away from you. That could happen if potential assailants have closed to virtual arm’s length, or if you decide to investigate that proverbial “bump in the night” and are moving room to room and peeking around corners. Leading with the gun is a poor idea.
The Strong-Hand Retention stance provides an effective alternative.
This stance has the gun-arm elbow tucked tightly into the side of the body, with the gun hand no more than a few inches ahead of the stomach and pointed straight ahead. The support hand moves to the support shoulder height to clear it from the muzzle, and provides a free hand to fend off a sudden attack. This stance locks the gun tightly to the body while leaving the support hand free to act. Foot placement doesn’t matter with this stance. They can go anywhere they need to as long as the gun is tucked in tightly to the body, making it difficult to grab.
If threats appear close and sudden, all one has to do is pivot the upper body to bring the gun to bear and fire. If threats materialize at longer distances the gun is already in hand, the support hand is ready to move, and one can quickly shift into any of the above stances.
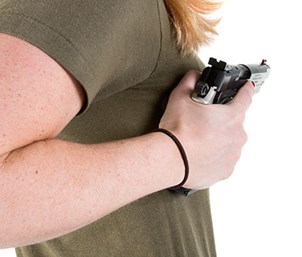 There is, however, one caveat to the Strong-Hand Retention stance: If your gun has a compensator or ported barrel, you don’t want to fire it from such a retention position. Powder gases and unburned powder particles will blow directly up and into your face and eyes. At best it’s distracting, and at worst disabling. In this case the gun will need to be extended.
No one stance is perfect for all situations, but learning these five will give you an edge in a life-threatening encounter.


