The mere act of owning a handgun won’t make you a skilled self-defense shooter any more than owning a football will make you a Cam Newton, or a set of golf clubs a Tiger Woods. These objects are only tools—a means to an end, but not the end itself. It takes training to learn their proper use and, more importantly, regular practice to maintain those skills.
In a self-defense crisis, those critical skills can involve more than just pointing the gun and pulling the trigger.
Defensive-handgun skills include drawing from your concealed-carry position, delivering fast and accurate shots from a low-ready position, engaging an attacker(s) with multiple rounds, rapid reloads, shooting with the weak and strong hand, shooting on the move and delivering precision fire, to name a few. For those who have access to an open bay outdoor range, these varied skills are easily practiced. Unfortunately, not all gun owners enjoy that luxury.
In large urban areas, a commercial indoor range may be the only option. In northern climes, even those with expensive gun-club memberships can find winter weather makes their open bays unusable. Indoor practice becomes a fact of life and once you pay your rental fee, their gun-handling rules tend to be strict. Drawing from the holster, shooting while moving and “rapid fire” (generally considered to be faster than one round per second) may be prohibited. Violate these rules and you will be told to leave.
However, that doesn’t mean your practice time must consist only of slowly sending rounds downrange. Your rental fee and ammunition budget can be better spent. There are important drills that can be practiced on a commercial range without violating the rules most ranges maintain.
Here are five that won’t get you ejected:
1. Low-Ready Drill
Many self-defense incidents don’t start with a fast shot from the holster. In fact, in some cases the gun will already be in hand. This is well known by military and law enforcement trainers, and they teach low-ready drills. These are just as applicable to civilians.
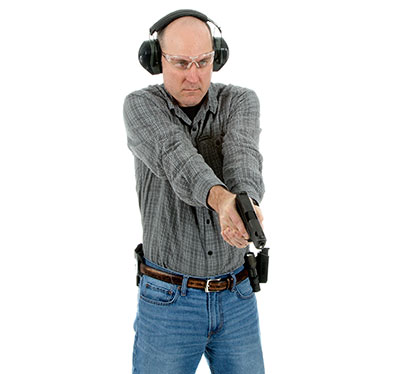
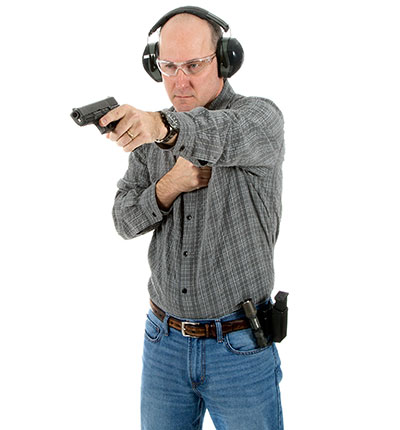
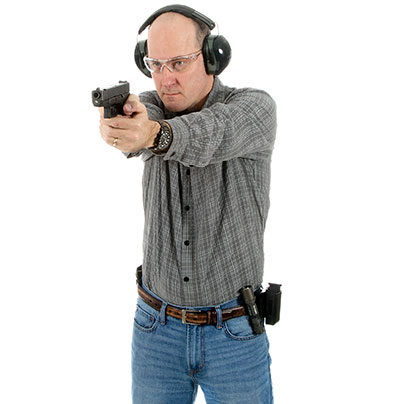
The traditional low ready has the gun in a two-handed grip with the arms fully extended and pointed downward at a 45-degree angle. Raise the arms to the target to deliver a shot. Military/law enforcement trainers often modify this position to bring the elbows back toward the body about 8 inches, raise the gun a few inches and move the muzzle slightly to the shooter’s weak side (to the left for right-handed shooters). To fire, punch the gun to the target as though you are delivering a sharp, two-fisted punch.
The Guardian position is a two-handed retention position. With a two-handed grip, bring both elbows back to contact the sides, with the gun located just below the sternum and about 8 inches ahead of the body. Punch the gun to the target to shoot.
Set a full silhouette target 7 yards downrange and practice snapping the gun to it from each of these positions while delivering one quick shot to the center mass. This violates no range rules and you will find the low-ready position that’s most natural for you. If your handgun is a double-action/single-action (DA/SA) design, fire the first shot DA (since that is how the gun will initially be accessed) make the second shot SA, and back to DA to repeat. If your gun is a compact DA revolver, shoot it DA only. Cocking a revolver in a self-defense situation uses precious time. You don’t want to make that a habit. As your skills progress, the target distance can be increased.
You can spice this drill up by taping several 3x5-inch index cards to various places on the target and focus on one of them for the shot. Alternate between them to gain experience shifting between multiple target focus points.
2. Weak- & Strong-Hand Drills
Modern pistol craft stresses a two-hand firing grip, which improves accuracy, speed and recoil control. But in a fluid self-defense situation, you can’t count on both hands being available. The ability to deliver accurate, close-range fire with the dominant (strong) or non-dominant (weak) hand is a valuable skill and easily practiced in a rental stall.
This drill is run in exactly the same manner as the Low-Ready drill, except the gun is fired with only the weak or strong hand. Try to run at least 10 drills with each hand.
Many shooters find their speed and recoil control improves if the shooting side foot is moved towards the target about 10 or 12 inches and the gun driven to the target with full arm extension; just like throwing a punch. In addition, many shooters who have a strongly dominant eye on their dominant arm side find that canting the gun about 45 degrees toward that eye when shooting with the weak hand helps them find the front sight faster.
Deliver the rounds from the same handgun starting condition as the low-ready drills.
3. Reloading Drills
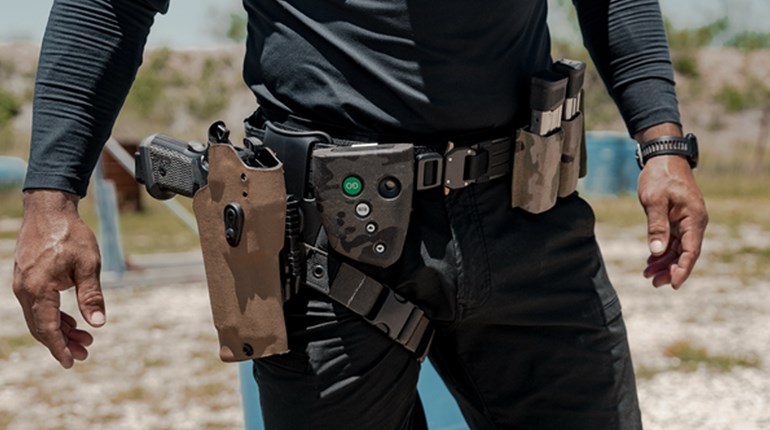
The majority of self-defense shooting incidents are over after three or four rounds have been fired—but not all. Given the popularity of compact semi-automatics with a six- to nine-round capacity and small-framed DA revolvers with a five- or six-round capacity, the ability to automatically perform an emergency (empty gun) reload can be critical. That can easily be practiced in a rental stall. The key is to carry your reload where you normally carry it on your person—don’t lay it out on the table. This will ingrain the reload movements “for real” and not just be an “administrative” procedure.
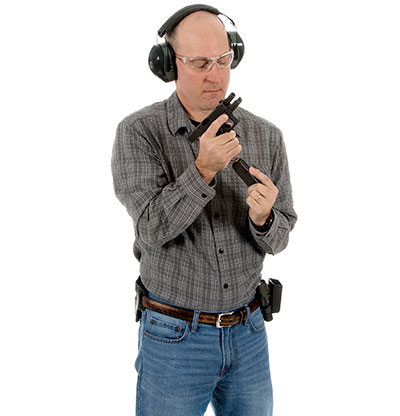
The drill is simple with a semi-auto. Load a magazine with one round and position a full-capacity magazine where you normally carry your reload. Insert the one-round magazine, and from a low-ready position deliver one shot to come to slide lock. Eject the empty magazine and make the reload as rapidly as you can. When the reload is completed, immediately fire one more round. Be sure to note where that round hit.
The reason for firing a round immediately after the reload is to determine if your reloading procedure quickly brings you back to a proper firing grip—just as would be needed in real life if you had to make an emergency reload.
When ejecting the empty magazine, don’t worry about where it winds up. Get it out and gone quickly, just as you would in an emergency. It can be picked up later. One tip is to place a carpet swatch on the bench, which will help keep the spent magazine from bouncing off the shelf.
After the first drill, you will have a round in the chamber, so just remove the loaded magazine from the gun, put it back into your carry position, and re-insert an empty magazine into the gun to repeat the drill. It takes repetitions to ingrain a procedure. Do this drill at least 10 times on every range visit. You can also get realistic practice with the Reload With Retention or Tactical Reload, as explained in the October 2015 issue.
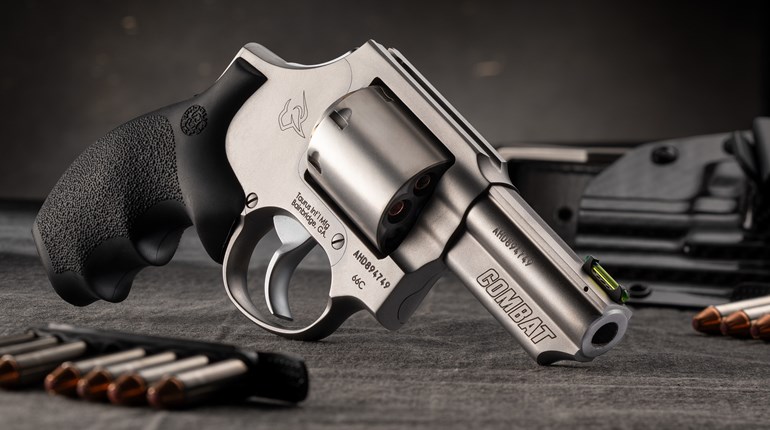
Revolver reloads require a different approach because the only way to truly duplicate an emergency reload is to have fired cases in all chambers, which definitely impedes their extraction. A simple way to do this is to combine it with the Low Ready Drill. Run that drill five (or six) times and then make the reload. As with the semi-automatic version, carry your reload where you normally carry it, and don’t worry about where the empty cases wind up. They can be picked up later if desired.
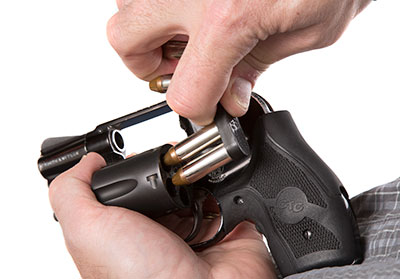
The drawback to a swift reload with small-frame revolvers is that the ejector rod stroke is not of sufficient length to completely remove all rounds from the chambers. A gentle stroke with the thumb will leave some hanging out the end of the cylinder and require manually removing them. That slows the reload. The most positive technique for ejecting cases from a small-frame revolver is the Stress Fire Reload developed by Massad Ayoob.
When the decision to reload is made (for right-handers) the shooting hand thumb activates the cylinder release while the support (left hand) comes under the gun. The two middle fingers of the support hand push the cylinder open and follow it through to join with the thumb to hold the cylinder fully open, while the two outside fingers grasp the gun to give gun control to the support hand. The muzzle is then rotated straight up and the shooting hand comes over the top of the ejector rod to forcefully smack it downward to expel the fired cases. The support hand then rotates the muzzle down while the shooting hand inserts cartridges from a speed loader, stripper clip, or loose rounds. When loaded, the support hand thumb rolls the cylinder closed and the shooting grip is re-assumed with a round immediately fired (and impact point noted) to confirm the proper after reload grip.
Southpaws have revolver reloading problems due to the design of the gun. But if they practice shifting the gun to their right hand this reload will work well for lefties.
With either reload technique, don’t worry about breaking the one-round-per-second rule. Even the top competitive Grand Masters won’t break one second, but every reload drill you run will get you closer to doing it quickly and correctly when you need to.
4. Flashlight Drills
The proverbial “bump in the night” wakes you up. You grab a flashlight and handgun to investigate. Now, how do you make the gun and light function effectively together? Here are three proven techniques that can be easily practiced on an indoor range.
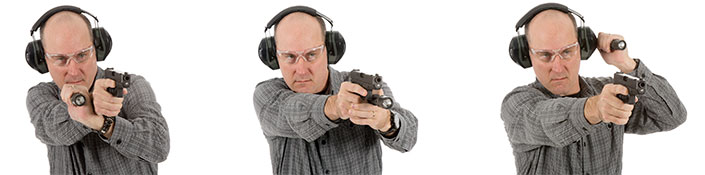
The Harries position starts with the gun in the strong hand. The light is grasped in a closed fist/ice pick grip in the support hand and brought under the shooting hand to the outside of the gun, and then upwards to lock the back of the gun and support hands together.
The Cup position places the light slightly to the support-hand side of the gun. Grip the light in the support hand with the palm upward. A light with a forward-sliding switch is gripped between the thumb and forefinger. A tail cap switch light is slipped between the forefinger and index finger with the thumb on the switch. The remaining fingers fan out to provide a “cup” for the gun hand to rest on.
The High-Head position has the flashlight brought into contact with the upper side of the head on the support hand side, while the gun hand takes a strong-hand shooting position. This positions the light to move with the head and puts the light where the eyes are pointing. Spillover light also illuminates the sights; a plus for those without tritium night sights. The training drill for this is simple. Bring the target close enough that your light will visibly spill onto it. That distance will depend upon the power of your light and the ambient lighting on the range. If the target distance is very close, tape an index card or business card onto the target for a specific focus/aiming point.
Start with the gun in the strong hand, the light in the weak hand, bring them smoothly into one of these flashlight techniques, and deliver one shot. Then repeat. Try the different techniques. Become comfortable with them. It’s very difficult to do something well that you have never done before. Making these flashlight positions “second nature” will pay off if you ever experience that proverbial “bump in the night.”
5. Focus Drill
The above drills have centered upon speed and movement. But, the basic fundamentals of handgun shooting cannot be ignored. The Focus Drill stresses them, and is an excellent way to end a practice session.
The target is an 8x10 sheet of white copy paper with a small (1- to 1.5-inch) central aiming point. That can be a commercial target dot, half a business card taped onto the paper or just a small spray-paint circle. These can be made at home.
Set the target at 5 yards. With a deliberate, two-hand shooting stance—bringing the gun down between shots and taking your time to achieve accurate hits—the objective is to chew one ragged hole in the center of the aiming point. This stresses grip, sight picture and trigger control, the fundamentals that can’t be ignored.
If you leave the range with this, you can be sure your lane fee and ammo budget will have been well spent.