Rubber Dummies by Mr Target are self-sealing when shot with ball ammunition and repaintable. Each can provide thousands of rounds of realistic practice.
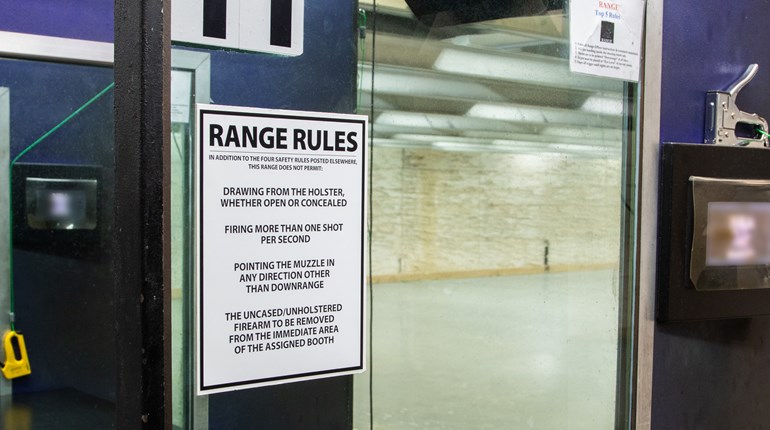
We all need something to shoot at when practicing our skills. Almost everyone begins, then continues, shooting traditional targets. Whether printed paper stapled or clamped to a target stand, or metal plates hung from a stand, our targets are generally flat and square to us as we attempt to hit our aiming point. The same “aim small, miss small” effort applies universally to our success in hitting what we’re aiming at. Whether using bullseye or silhouette targets, we develop our practical-accuracy skills by firing at the center of the designated target area. For target shooting, hitting the “X” in the 10-ring of a bullseye target is the goal, while a silhouette target may have either the same 10-ring or a square, rectangle or a circle of some size as the target, with any round inside counting as acceptable accuracy.
“Acceptable accuracy” is a critical context of every shooting activity, whether competition, hunting or self-defense. Hunting and self-defense differ from competition in what constitutes success: where the bullet strikes the target is less important than what the bullet passes through and what it does to the target. This simple concept of targeting through the structure changes how we train for these activities, both mentally and practically.
What we aim for must be in context with our need in the moment. For self-defense, we are taught to aim for “center mass.” This targeting concept is derived from hunting, where the twin goals in harvesting an animal are a humane kill and preserving as much meat as possible. The function of center-mass targeting in self-defense can be misunderstood by both professionals and private citizens alike. For example, a police officer once related a shooting to me in class: A suspect some distance away began shooting at the officer, and both men quickly moved behind the cover of huge rocks some 30 feet from each other. He and the suspect alternately took turns shooting each other’s rock, then ducking back, summoning to mind old-time, black-and-white images of Roy Rogers or Gary Cooper. When I asked why he shot the suspect’s rock, the officer said he wanted the suspect to know he was still in the fight. Asked how he knew the suspect was still behind the rock, the officer replied, “Because I could see his foot and lower leg.” So, the question begged, “Why didn’t you shoot his leg?” He looked at me as if I’d lost my mind and his incredulous reply was, “Because it wasn’t center mass!”
To be clear, all self-defense targeting is “center mass” of any visible body part. Current targeting theory is something along the lines of “shoot through the center of the mass of any visible target, until a bigger or more effective target becomes available.” Many criminals, if injured even slightly, will flee. For those who won’t, center-mass hits to any target (including a foot visible behind cover) tend to begin to degrade their ability to continue attempting to harm you and/or others.
Now, to stave off the pitchforks and torches and all the hubbub that goes with it, this is not advocating the “shooting in the leg or arm” as the primary self-defense targeting strategy. Taking advantage of a visible target because a larger, more effective target is not presently available in this continuing gunfight simply makes sense.
A self-defense shooting, morally and legally, is never intended to “kill.” Our intent is always to save life (our own or someone else’s) by stopping the criminal’s intent and capacity to cause severe harm. Every self-defense bullet fired is intended to stop the threat to life and safety, regardless of where it hits. When a criminal attacker has taken cover, targeting the center of any visible body part is a rational solution.
Properly, the center-mass target is always the nearest point to the muzzle and through the thickest part of the target. How do we train for that?
If we always shoot at a flat, square-facing, two-dimensional target and always aim for the 10-ring (or the small targeting area in the top of the head of the silhouette) to achieve a small group, are we preparing to meet the urgent needs of saving our lives or that of others? How we train (and think) to achieve center-mass hits affects our ability to operate in the volatile, uncertain, complex, ambiguous and threatening environment where we generally experience events that are happening extremely fast. Wide human experience when under severe threat tells us we will probably devolve to our lowest level of consistent training rather than to rise to the occasion. If we are normal humans who have only practiced shooting at the 10-ring on a flat target, chances are we are likely revert to shooting only to the center of the front of the torso. That’s fine if the threat is facing me, but humans often react unexpectedly and move when bullets are in the air, including bad guys.
While great accuracy under such threat is uncommon because, well, the situation is too surreal and too pressure-filled for a finely tuned sight picture, there have been instances, both from police and civilians, where rounds struck the criminals near dead center of the chest without causing damage to the internal organs. How could that be? If the threat’s body is sharply bladed to the muzzle, rounds impacting the 10-ring on the criminal’s chest can cause the bullets to pass through only the outer layer of muscles, resulting in minor wounds. Under the stress associated with a life-threatening encounter, we will likely aim for the target we constantly practice hitting.
The body’s orientation to the muzzle of our firearm determines “center-mass” targeting. Properly, the center-mass target is always the nearest point to the muzzle and through the thickest part of the target. How do we train for that? We can shoot three-dimensional (3-D) targets while consciously intending to hit through what would be the thickest part of the body.
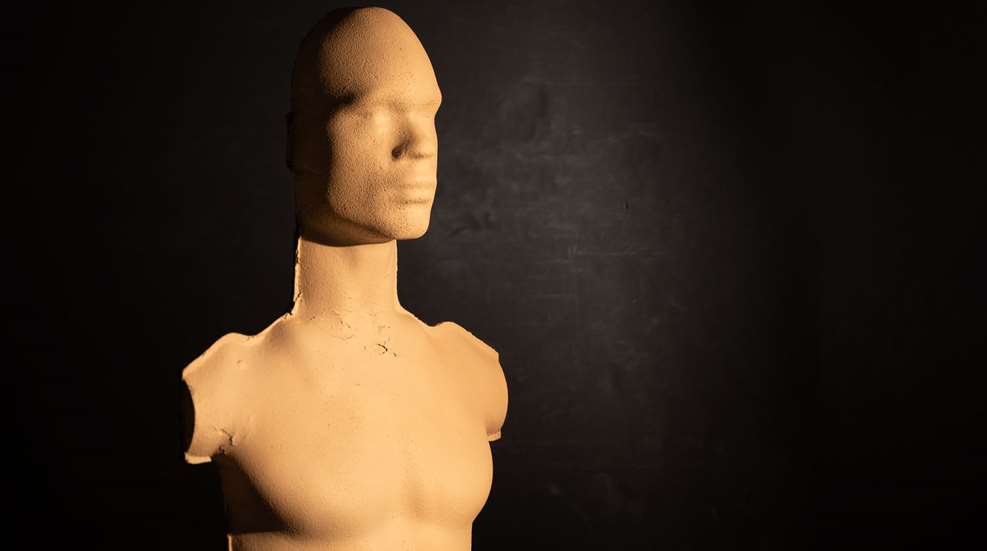
Any 3-D target for self-defense is likely to mimic the average anthropometric dimensions of an average, lean American male facing you: 18 inches across the shoulders, 14 inches across the chest at the top of the armpits and 20-inches high from the top of the pelvis to the bottom of the collarbones when facing the muzzle. If viewed from the side, that body, front to back, is 9 inches thick. The head, on top of a 4-inch neck, is 6 inches wide and 9 inches high when facing the muzzle, and about 8 inches wide when facing to the side. Let’s keep in mind that the “average” male represents the middle of pack ranging from smallest to the of largest bodies in height, size and girth.

In selecting a 3-D target, there are many choices and levels of cost. A manufactured 3-D target ranges from a simple, molded upper torso and head targets for $16.99 for a three pack, all the way up to a posable, full-human body with articulating limbs (like those used by the U.S. Army) that can cost hundreds of dollars. If you’re like me, however, you might want to save our pennies for as much ammo (and the hardware that makes that ammo go bang) as our long-suffering spouses will permit by creating functional 3-D targets for pennies.
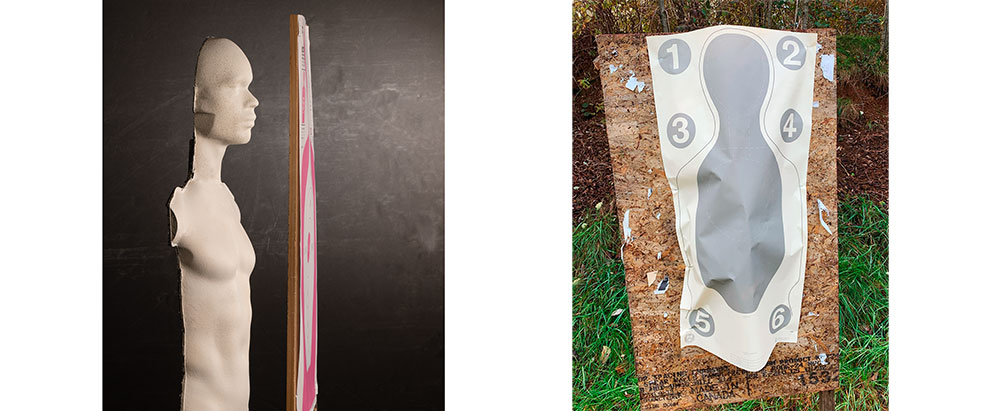
Starting with any standard (paper) silhouette target and staples, we have choices: free-standing or supported. By stapling one vertical side of the target then stapling the other vertical side a few inches toward the stapled side, the resulting bow of the paper creates a concave 3-D target. Problematically, the slightest wind will move the target, misaligning it.
Supporting that target by stuffing something between the target and the target backer creates some stability. Some use balloons, representing high-center mass and the brain. This works well until the shooter hits the balloon, turning it into a free-standing target. Refreshing the target takes a lot of precious range time, as trips are made downrange to replace balloons. One solution is to use crumpled, shot-up paper targets, paper bags or blocks of old foam rubber between the backer and target. These hold the target’s shape through repeated hits. I’d avoid the use of Styrofoam as a support, as I can personally attest to the very necessary and painfully tedious cleanup. While these improvised targets are less than ideal because they present a more rounded or flatter front of the chest than the manufactured 3-D targets do, they still provide an adequately functional sense of targeting depth.
These targets permit realistic live-fire practice when moving and hitting from angles. While a simple step to the left or right has little practical effect on the angle of fire through the target, intentionally setting the target up at an angle to the firing line—or when moving several lateral steps during firing—the bullet strikes can give us the maximum benefit of proper self-defense targeting.
What does this look like on the target? It depends on what you’re doing. If static, the group will look like any number of well-aimed hits on the surface of the target representing the thickest part of the body. If you’re moving more than a single step while firing, the bullet holes in the target will track laterally. For example, from 5 yards, moving three steps to the left at 45 degrees toward the target line while firing three rounds, you might expect to find a round near the 10-ring, another at 9-o’clock a few inches to the left of the first and the third another few inches to the left of the second, each representing the targeting at that moment of the thickest part of the target.
It takes most shooters a number of times to “get” the center-mass aiming point when first transitioning to a 3-D target of any kind. The shooter’s historic targeting practices tend to pull the muzzle to the center of the target/10-ring, clustering hits around the bullseye area regardless of the shooter’s angle to the target. Repeated reminders that “any movement changes targeting” are necessary until the 10-ring is replaced in their minds with functional targeting based on the body position of the target, with the hits tracking laterally as the shooter moves.
If you are strictly limited to stationary shooting without lateral movement, or your range will not permit these targets at all (some even forbid silhouette targets), all is not lost, because you can still take advantage of 3-D target training. The same 3-D targets, manufactured or improvised, are perfect for dry-practice exercises in your home (and these last forever, because you’re not poking holes in them). Ideally, but not required, is using some type of laser-shot indicator at an angle to the target.
We live in a 3-D world, yet a vast majority of us practice on a 2-D target. When under peak-stress pressure to perform, perhaps it might be beneficial to have practiced—or at least considered—the three dimensionality of a self-defense situation. It’s not what the bullet hits, but what it passes through that saves lives in a defensive shooting. And maybe it will keep you from shooting at a rock someday.