In the process of building fundamental shooting skills, few handgunners delve into mastering every one of the nine pistol trigger positions. What and where exactly are those nine trigger positions? Why is it so critical that they be identified and controlled? What are the best-kept secrets of mastering each to shoot well?
In firing any handgun with the intention of hitting the target, the shooting process consists of bringing muzzle stability to target alignment and breaking the shot without moving the gun. An essential part of breaking the shot is to have good fire control. You can have a great grip and good alignment, but poor fire control can cause you to miss the shot.
Either you control the trigger, or the trigger controls you. Comprehensive control of your trigger affords you good fire control. Conversely, bad fire control is the result of poor or weak trigger control. Breaking trigger control down to its sub-particulates, it’s important to be familiar and comfortable with each of the nine trigger positions. Identifying these positions, analyzing their functionality and knowing how and when to control each, afford the shooter a greater understanding which in turn supports building higher performance fire control skills.
The nine trigger positions of a handgun are identified as: Rest (1), Slack (2), Wall (3), Creep (4), Break (5), Overtravel (6), Pin (7), Reverse Travel (8) and Reset (9).
The trigger is design to move in only one of two directions at a time – either back toward the shooter along a straight path stopping at the trigger guard (aka ‘break path’) or moving in the opposite direction from the back of the trigger guard toward the front of the trigger guard (aka ‘reset path’).
Starting with the break path, when the trigger is at rest position (Rest) it is without trigger finger manipulation and there is no other force impingement other than the trigger spring holding it in place – at rest.
After placing your trigger finger inside the trigger guard and on the trigger face even the slightest touch creates movement toward the back of the trigger guard. This movement takes up any trigger slack (Slack) from the Rest position during movement.
Continued trigger movement toward the rear of the trigger guard brings the trigger to its next position where it is met with resistance. The start of this tension (greater than that felt during Slack) is identified as Wall (a term coined by multi-time world champion and Master level instructor Rob Leatham decades ago).
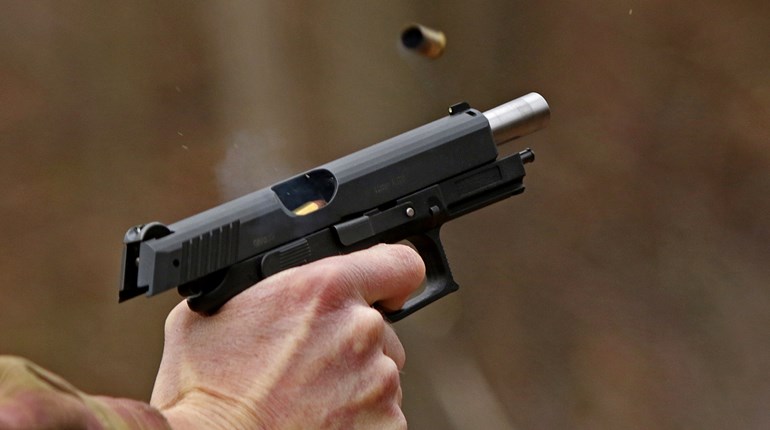
As tension continues to build just prior to the sear releasing, this section is identified as Creep (a term utilized by leading competitive shooter Travis McCamish). Next is the position where the sear is released causing the striker or pin to hit the primer anvil (or cartridge rim) which ignites the casing powder and in turn builds chamber pressure high enough to wrest the bullet from its crimp and launch it down the barrel past the crown and out the barrel (Break).
Immediately following Break the trigger continues on its rearward trajectory toward the back of the trigger guard covering a space identified as Overtravel which then stops abruptly when pinned at the back of the trigger guard (Pin).
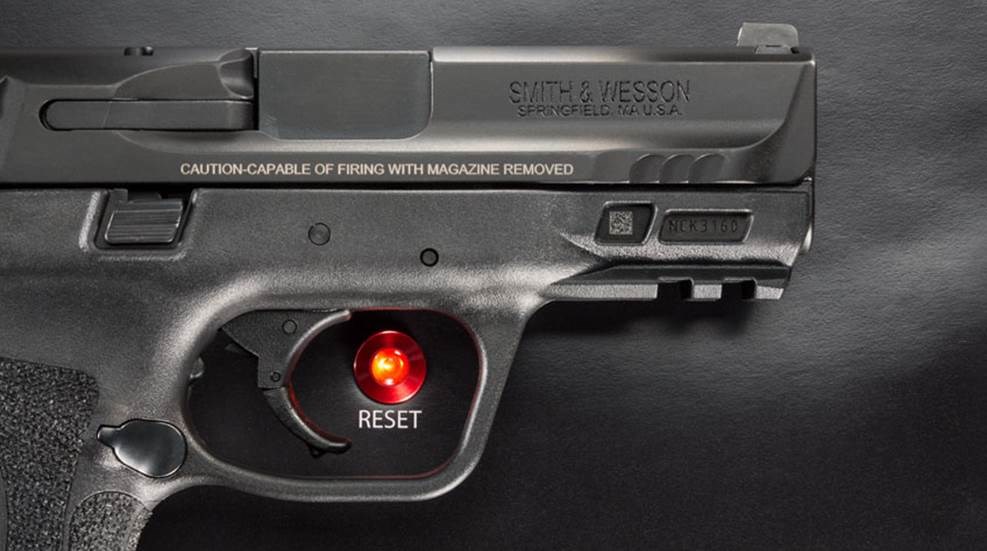
Changing direction (now following the reset path) the trigger, when released from Pin has changed direction and is now recovering Overtravel toward the front of the trigger guard (Reverse Travel). Additional movement past this position will reset the sear when, in most pistols, you will hear an audible ‘click’ which is an indicator that the sear has been reset (Reset).
The break path describes the first five trigger positions, whereas the reset path describes the remaining four.
Various gunowners will argue that their modified pistol trigger is so highly tuned that there’s little or no Slack, Creep or Overtravel. It’s true that those distances may be so small (1/1000 of an inch) that they may seem imperceptible to the shooter, but it does not change the fact that to fire a shot, any trigger must move through each of those positions and in both directions regardless of distance.
Many professional firearms instructors such as Rob Leatham, Travis McCamish, Mike Voigt, Ron Avery, JJ Racaza et al, talk about critical aspects of trigger control which allow optimal manipulation through each of the nine positions. Each stress the operational importance of mechanical isolation, flat line trajectory and steady press.
‘Mechanical isolation’ is moving ONLY the trigger finger and no other fingers or parts of the firing hand. Try this training drill with nothing in your firing hand: shape just your firing hand as if you were holding your pistol. Starting with your trigger finger straight curl it toward you as if you were pressing an imaginary trigger. While doing multiple repetitions, do you notice any movement whatsoever with any of the other fingers or your hand? If so that movement impacts alignment during a trigger press.
‘Flat line trajectory’ is all about moving your trigger finger in a straight line. If you look at your trigger finger there are three flexing joints. The one nearest your fingernail is the closest to the trigger – J1. The next is behind it in the approximate middle of your trigger finger – J2 and the last one is the one connecting your finger to your hand – J3. Flat line trajectory is defined as movement of ONLY J1 and J2. Running the same drill as above and while doing multiple repetitions, is J3 completely locked and without movement?
If not, then flexing at J3 places pressure alongside the trigger which impacts alignment during a trigger press.
‘Steady press’ is moving through each of the positions with contiguous motion akin to that of using a squirt gun where you maintain continual water pressure. If you stop anywhere along the way on either path (break or reset) then you increase the probability of altering alignment.
Champion shooter and SIG Sauer Team Captain Max Michel, Jr. discusses speed referencing both trigger movement pathways “I prefer to have my students come all the way off the trigger. In a stressful situation [combative or competitively], it’s important to be sure the trigger is reset to avoid trigger freeze. In fact, depending on the distance or difficulty of the target, I have my students slap the trigger for speed, but as the target gets smaller/farther it becomes more of a controlled slap. In other words, I reset the gun in recoil and work the trigger as fast as possible without disturbing the sight off of the target. The distance/difficulty will always dictate the trigger speed but never how quickly I reset the trigger.”