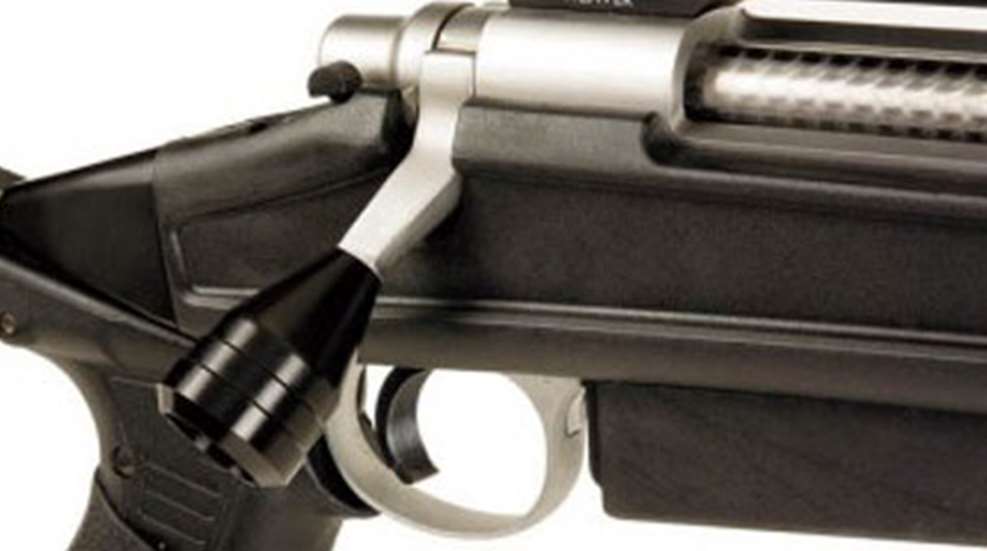
Your bolt-action rifle might be able to drill the eyes out of a bug at 1,000 yards, but it's not a sniper rifle unless it has the right bling. One important option, for a multitude of reasons, is an oversize tactical bolt handle. A big knob has a practical use, of course, making it much easier to run the bolt fast. But it also makes a statement: "This is a specialty rifle, a 'tacticool,' long-range, precision tool."
Fortunately, installing one on your rifle is a pretty easy project. Most aftermarket bolt knobs, such as those available from Brownells, are threaded, so the real task is threading the shank of the bolt handle to accept a new knob. Pacific Tool & Gauge makes an excellent jig to hold the bolt at the correct angle for turning and threading the handle on a lathe, and it's not all that expensive at $125. No doubt when the guys at the range see your bolt gun, you will have enough work installing oversize knobs on their rifles to pay off the jig in a hurry, with money left over for ammo.
I've been working on converting a Remington Model 700 Sendero that has been collecting dust in my safe into a long-range tactical rifle, and it served as the base gun for this project. The Model 700 is a common rifle in both hunting and tactical circles, and mine was a sensible candidate for a make-over. The following steps are specific to the Model 700, but they also apply to other models' bolt handles.

The first step is to remove the existing bolt knob. Some instructions recommend cutting off the knob and threading the remaining shank. That may leave the handle too short, however, so I elected to turn down the existing knob. This basically added length to the shank—the handle was actually longer with the new knob installed. If this makes the handle too long for your taste, it's easy to cut it shorter. But once the knob is cut off, it is much more difficult to replace the length if the handle ends up being too short.
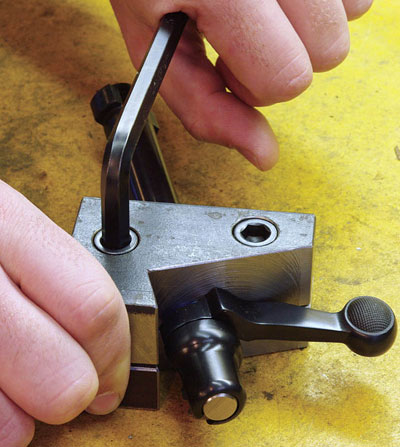
Start by placing the bolt in a Pacific Tool & Gauge Bolt Handle Threading Jig, and install the jig in the lathe's four-jaw chuck. Index off the shaft of the jig, so it's running true. The hardest part for me was indexing the bolt in the jig. Most bolt handles have a multitude of angles to deal with, so which one do you use? Forget indexing off the knob on a Remington; that will drive a devout Baptist to a life of drink and sin. I used a magnetic indicator holder mounted on my tool post to measure on the bolt handle just behind the knob.
Adjust the bolt inside the jig, leaving the screws snug enough to hold, but so the bolt will move slightly with a tap from a soft-face, dead-blow hammer. The Model 700 handle is a rectangle, so you must adjust from two axes. Index first on the two long sides until they are even, and then on the two short sides until they are even.
When everything is lined up, tighten the screws until the bolt is secure in the jig. (I had to build up the diameter of the Model 700 bolt a little bit with masking tape to get a tight grip in the jig, which also helped to protect the finish.) This will provide the correct angle to cut the shank for the handle.
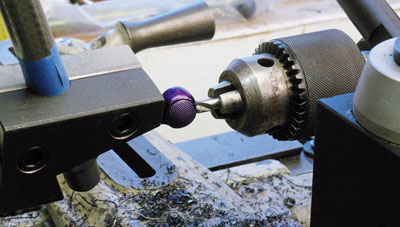
Use a countersink drill to make a tapered hole in the end of the bolt handle to accept a live center. The live center will help support the bolt when making the cuts.
Now, turn the bolt handle knob to size. Because of the shape of the Model 700 bolt knob, this is an interrupted cut for much of the operation, which can be hard on tungsten cutters. I found that out the hard way by chipping a couple while turning my first bolt handle. I switched to a tool-steel cutter and had no further problems.
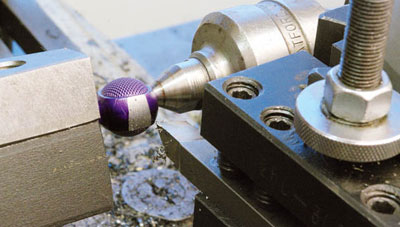
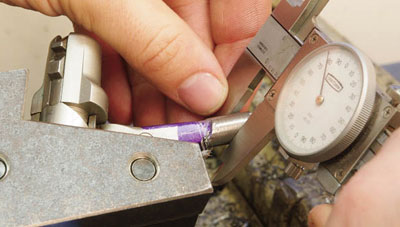
Always check the thread size before cutting anything. Most knobs use a 5⁄16-24 thread, so the goal is to turn the old bolt knob down until it is round and measures 0.3125 inch in diameter. If your new knob has a different thread size, adjust accordingly.
Once you have the bolt handle turned to the proper size, face off the end, using the same tool-steel cutter to square it up. Adding a slight radius on the edge with a file will help start the threading die. Clean up the back side of the shank to be threaded so you have a square shoulder for the handle to stop against. Then use a file to break any sharp edges.
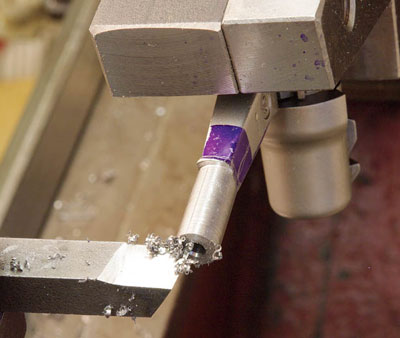
Turn off the power to the lathe and take it out of gear so you can turn the chuck by hand. Install a 5⁄16-24 threading die in a die handle. (Again, adjust accordingly for a different thread size.)I took the live center out of the tailstock and used the flat end of the tailstock to hold the die square against the bolt handle. Adjust the tool holder on the lathe so the handle will rest on it to prevent the die from turning.
Flood the area to be threaded with plenty of cutting fluid. Then turn the chuck by hand while applying continuous light pressure from the tailstock on the die until it has cut several threads. Then, you can slide the tailstock out of the way. Continue turning the chuck until the shank has threaded to the end.
Back off the die and reverse it in the holder so the cutting threads now extend all the way to the edge of the die. Run the die back onto the threaded shank, and use it to cut the final few threads the tapered "starter" side of the die left undone.
Before removing the bolt from the jig or the jig from the lathe, make sure the new knob will completely screw onto the shank. If the threaded shank bottoms out before the knob hits the shoulder, it might be necessary to remove a few threads from the end of the shank using the facing tool.
Once the knob fits properly, remove the bolt from the jig. Clean all the oil and metal chips off the handle with a spray degreaser. Put a few drops of Blue 242 LocTite on the threads, and install the new bolt knob.
Place the bolt in the rifle. Check to make sure there is ample clearance between the knob and the stock, and between the knob and the scope. Finally, take the rifle to the range and mock all your buddies for their continued use of inadequate, undersize bolt handles.