A critical factor for fast and accurate handgun shooting is to have the sights regulated to put the point-of-impact (POI) directly onto the point-of-aim (POA). In addition, sights should be visible enough to be quickly and positively acquired.
That's not hard to do with adjustable handgun sights using a fiber-optic or tritium front sight. Simply move the rear sight to adjust the elevation and windage. However, that procedure goes out the window when dealing with the miniscule fixed channel sights on most popular 2- and 3-inch snubnose revolvers. There are no adjustment features, plus the short sight radius, narrow rear sight channel and small front sight are tough to see under even the best light.
These drawbacks can be fixed, and it often requires nothing more than the careful use of a file and a bit of paint.
With fixed-sight snubnose revolvers, elevation adjustments are made by changing the height of the front sight. Windage adjustments are made by removing metal from the appropriate side of the inner rear sight channel, unless your gun uses a rear dovetail sight that can be drifted right or left. Most snubnose revolvers use a milled channel rear sight.
It is best to address one issue at a time, and windage is the best place to start.
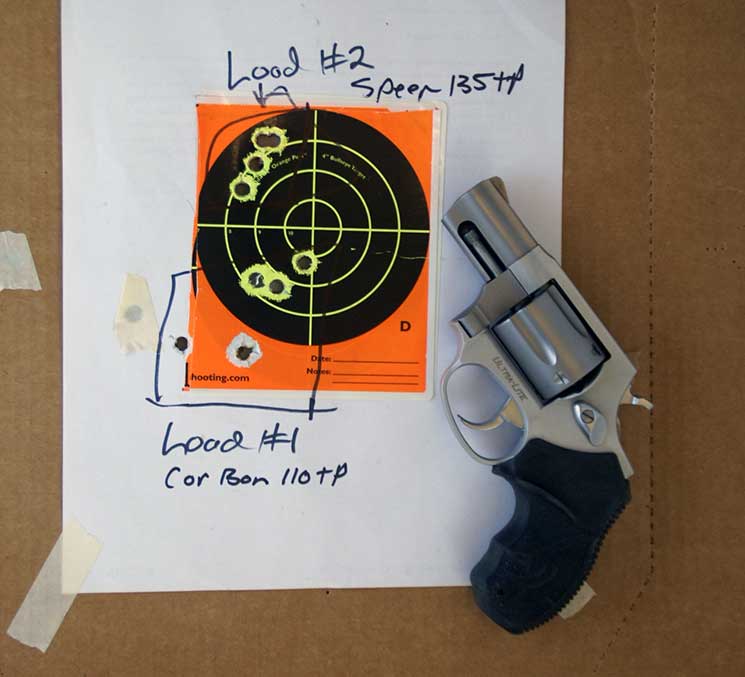
To adjust windage (horizontal dispersion) you remove metal from the inside of the rear channel sight in the direction you want the POI to move. If the gun is shooting left, remove metal from the right side to move the POI to the right. If it's shooting to the right, remove metal from the left.
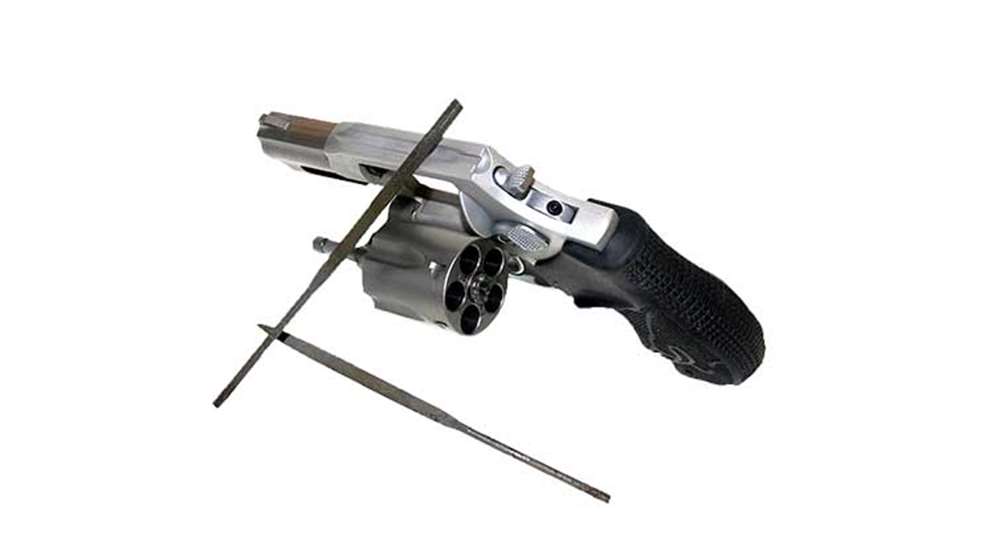
The tool required is a flat Swiss file. Ten yards is a realistic distance to zero a snubnose revolver, and it will put bullets on target to well beyond 25 yards.
Set a target at 10 yards, preferably with a comfortable chair and a bench with a sandbag rest. Fire a two- or three-round group. Note the POI group center as opposed to the POA. Use the Swiss file to make four or five swipes on the inside of the rear sight channel in the direction you want the bullet to move. Fire another group to check the progress. Don't be in a hurry! Approach this slowly. It doesn't take much metal removal from the short sight radius to move the POI several inches. If you overshoot and move the POI too far, simply make a few swipes in the other side to bring it back. If the gun has a satin finish, you're done. If it is blued steel, you need to touch up the sight channel with cold blue.
Of course, this will widen the rear notch, but that's a definite advantage, because it allows more light around the front sight, making for easier acquisition and alignment.
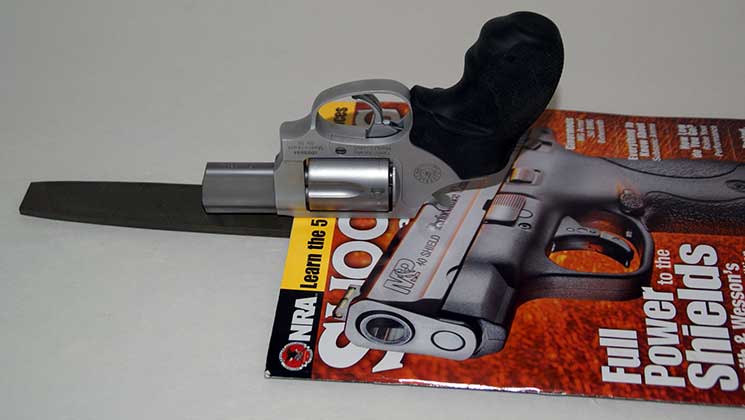
Elevation is a front sight height issue. If the gun shoots low, the sight height needs to be lowered to bring the muzzle, and POI, up. The tools needed are a large mill bastard file, the Swiss file previously mentioned and a slick paper magazine. Lay the file on a flat surface, place the magazine on top, leaving about six inches of file exposed. Place the top strap of the gun on the magazine and the front sight on the file. The magazine protects the gun finish and holds the front sight in the proper position to evenly remove metal from the top of the sight by sliding it back and forth. Like windage, it doesn't take much metal removal to move the POI. You do not want to file the ramp – just the top of the sight itself. The flat Swiss file is used to remove any burrs on the top outside of the sight to produce a clean sight picture. This is best done on the range, with a black Sharpie to cover the bright metal as you shoot test groups to gradually move the POI.
If the gun shoots high, things get more complex. You need a higher front sight to lower the muzzle and POI. If the front sight on your gun is integral with the barrel, it will require a gunsmith to TIG weld metal onto the sight and reshape it. That will be higher than needed, making the gun shoot low. However, this is easily fixed with the above procedure.
If your gun has a pinned front sight, there are simpler and less expensive options.
The handgun's manufacturer will likely have higher blades that a gunsmith can quickly install. Other options include XS sights. The company offers its standard (.140) dot front sight in a number of heights for both Smith & Wesson and Ruger guns. Dawson Precision offers front sights in fiber-optic, tritium night sight and plain black to fit S&W guns. The company's customer service reps can explain how to take the required measurements to wind up with the proper sight height.
Once the gun is properly zeroed, a highly-visible front sight is a major asset to fast and accurate shooting. If you've opted for the XS dot, or a Dawson fiber-optic or tritium front sight, you'll have one. With a plain black or satin finished front blade, the simplest way to increase its visibility for faster acquisition is to paint it.
You'll need the following materials: a couple of Q-Tips, isopropyl alcohol, mineral spirits, one or two small artists brushes, a business card, white primer and fluorescent paint. The primer is necessary to make the paint stick, and it brightens the fluorescent paint.
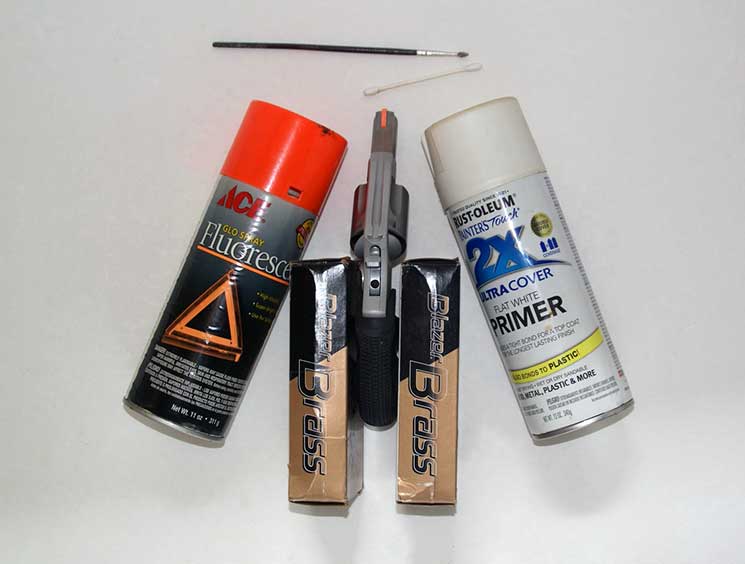
There are a number of paints on the market. I use the Ace Hardware brand fluorescent orange or green spray paint. It's bright, tough and it lasts in holster use. The company's spray white primer also works well. A can of each is an inexpensive lifetime supply.
Clean the front sight with alcohol to remove all oils. There is no need to clean to bare metal. Primer will stick to blued steel or stainless steel. A couple of 50-round ammo boxes makes a nice fixture to hold the gun in place.
If you're using spray cans, spray a silver dollar-sized amount of primer on a sheet of paper. Use a brush to paint the front sight. Immediately after that, while the primer is still wet, fold the business card and run it down the sides of the sight to remove any spill over and create a 'clean' line. If any primer remains on the sides, dampen the end of a Q-Tip with mineral spirits and carefully remove excess paint.
Let the primer dry for 20 minutes, then repeat the same process with the fluorescent paint. Let that dry for 24 hours.
The resulting front sight will be bright, sharp and easy to find. Touch up is easy. Your snubnose revolver will now be dialed in.