 "Well, You can always cast your own bullets in a shortage."
I've heard that line my entire life but—until the recent component shortages—I never really gave it much thought. After years of skipping over bullet casting articles (that stuff is for cowboys, right?), I finally decided to tackle pouring my own. I reached out to two highly experienced casters, gunwriter Ross Seyfried, and Lead Bullet Technology owner Veral Smith for advice—they got me started out right and much of what you'll read below is straight from their mouths or writings.
I'm not going to write you a treatise on bullet casting—there are plenty of print and online resources exhausting the subject, written by folks far more knowledge than me. I'm not going to tell you how to build a watch; I'm going to tell you what time it is. What follows is the "no BS" beginner's guide to making your own quality bullets safely and effectively.
Safety
800 degree molten metal is no joke. Long sleeves, pants or jeans, welding gloves, boots, and a face shield are "must haves." Cast bullets in your Crocs and you'll regret it. Being young & allegedly healthy, I'm a bit concerned about what I breathe so I added a respirator mask designed for lead clean-up to my list of equipment.
Droplets of water invisible to your eye can become explosives when placed into molten lead. Unless you want to visit the ER, never put anything into the molten lead pot that hasn't been slowly warmed to temperature, more on this later.
Raw Materials
Volumes have been written about which alloys are best for different applications. I use regular wheel weights and lead ingots purchased from RotoMetals for my alloys. When using wheels weights, be sure to melt them (at least initially) at less 787 degrees Fahrenheit. Many modern wheel weights are made of zinc and you don't want that in your melt; melting the raw weights down at below Zinc's melting point will float the zinc weights and keep your alloy from being contaminated. Adding about 2 percent tin by weight to your wheel weights will make for better casting.
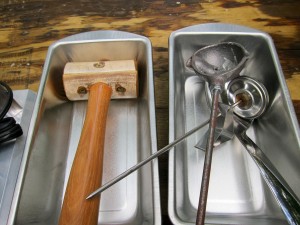
EquipmentMolds: The more you cast, the more you'll appreciate high-quality custom molds. I've used molds from RCBS, Lyman, LBT, and Accurate Molds and all worked fine. Get a set of handles for each mold and leave them attached.
Rowell Ladle: Available in many sizes, it pours from the bottom to keep floating trash out of your mold.
Large metal spoon: Mine came from Wal-Mart, you'll use it for a variety of tasks.
Metal receptacle: Used for rejects/sprues, I use a bread pan or coffee can.
Cupcake pan: Good for making ingots from your wheel weights for future use.
Thermometer: Saves lots of guesswork and allows for better control of your alloy.
Mallet: Rawhide works great, a wooden hammer handle works fine—just don't use metal.
Lee Magnum Melter: Holds enough lead for the hobbyist and is more forgiving than bottom-pour designs.
Magma Star Sizer: Cast bullets must be lubed and sized after they're cast (I didn't know either), the Star is the Dillon of sizers. RCBS and Lyman luber/sizers work fine as well.
Let's Make Some Bullets
Your lead is hot, your molds have been cleaned & degreased (use brake cleaner), and you're dressed for safety. Start by leaning all of your tools that will go into the pot on the outside so that they'll warm up and shed moisture.
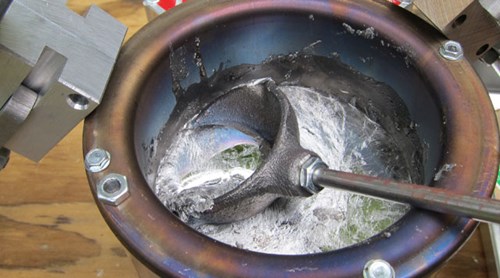
Drop a ball of flux (I use Brownells Marvelux) into the pot and stir it into your lead (slowly put the warm spoon or ladle into the molten lead). Scrape off the floating trash (called "dross").
Slowly dip the corner of your mold into the molten lead and slowly roll it around to bring it up to temperature- once the lead no longer sticks to the mold, it's hot enough.
Dip your ladle into the melt and pour a stream of molten lead into each cavity of your mold, don't pour gently. Pour the lead directly into the center of the hole- the faster the cavity fills, the better.Go overboard and let the lead run out and over the top of the mold- this overflow is called a "sprue" and the top plate of the mold is a "sprue plate."
Wait until the sprue gets frosty (this timing will take some trial & error) and then use your mallet to knock the sprue plate to the side. This will cut the sprues free from the bases of the bullets—if you get a smearing of lead on the plate, you need to wait longer. Open the mold and knock the handles (not the mold) with your mallet, this will drop the bullets free. The bullets are prone to damage at this temperature so drop them on something soft like a towel or (if you want harder bullets), drop them into a bucket of water.
Your first few bullets probably won't be any good, that's fine—put them in with the sprues to be melted down later (remember what I said about dropping things into the hot pot)?
When the mold is up to temperature, you'll get into a rhythm and can even rotate two molds- one is cooling while you're pouring into the other. Using this method, you can really crank bullets out in volume.
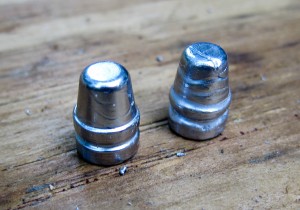 Once your bullets have been cast, inspect them for sharp corners, roundness, and square bases. You'll know that you have it right when the bullets start looking like they've been machined on a lathe rather than dropped from a mold. Rejects can be used for plinking or melted down again. Follow the instructions for whatever luber/sizer you choose and, once the bullets are sized, they're ready to be loaded.
These bullets are wrinkled, which indicates a mold that isn't hot enough.
Whether you're high-volume shooter, a "prepper," or just want to experience making your own bullets, casting is less overwhelming than you may think. You can get started with a minimal investment, and even just keep some of the materials around "just in case." Cast bullets can be used in everything from 1911s to ARs so don't turn your nose up just because you think lead bullets are for guys with grey beards and big hats. Give it a try and be patient; before you know it you'll have a pile of bullets to shoot.
