You know the old saying, “do as I say, not as I do?” I kinda wish you would follow that advice here.
When I was ordering the parts for my first 1911 build some years back I thought the idea of a titanium frame sounded pretty high tech.
“I don’t recommend it,” said Gary Smith, the former sales manager at Caspian Arms, the leading manufacturer of frames and slides for 1911 builds. In fact, its parts are probably used by more custom builders than all others combined.
He continued, “The titanium frames are much more difficult to fit and they just lead to a lot of problems unless you are very experienced in working with them.”
While I had never built a 1911 at that time, or worked with titanium for that matter, I was pretty cocky about my abilities in the shop. I figured, what could really be that different?
I can tell you that I darn-sure found out in a hurry.
Titanium has a reputation for being difficult to work with, and in my never-humble opinion, that reputation is far too kind. It’s not any one thing I can point to as the issue, but a multitude of little things. I have built a few guns since, but never with titanium.
Eric Reynolds bought stainless-steel parts at the same time and we built the guns together. That made a perfect “real-time” comparison of building two different guns and opened my eyes to one simple truth: Listen to the people who truly do know what they are talking about.
Reynolds’ gun was a pleasure to build and caused very few problems or temper tantrums. Mine? Let’s just say it was something different and all walk away before somebody gets hurt.
It worked out in the end, and I have a very interesting and unique handgun that weighs in at slightly less than 2 pounds. I used the Commander-length slide with the smaller Officer’s Model-size frame. Doing so allowed for easy concealed carry and reliable function.
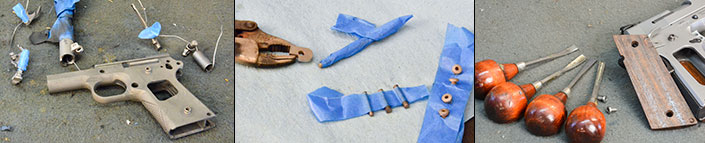
Both of our guns have very aggressive checkering, as Caspian offers a wide range of options to from which to pick. The company also offers custom serial numbers. Being a sentimentalist, I chose a number and letter combination special to me—my wedding date and me and my wife’s initials. I picked this because I started this project just before our 30-year wedding anniversary. I might note that we celebrated the 27th eating a frozen pizza while we packed for a hunting trip I was leaving for early the next morning. Who says romance is dead?
Reynolds’ serial number is Pretty Boy 1. I think it has something do to with one of the girls at Caspian calling him a pretty boy. (Clear evidence she needs glasses.)
Building a 1911 is a good DIY project, but it’s far too complicated to detail in a single magazine article. Let me walk you through the basics and stir your interest. There are books, videos and hands-on classes that will teach the minutia and then some.
As first-time builders, we took a few shortcuts. Nothing to compromise the outcome, but things that kept us away from the most-complicated aspects of building custom 1911 handguns.
Most of our parts came from Caspian Arms. Everything else came from Brownells. We used drop-in barrels that shipped with fitted bushings and the link installed. Mine took a little bit of tweaking on the locking lugs, but not a full-blown fitting process.
We also took advantage of the service offered by Caspian to fit the slide to the frame. This is a critical part of building a 1911, and one that is filled with myths, traps and potholes for first-time builders. For a reasonable fee the experts at Caspian will perform this critical step for you.
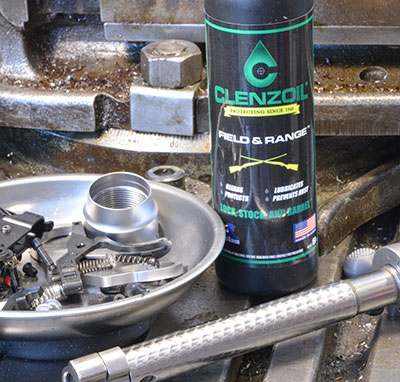
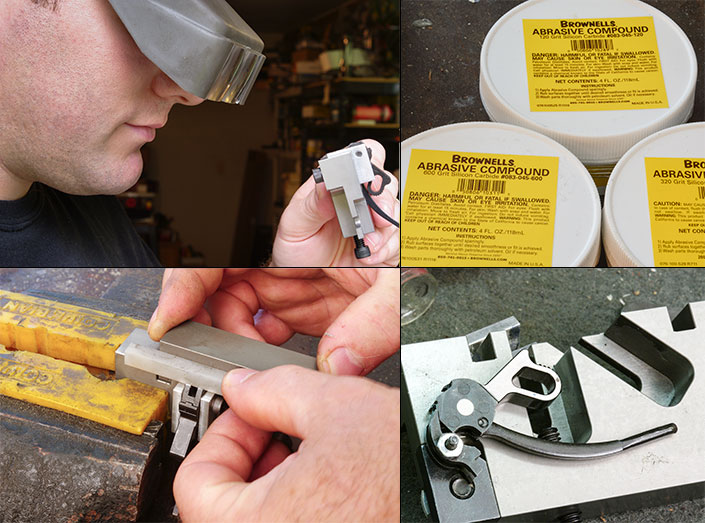
As you work, take a little time to polish all the contact surfaces on any moving parts. Never remove any metal or change the contours, simply polish. This helps the gun run well, and gives it that slick “custom” feel. Remember, aesthetics and feel are a big part of a custom pistol.
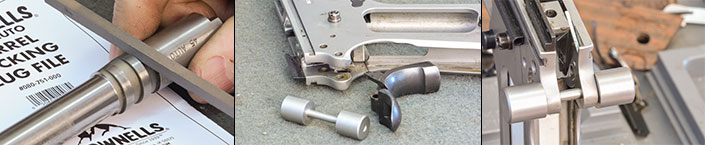
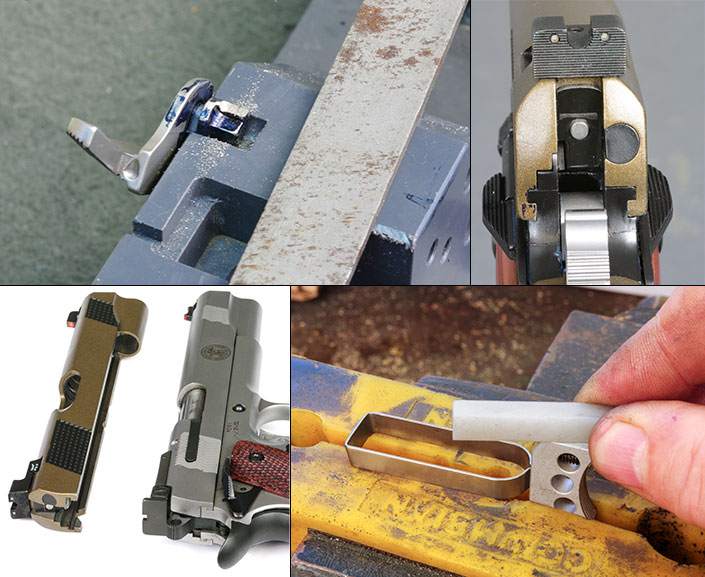
The first step we tackled was to fit the grip safety to the frame. As always, the best approach when you need to remove metal is to modify the cheapest part. In this case it was the grip safety, so I used a file to work the sides of the grip safety until the part fit the frame easily.
The tangs on the Caspian frame are oversize and must be fitted to the grip safety. Brownells offers several different jigs to accomplish this task while maintaining the correct angles and contours. I took the redneck gunsmithing approach of, “we don’t need no stinking jigs” and did it freehand. Let me give you a bit of advice: Go ahead and buy the jig.
The key is to fit the tangs on the frame to the grip safety so that the thumb-safety shank can fit through the hole in the grip safety without any tension or drag. At the same time, the tangs on the frame should fit the grip safety closely without any unsightly gaps, yet allow the grip safety to move freely.
After the fire-control parts are installed, the tab on the interior of the grip safety will need to be fitted to the trigger bow. The release point should be when the grip safety is compressed to about 50 percent of its travel. To adjust for this, the face of the tab contacting the back of the trigger bow contains a clearance notch that should be deepened by removing a bit of metal from the tab’s underside.
Check Your Work
- With an unloaded pistol, check that the slide will cycle back and forth without binding or other problems. It’s not unheard of for the hammer spur to hit the grip safety and lock up the slide.
- Insert a magazine and pull the slide rearward until it locks. Actuate the slide stop. The hammer should never follow the slide forward, but should remain in the cocked position.
- Cock the hammer and, with the thumb safety on, pull the trigger firmly several times. The hammer should stay in the cocked position. Now release the thumb safety. The hammer should not move. Depress the grip safety and pull the trigger. The hammer should then fall.
- Cock the hammer and, with the thumb safety off, pull the trigger without compressing the grip safety. The hammer should not move. Now, depress the grip safety, pull the trigger and the hammer should fall.
- Cock the hammer and, with the thumb safety on, pull the trigger. Now put the gun where you can hear faint sounds. Pull back on the hammer and listen for a click. There should not be one. If you hear a click, the safety is fitted incorrectly and must be replaced.
- Cock the hammer and put the thumb safety in the “off” position. Without engaging the grip safety, pull the trigger. The hammer should remain cocked. Put the gun close to your ear, pull back on the hammer and listen for a click. There should not be one. If there is a click, the grip safety is incorrectly installed and must therefore be replaced.
For a truly professional-looking job, take the time to match the grip safety to the frame (specifically, the contours at the top and bottom of the grip safety with the corresponding frame tangs). The easiest way to do this is to match the frame’s top contour with the grip safety in its activated or relaxed position and to match the bottom contour with the safety in its deactivated or depressed position.
Remember, once the metal is removed, it’s hard to put it back. So, go slowly, work thoughtfully and stop when you get tired or distracted. Come back another day when you are fresh.
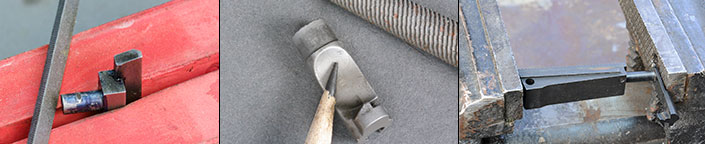
The firing-pin stop is easy enough to fit if you work carefully and remove the same amount of material from each side. It should fit so that the firing pin will protrude from the hole and will slide in and out against the spring pressure with no drag or interference. This fitting is critical, as the firing-pin stop also retains the extractor in place and must be tight enough that it can’t rotate or wobble, which can lead to problems. This is assuming, of course, that you are using an internal extractor, just as John M. Browning decreed.
The 1911 is a controlled-round-feed design where the extractor captures the cartridge as it exits the magazine and maintains control as it feeds into the chamber. A properly fitted extractor should contact the rim of the cartridge to hold it in place. However, the extractor hook should not make contact with the front of the rim when the cartridge head is flat against the slide.
Check Your Work
- Cock the hammer and put the thumb safety in the “off” position. Put the muzzle against the bench or a wall and push forward on the grip to compress the slide and barrel back until they stop. Holding that position, pull the trigger. The hammer should not move. Hold the trigger back and remove the gun from the bench or wall so the slide and barrel move back into battery. Now, slowly release the trigger and listen for the audible click of the disconnector resetting. This time there should be a click. If not, you have a problem with the disconnector. You need to replace it or at least correct the problem.
- Remove the magazine, safety off, hammer down. Pull the trigger and hold it back. Now rack the slide; listen as you release the safety. You should hear the disconnector reset.
- Load the magazine with dummy rounds and cycle them through the action to make sure they feed and eject correctly.
- Insert a new, unsharpened pencil with an eraser into the muzzle with the eraser against the face of the slide. Cock the hammer with both safeties off, point the gun up and pull the trigger. The pencil should be launched out of the barrel by the force of the firing pin striking the eraser. If it is not, the firing pin is not coming through the slide enough to fire a cartridge.
- At a safe place to shoot, load two cartridges in the magazine. Remember the 1911 is a controlled-round-feed gun, so the cartridges should always feed from the magazine. Dropping a cartridge into the barrel and slamming the slide shut can break or damage the extractor as well as cause damage to the hammer and sear.
The extractor should have a radius on the bottom to help guide the cartridge into place. It’s also a good idea to polish the surfaces of the extractor and the breechface of the slide. My gun would not function reliably when I first got it together. I polished all the surfaces mentioned, took a very slight bit of tension off the extractor and now it runs like a Swiss watch.
The ejector is next. With it in place, hold it down tight and insert a magazine to make sure there is no contact. If there is, you must file clearance into the ejector. There is a small hole for the ejector pin through the frame. If you look through the hole with a strong light behind, you can see that the leg of the ejector protrudes into the pin hole. That metal must be removed from the leg on the ejector with a round file so the locking pin will pass through and hold the ejector in place.
When the gun is in battery, the slide might be protruding a bit past the frame. If the barrel fit is final, you can blend them together by using a file and then polishing the surfaces. The extractor can also be fitted to be flush with the frame at this time.
Check Your Work
- Fire the first cartridge and the second should not follow. Repeat this a few times, always loading only two rounds at a time.
- Load a full magazine. Chamber a round and remove the magazine. Fire the round. Repeat this with the remaining rounds in the magazine. Chamber, remove the magazine and fire the gun.
- Load the magazine and fire with both hands until empty.
- Repeat this with strong hand, weak hand and with a deliberately limp wrist, each with a full magazine.
- Load a full magazine and fire it into the backstop as fast as you can.
- Test the half-cock by holding the hammer while pulling the trigger to release it. Then, after the hammer moves a short distance, release the trigger and half-cock should stop the hammer from falling all the way forward.
- The trigger overtravel screw should be adjusted to ensure that the sear is not hitting the half-cock ledge as the hammer falls. Cock the gun. Hold the trigger back while gently lowering the hammer to the full-forward position. You should be able to feel if there is contact as the half-cock ledge passes the sear. If there is, unscrew the overtravel screw a quarter to a half turn. Repeat until the hammer travels without contacting the half-cock ledge, then back it out another quarter to half turn for added insurance.

The magazine release must easily allow inserting the magazine into the magazine well and hold it firmly. It must then eject the magazine completely. Look inside the frame with a flashlight and see that the magazine release protrudes into the magazine well. Depress the magazine-release button and it should recede entirely back into the frame. If the release doesn’t move deep enough into the frame for total clearance, you must remove the part and modify it to allow further travel.
Assemble the mainspring housing by inserting the spring, end cap and plunger. Compress them and lock them in place with the mainspring cap pin. One good way to compress them is with a bench vise. You can use the slide stop to compress the plunger. When it is in place and pinned, the mainspring housing must not hit the grip safety and prevent it from moving freely.
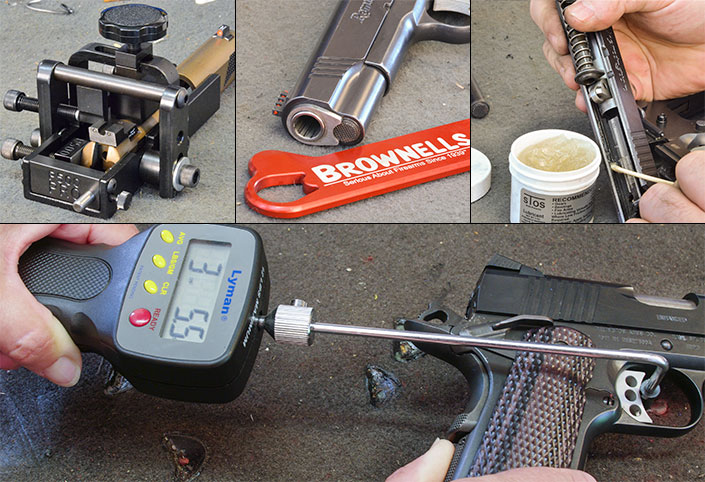
I will note that I used an STI short trigger for this gun as I have wide hands and short fingers. Before installing the fire-control parts, it’s a good idea to set the height of the hammer hooks to an ideal of .020 inch (and no less than .018 for safety reasons) and polish the hammer hooks and sear contact surfaces. (You must have the proper jig to do this work.) I use a Bob Marvel 1911 Auto Sear and Hammer Jig from Brownells, which comes with detailed instructions for the process.
I believe that messing with the sear spring on a gun that might be used for defense is a bad idea. I prefer to find a spring that works well and use it unmodified.
One school of thought about a trigger overtravel screw is they cause more trouble than they are worth. The more I learn, the more I am inclined to agree that they are probably better not used. If you do it wrong it can damage the sear. I know this to be an absolute truth.
The pull weight goal for most 1911 pistols is 3 to 4 pounds, but the quality of the trigger is just as important as the pull weight. The trigger should break clean and crisp with no hitches or creep.
Most thumb safeties are made oversize and must be fitted to the handgun. Install all the fire-control parts, including the spring and the mainspring housing, but leave out the grip safety. If you slide the thumb safety into position it will mostly likely be blocked from going all the way past the sear. You will need to file or lightly stone the thumb-safety lug until it just clears the sear. Be careful, work slowly and try the fit often. The idea is to just clear the sear without contact. A jig is helpful here. If the safety is ambidextrous (as it darn-well should be) the grip panel on the right side of the handgun may require a relief be cut.
The slide stop must fit correctly to work with the magazine to engage the slide stop on the last shot. Some builders like to add a bevel on the slide stop to aid in inserting it past the detent plunger when installing it into the firearm. This helps eliminate the “idiot scratches” on the gun’s finish caused by trying to insert a balky slide stop.
Speaking of finish, we coated Eric’s 1911 with DuraBake and mine is in Cerakote. Both of these finishes require oven cure. It’s easy to find an oven at the local ’Mart. Buy the largest convection toaster oven you can find.
The final step is to install the sights. We used Novak-style cuts for Trijicon HD Night Sights. When installing night sights, some builders believe you should use a sight pusher to prevent damage to the somewhat fragile vials.
Run some safety checks and take the gun to the range.
Then start thinking about your next build.
Bryce M. Towsley’s book “Gunsmithing Modern Firearms” has a more detailed chapter on building a 1911. It’s due out in fall 2018.