The primary purpose of a shooting sling is to provide additional stability by making the interface between the shooter and the rifle more rigid. A shooting sling is not ideally adapted to close-quarter engagements or tactical carry—its principal intent is to assist with marksmanship at distance. When it comes to shooting slings, the old military leather sling is the referenced standard, but the speed sling is faster.
Speed-sling techniques are not to be confused with what is often called the “hasty sling,” where you simply snake a traditional carry strap around your support arm. The hasty sling does nothing other than secure the strap so it doesn’t sway below the rifle while you try to hold on target. A speed sling, though it works in a similar fashion, it is also not the same as the military loop or competition sling. While a practiced rifleman can loop up a military sling in about 5 seconds, using a speed sling, the process can be completed in about 1 second. Speed slings are simply better suited to field use.
According to Gunsite Academy founder and author Col. Jeff Cooper, “The origin of the speed sling as rediscovered comes from Guatemala.” It was there where Cooper met Carlos Widmann, who had a rifle with a sling attached at the common forward position and just forward of the magazine. This attachment method allowed the shooter to quickly loop the sling behind the triceps of his support arm almost instantaneously while shouldering the rifle. Cooper named this configuration the CW Sling after Widmann. As Cooper soon learned, this system was not new—it was originally known as the British two-point system.
Soon, Gunsite graduate Eric Ching revised the CW system with a three-point attachment sling that could be used in the same manner. It worked much better for carrying the rifle, and soon became known as the Ching Sling. Ching Slings are available from Andy’s Leather or Ruger for $60 to $75. Galco further modified this design with a two-point attachment sling it calls the Safari Ching Sling ($79.95). It works similar to the Ching Sling, but the forward section of the sling is split and a separate leather strap provides the loop. The Rhodesian sling ($55), also crafted by Andy’s Leather, is yet another take on the two-point attachment, loop-sling concept.
Some call what I refer to as the “Sniper” method, the “military triceps” method. But, since the loop sling also works off your triceps—your support-arm triceps—that would seem to confuse the issue. I call it the Sniper method because former Marine sniper and Magpul instructor Caylen Wojcik first showed it to me. Interestingly, he had no special name for it, and since Cooper had already coined the term “CW Sling,” another name was needed.
The Sniper technique can be executed with just about any fast-adjust sling, like the Magpul MS1 ($34.95). Galco’s new RifleMann sling ($49.95) works, too. Both the Magpul MS1 and Galco RifleMann slings are two-point attachment slings.
The Advantage
Single-point-carry slings that allow your tactical carbine to dangle along the centerline of your body are popular today. They’re advisable if you’re working in close quarters where you may need to let go of the rifle, freeing both hands to perform other tasks. They’re also beneficial if you need to transition from your long gun to a handgun. What these slings do not do is help you shoot better. In order for a sling to do that, it must free one of your arms from the job of supporting most of the rifle’s weight. The only way a sling can do this is if it binds the rifle to one arm.
As Cooper pointed out in his 1997 book, “The Art of the Rifle,” “The function of the shooting sling is to take the weight off the muscles of your support arm, so that when you are in a proper shooting position you can relax all your muscles and the weapon will remain exactly on target.” This allows you to shoot from a relaxed position where your arms are not stressed. In other words, speed-sling techniques let you hold steadier, longer.
In that same book, Cooper also wrote, “…proper use of the loop sling will increase your likelihood of hitting by about 30 percent.” Tests I’ve conducted have confirmed this performance enhancement, though an increase in accuracy between 10 and 20 percent is more common. Just as important, however, during rapid-fire engagements, a speed sling can allow you to shoot about 10 percent faster, because the rigidity of the interface between you and the rifle allows faster recovery from recoil.
During a rapid-fire test at 50 yards from the seated position, I was able to, put five shots from an AR-15 into a 3-inch circle within about 14 seconds, on average. Using a speed sling, I was able to cut 2 seconds off this time with no decrease in accuracy. In fact, the 2-second reduction included the time necessary to loop up. Additionally, using the Sniper speed-sling technique, I realized the same increase in speed, while achieving a 10-percent increase in accuracy from the standing, unsupported position.
Loop Method
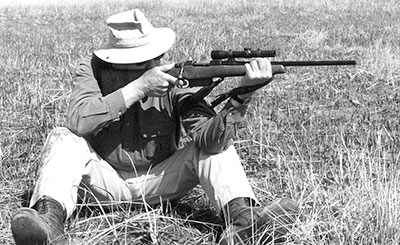
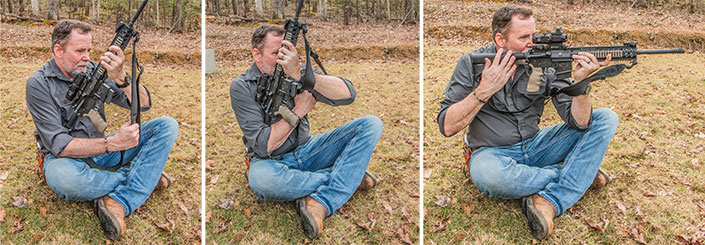
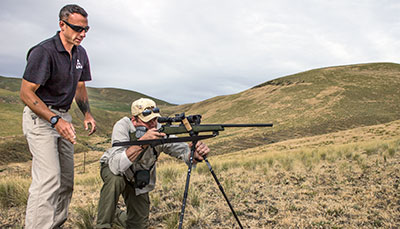
The loop method Cooper was so fond of works with your support arm. To loop up, grasp the fore-end of the rifle at the location where you will hold it while shooting. The support hand never leaves this position. Then, with your shooting hand, grab the bottom of the loop and pull it over your elbow, positioning the loop as close to your armpit—on your triceps—as possible. Keeping your support arm positioned vertically under the rifle while rested on your knee or other rigid provision, grasp the butt of the rifle with your shooting hand and guide it to your shoulder. If the sling feels tight and moderately uncomfortable, you’ve done everything right.
Without being able to rest the support-arm elbow on your knee, the ground or some other fixed object, the loop sling provides no advantage. In other words, shooting from the standing off-hand position with your support arm looped up is no steadier than shooting with no sling at all. To work properly, the loop sling needs to be adjusted for a specific position, ideally the position you intend to shoot from most often. This is partly because in different positions the relationship between your support arm and the rifle changes, and partly because slings designed for looping the support arm are not of the quick-adjust variety. Pick your favorite position and adjust accordingly.
Sniper Method
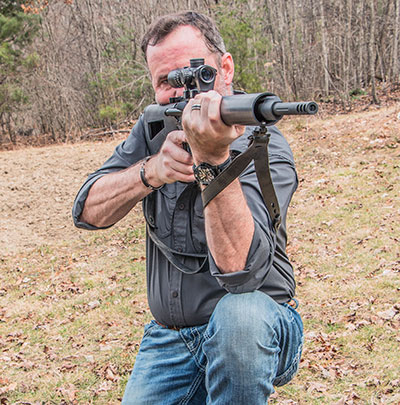
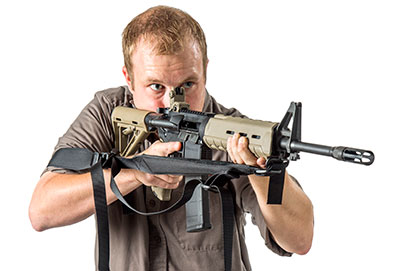
With the Sniper technique, you loop the rear of the sling on the triceps of your shooting arm. This method is fast to assume and, unlike the loop method, it provides enhanced steadiness during off-hand shooting, as it eliminates the need for the shooter to support most of the weight with their support arm.
For a sling to be compatible with the Sniper method, it should have a quick-adjust buckle to let you sling up and torque the sling so it is almost tight enough to cut off circulation. It’s possible to pre-adjust a non-quick-adjusting strap or sling to work for this method, but it will only work perfectly in one position and with the same clothing you were wearing when you made the fit. The key is to make the sling as tight as possible with your shooting elbow tucked very close to your body. The further your elbow is from your body, the less assistance the sling will provide.
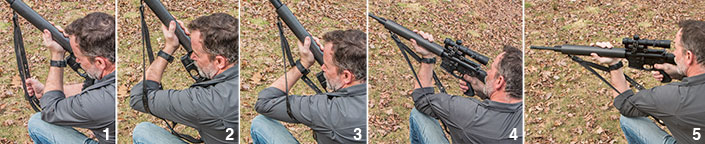
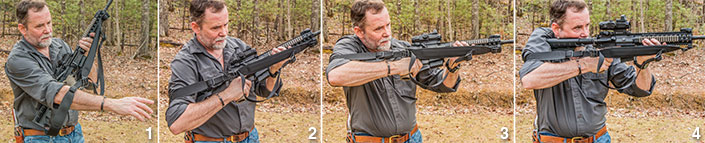
To loop or sling up in the Sniper manner, hold the rifle with the support hand on the fore-end just as when preparing to get into the loop method. Next, pass your shooting arm between the sling and the outside of the rifle’s buttstock, positioning the rear of the sling—where it attaches to the rifle—as deep into your armpit as possible. Finally, grasp the rifle at the wrist/grip with your shooting hand and use your support hand to cinch the sling tight with the fast-adjust buckle.
The Sniper speed-sling method can be used in just about any position and is particularly useful when using a bipod. Its primary drawback is the sling can interfere with the working of the rifle’s bolt. Obviously, with an AR this is a non-issue. And, unlike the loop method, you do not have to unsling to conduct a magazine change. In fact, you can hold the rifle on target almost effortlessly with your shooting hand and conduct a reload while slung up in the Sniper method.

Proper Application
When shooting a rifle in the field, you must first choose between the standing, kneeling, sitting, prone or some improvised position based on the cover and concealment available and needed. To make the best use of a speed sling you must apply the correct method with regard to the support you have at your disposal. Working on your own with each technique is the best teacher, and your physical limitations may restrict some applications. Still, there are some general guidelines for speed sling use.
If you can rest your support elbow on a fixed object or your knee—while kneeling or sitting—the loop method is generally the best option. The loop method also works very well from the prone position, if the rifle’s fore-end is not rested on a solid surface or a bipod. In all other instances, the Sniper method will provide more stability because it is not entirely dependent on additional elbow support. It also, for reasons already mentioned, generally works better with semi-automatic rifles.
With practice, you can loop up using either technique in about 1 second. Considering the advantages offered in terms of better accuracy and faster recovery from recoil, that’s a second you can well afford to sacrifice.
 Galco RifleMann Sling
Among the numerous speed-sling options available, Galco’s RifleMann sling offers greater versatility to shooters in the field. Designed in conjunction with Shooting Illustrated’s Ammo Editor, Richard Mann, the product serves not only as a means to help carry a rifle, but also as a shooting aid capable of providing greater stability. That added support can make you a better shot and facilitate faster recovery from recoil.
Capable of fitting 1-inch swivels, it attaches in common two-point fashion and is capable of 45 to 59 inches of adjustment. Sliding the padded section of the built-in loop behind the triceps of the support arm (Safari Ching-style) while shouldering the rifle helps to steady your aim. Or, for additional support when shooting off-hand, you can loop the rear of the sling around the triceps of your shooting arm and cinch the quick-adjust buckle tight (Sniper method).
Suede-covered padded sections provide welcome comfort while in place when carrying your rifle slung over your shoulder for extended periods.
MSRP: $49.95; galcogunleather.com
—Bob Boyd