The Mosin–Nagant bolt-action military rifle was developed by the Imperial Russian Army in 1891. It is one of the most common military bolt-action rifles in history, with more than 37 million produced. Odds are you have one, or know somebody who has one. Or, at the very least, you have seen them lined up on the rack at a gun shop with a stupid-low price tag.
Ed Friedman, editor-in-chief of Shooting Illustrated, and I were talking about these rifles and he came up with the idea of taking a standard Mosin-Nagant, the gun that’s as common as dirt, and tricking it out into a “poor-man’s sniper rifle.”
I am always up for a DIY project, so I started looking for a donor rifle. The bore looked good on the one I found and everything seemed to be in working order, so I brought it home and took it apart. (The rule of thumb is you never shoot the donor gun for a build project. You risk falling in love and not completing the project.)
If you are going to build a long-range sniper rifle, you need optics, which creates some problems as this gun was not designed for use with a scope. Advanced Technology International (ATI) has a scope mount and bolt-handle kit designed for the Mosin-Nagant. This is perhaps the trickiest part of the project, as it requires some light gunsmithing. The most difficult step is getting the scope mount located correctly before drilling holes in the receiver.
Line up the front of the scope mount with the front edge of the receiver. Just to be sure, measure inside the receiver to the back of the barrel. Then measure to the front screw hole. You should then have plenty of clearance to drill without hitting the barrel.
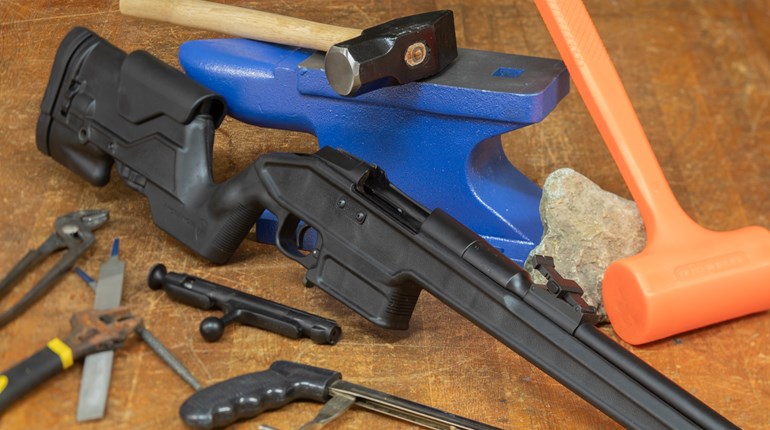
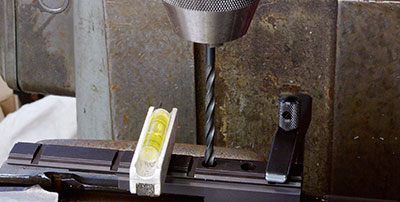
Find a smooth, flat and level surface on which you can place the flat on the bottom of the receiver. I used the vise in my milling machine, but anything that’s the right size can work. Make sure it is level. Lay the gun on top, making sure the flat on the receiver is flat on the level surface. Place the scope mount on the gun, correctly aligned with the end of the receiver. Adjust the mount so it is also level. Make sure that the level reads exactly the same on the flat “index” surface and the scope mount, with no variation. Clamp the mount in place with a parallel jaw clamp. Re-check, double-check and triple-check to make sure you have the mount exactly right. The centerline of the scope mount should be exactly the same as the centerline of the action/barrel and the top of the mount should be parallel with the flat on the bottom of the action. Clamp the action in a padded drill-press vise. Find the larger of the two drills included with the mount, the size #11 and, using the holes in the clamped mount as a guide, carefully drill the top of the receiver. Just spot the receiver with this drill. This is to mark the center of the hole with the tapered tip, so you do not need to drill very deep. Switch to the smaller drill size; #21. Make sure the drill is centered in the hole using the dimple from the larger drill and carefully drill through the receiver. Use plenty of cutting oil. Repeat on the next hole. Keeping the mount clamped in place, use the supplied 10-32 tap to carefully cut threads in each of the holes.

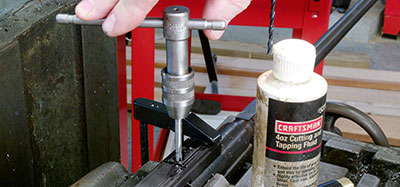
Again, make sure to use lots of cutting oil and to have the tap started straight in the hole. Work carefully and reverse the tap often to break the chips. Taps are very brittle and break easily, so use a light touch. If you break the tap off you will have major problems. Run the tap well past the end of the hole so you get past the tapered section of the tap’s threads.
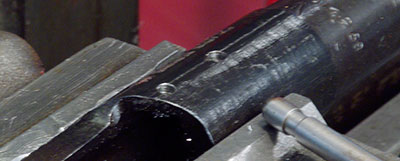
Once it’s tapped you can remove the clamp and scope mount if you are going to finish the metal on the barreled action. If you are not coating the metal, degrease the holes and put a little thread-locker on the screws. Loctite blue #242 is best as it allows you to remove the screw later. Start the screws, remove the clamp and tighten the scope mount in place.
Note, the screws that came with my kit were too short. They only held by a few threads, and they stripped out after a few shots. If the screws do not go to the bottom of the threaded hole, replace them with a high-quality 10-32 screw and cut the length to an exact fit.
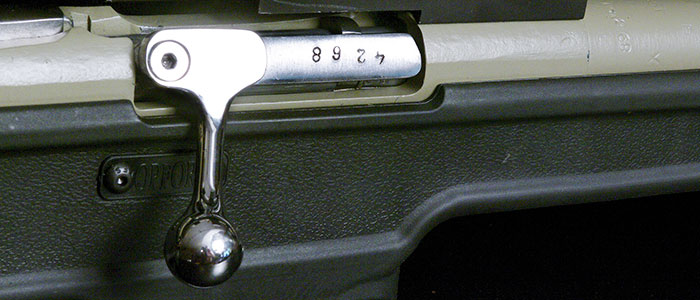
The straight bolt handle will not clear the scope, which is why a new bolt handle is included in the kit. Before you take the bolt apart, take some photos from multiple angles so you can see how it all fits back together. You may think you can remember, but odds are you won’t. Trust me; you will be glad you did. Take note of the firing-pin depth at the rear of the bolt, so you can return to that point after you have removed the firing pin.
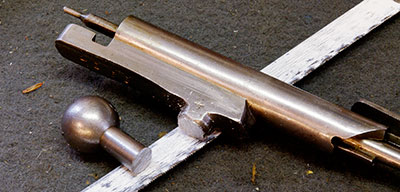
Follow the instructions for your style of bolt handle to mark a line and cut the handle off with a hacksaw. It’s best to cut it a bit longer than needed so you can file or grind it to fit. I used a bench-mounted disk grinder to take a little bit at a time off the remaining nub, stopping often to try the fit. Make sure that you keep the ground surface square. The new bolt handle fits properly when it is tight against the bolt.
Then, clamp the bolt handle in place and use the size No. 11 drill to mark the center. Drill with the size No. 21 drill, being very careful as it breaks through. Thread the hole with the 10-32 tap. Degrease everything and put a little Loctite on the screw. Then tighten in place and you are done with the part of this project that has a high pucker factor. Take a deep breath, relax; it’s all easy from here.
If you plan to finish the gun, you must degrease it. I have a bluing tank where I can soak the barreled action with degreaser. But, if you hang it outdoors and go to work with a brush and a couple of cans of Outers gun degreaser or CRC Brakleen, you will do just as well. Make sure you have the kind that dries with no residue.
Once degreased, you can go really high tech and sandblast the metal, but why bother? It’s a lot of extra work, and most folks don’t have a blasting cabinet big enough to handle the action and 29-inch barrel. Besides, the metal is rough enough from the Russian machining anyway.
Brownells Aluma-Hyde is a good coating to use as it comes in a rattle can, air dries and you can get all the “tacticool” colors. I found a can in my shop in Coyote Tan to match the Weaver scope I was going to use.
(Note to self. Next time don’t be so cheap; buy a new can of Aluma-Hyde. Or at least check the date on the can you use before spraying as 10 years out of date is pushing it!) Once the coating cures (overnight for a new can, much longer if it’s a decade old) you can put the gun back together.
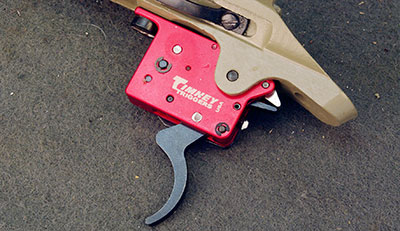
Any rifle is only as good as its trigger. Fortunately Timney makes an excellent drop-in replacement trigger. It comes with a safety, which has a knob on the side much like a Remington Model 700. This is a vast improvement over the hard-to-use—and perhaps dangerous—MN safety where you must pull the bolt back and turn it to lock. Releasing that safety can be extremely noisy, which an issue is if you plan to hunt with this rifle or use it for defense. The Timney safety simply eliminates all those problems.
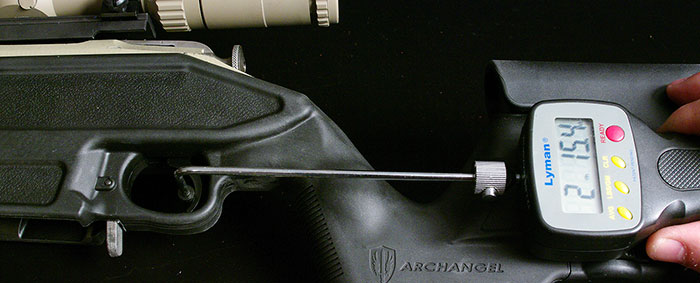
Installing the trigger is easy. Remove all the old trigger parts. Slide this new trigger into place and start the screw in front, leaving it loose. (Put a dab of Loctite on it first.) Then insert the retaining pin through the receiver and the trigger. Tighten the screw and check function. My new trigger is clean and crisp and breaks at just under 3 pounds on my Lyman digital scale.
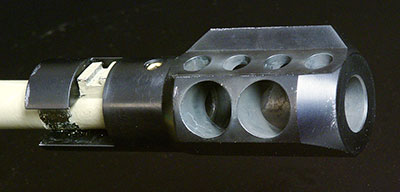
A muzzle brake reduces recoil and just looks cool on any gun. Most require threading the barrel, which is beyond the scope of most hobby guys, but Texas Precision Products makes a muzzle brake that fits over the barrel and turns to lock on the front-sight lug. Then you tighten two setscrews and it’s done. They say it reduces the felt recoil to that of a .243 Win. Who cares? It looks badass, and that’s what matters.
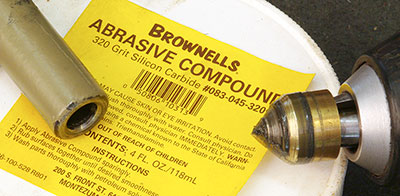
Before I installed the brake I re-crowned the barrel. This is fast and easy to do with a brass 45-degree muzzle-lap tool and some lapping compound, both available from Brownells. This step will almost always improve accuracy.
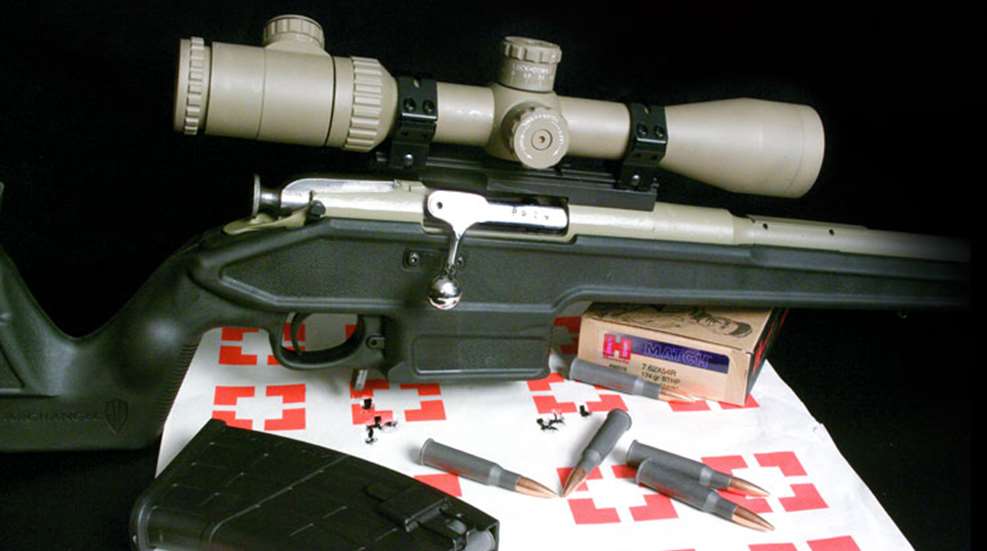
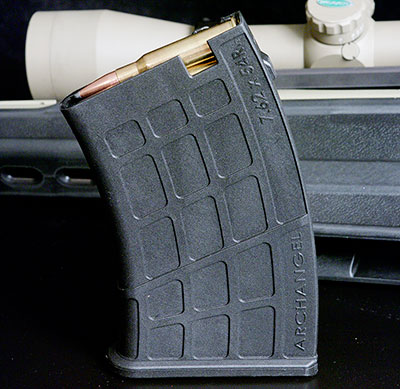
ProMag Industries’ Archangel offers a tactical replacement stock that also allows the rifle to take removable magazines. The stock comes with a five-round magazine and it offers 10-round magazines, as well. The single-stack magazines are easy to remove by pushing forward on the lever between the trigger guard and the magazine. This stock is a drop-in fit and free-floats the barrel. The company also offers a barrel-tension module that you can install in order to tune the rifle’s accuracy.
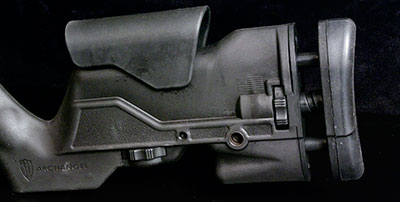
The stock has an adjustable cheekpiece and buttpad. This lets you adjust length-of-pull to fit the shooter and ensures a correct cheek weld with the optic and ring combination of your choice.
There are pockets in the stock for push-button-style (QD) sling swivels. I also added the included swivel stud so I could mount a bipod. This was as easy as drilling through the guide inside the stock and then screwing in the included swivel stud. There is a storage compartment built into the pistol grip. The stock is available in black, olive drab or desert tan.
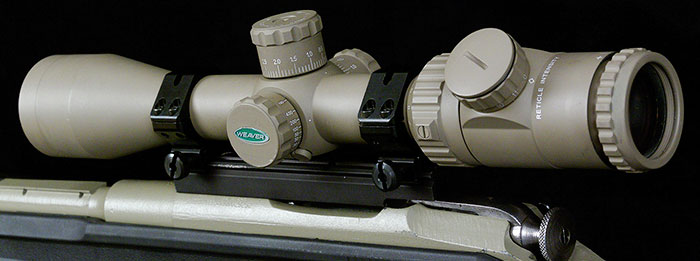
Finally, I installed a Weaver Kaspa 3-12x44 mm Tactical scope in Flat Dark Earth. This inexpensive tactical scope packs in a lot of features. It features dial-up turrets as well as an illuminated Mil-Dot reticle. This model has a side-focus parallax adjustment. I mounted it in 30 mm Weaver Tactical four-hole Picatinny rings. One note on that, I tried to use the six-hole rings, but they were too wide to mount this scope on the short base and maintain the correct eye relief. So, if you order, get the slimmer four-hole rings, which are more than rugged enough for the application. Or, better yet, order Weaver windage-adjustable rings. It’s likely that your scope mount will not be centered perfectly, so having a little adjustment for windage in the mount can help keep the scope aligned correctly.
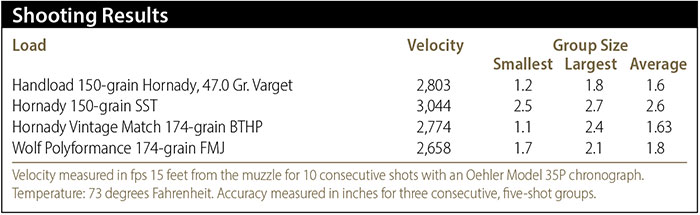
The rifle is an eye catcher and gets a lot of attention at the range. It is almost a 1.5-MOA gun right now with good ammo, and I am going to mess with the barrel tension module in the stock to see if that will improve accuracy. With handloads, I’m thinking I might see this gun shooting very close to 1 MOA by the time I’m done.
Right now, the rifle can easily keep all its shots on a 10-inch plate out past 500 yards, which is not too bad considering where this all started. Remember, this is a 124-year-old design, Russian rifle. Mine was probably built during the World War II era to military specifications. The accuracy standard, according to The Soviet Mosin-Nagant Manual, is a four-shot group at 100 meters. Three of these must be in a 15 cm circle, which is 5.9 inches. Given that standard, the fact that I am even considering the possibility of achieving MOA accuracy is pretty amazing.