** When you buy products through the links on our site, we may earn a commission that supports NRA's mission to protect, preserve and defend the Second Amendment. **
The necessary parts and tools are listed below:
Parts
Barreled AR Upper Receiver
Tools
Headspace go and no-go gauges that match the chambering of your rifle.
Most barrels are shipped with the barrel extension in place, and in theory everything is machined so the headspace will be correct when the bolt is closed. But, it’s a very good idea to double-check to reduce the risk of experiencing a spontaneous separation of parts the first time you drop the hammer on a live round.
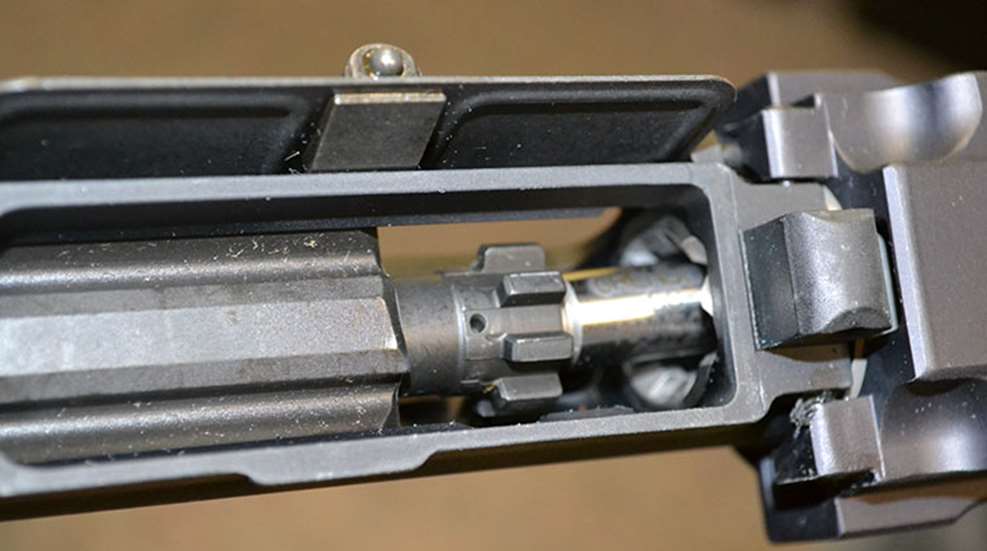
 If your go/no-go gauges have a notch in the rim, align the go gauge so the ejector fits into the notch and clip the extractor over the rim of the gauge. If there is not a notch, you will need to either remove the ejector or compress it with the gauge. Hold the gauge in position on the bolt face while placing the bolt carrier assembly and charging handle in the receiver. Then push the bolt carrier forward, inserting the gauge into the chamber like a cartridge. The bolt should fully close, and the bolt head should rotate into battery. Now install the no-go gauge and repeat. This time the bolt should not close into lockup.
 Remove the no-go gauge, and push the charging handle and carrier forward, bringing the bolt into lockup.
Function Check
Run through a few dry cycles to make sure the bolt cycles. Close the bolt and shut the dust cover. Now, pull back on the charging handle, and the dust cover should open. Make sure the forward assist pushes against the bolt when you press the plunger and releases cleanly. Insert an empty magazine, and check that the bolt locks back. Also make sure the bolt release functions properly. Finally, clean the bore and chamber and install some sights and/or an optic.
Your completed AR upper is now ready to be joined to a lower receiver by attaching the pair by the front-pivot pin and the rear-locking pin. What’s that, you down own an AR lower? (What a rare breed you are, indeed.) The good news is building one is easier than the upper. However, (spoiler alert) that sounds like the topic for another build, doesn't it? Stay tuned.
Parts
Barreled AR Upper Receiver
Tools
Headspace go and no-go gauges that match the chambering of your rifle.
Most barrels are shipped with the barrel extension in place, and in theory everything is machined so the headspace will be correct when the bolt is closed. But, it’s a very good idea to double-check to reduce the risk of experiencing a spontaneous separation of parts the first time you drop the hammer on a live round.
Phase one: A quick way to determine if a new AR barrel is properly headspaced and safe to shoot is if the bolt goes into complete battery when attempting to chamber a "go gauge."
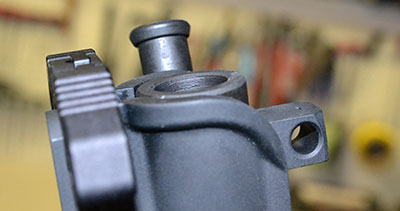
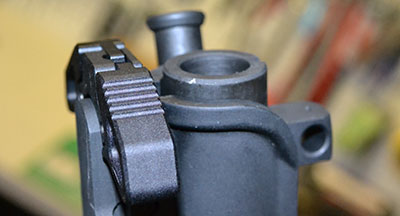
Phase two: the bolt should only go into partial battery when attemping to chamber a "no-go" gauge.
Function Check
Run through a few dry cycles to make sure the bolt cycles. Close the bolt and shut the dust cover. Now, pull back on the charging handle, and the dust cover should open. Make sure the forward assist pushes against the bolt when you press the plunger and releases cleanly. Insert an empty magazine, and check that the bolt locks back. Also make sure the bolt release functions properly. Finally, clean the bore and chamber and install some sights and/or an optic.
Your completed AR upper is now ready to be joined to a lower receiver by attaching the pair by the front-pivot pin and the rear-locking pin. What’s that, you down own an AR lower? (What a rare breed you are, indeed.) The good news is building one is easier than the upper. However, (spoiler alert) that sounds like the topic for another build, doesn't it? Stay tuned.