Learning to read winds and apply useful corrections to hit long-range targets is one of the more difficult precision-shooting tasks to master. The more time a projectile spends in flight, the more time winds have to move it off the intended path. Therefore, accurate wind estimation becomes more critical as the bullet's flight time increases due to long-range or slow-moving projectiles. I can't provide a detailed lesson here, but hopefully this two-part primer will help get you headed (or holding) in the right direction.
There are good arguments for measuring winds at the shooter, the target or somewhere between. I've experienced the pros and cons of each method, but prefer to look most closely at winds from the halfway point on out to the target. In open country and rough terrain, winds coming from opposite directions are common and appear anywhere along the bullet's path. If you plan to hit challenging targets, you've got to find and factor in those winds. Low light, extreme heat or extended ranges will further complicate accurate wind measurements downrange. In those cases, or whenever winds are noticeably different near the firing line, I factor them in as well.
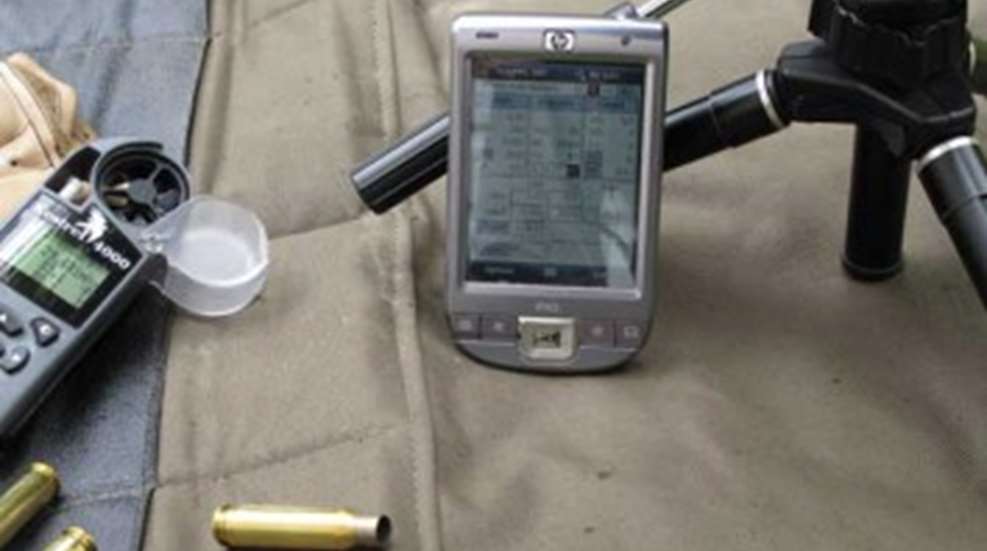
Handheld anemometers like the battle-tested Kestrel 4000 have been the "gold standard" for measuring winds in the field for many years. I use one for winds and other atmospherics that factor into precision-firing solutions. Anemometers have two weaknesses: They're electronic devices that eventually fail and they only read winds at their current position. Unless you have an elaborate system of multiple sensors attached to transmitters, they won't give you downrange data. Fortunately, your eyes can provide the downrange clues needed. Look for these natural indicators between the firing line and target:
- Wind felt on the face/body
- Low-to-ground vegetation (long grasses, weeds)
- Deciduous trees (longer branches, larger leaf surface areas to catch more wind)
- Coniferous trees and bushes
- Blowing dust from loose surface material or bullet impacts in dirt/sand
- Flags or streamers (if present)
- Rain (lateral movement while falling)
- "Mirage" effect created when light refracts as it passes through different densities of air
Each of these indicators has different levels of observable movement to indicate wind speed and direction. If you have an anemometer, practice your skills by judging winds visually then check your work electronically to adjust the "calibration" of your eyes. Judging visual indicators such as dust, flags and vegetation comes fairly easily with practice, but estimating speeds based on mirage requires more effort to master.
The mirage we use for shooting is the same effect seen over pavement on a sunny day. As the sun heats the ground, rising thermal layers and water vapor rise. Any wind component present will push these layers in a detectable direction, creating a visible mirage. Spotting this effect between you and your target allows determination of the two factors needed: direction and speed. The former is determined by watching the waves closely to see the direction of drift as they rise from the ground. You can practice this by simply looking at the roof of a car on a hot summer day from several feet away. Compare what you see in the rising vapors with the wind you feel to get the hang of it before ever firing a round on the range. Speed judgment takes more practice. Mirage varies from "boiling" waves that appear to shimmer as they rise straight up when there's no wind to horizontal waves moving rapidly, low to the ground in 10-15 mph winds. Above 15 mph, mirage is harder to see because the wind moves the waves laterally out of sight too fast to detect them. My experience has been that at 15 to 20 mph mirage starts to disappear. The good news is that as winds get higher, other indicators, such as blowing branches and debris, become more apparent and reliable for judging wind values.
Mirage can be especially tough to see on cloudy days and in cool weather. Look for a horizontal surface in the vicinity of the target, such as a rooftop, railroad timber, cement pad or target frame and focus on its top edge. The darker the color, the easier it is to see mirage. To find mirage closer to your position, change the focus of your optics to a point 1/2 to 2/3 of the distance to the target. Opposing winds may offset or cancel each other out completely, so look closely. If winds are gusty, either wait for lulls or apply your corrections into the direction the wind is coming from either by adjusting sights or by holding into the wind. Part 2 of this series will discuss different methods of applying the measured wind speed and direction to your shooting.