Each generation likes to think it discovered everything great, but that's not always so. Sometimes those things have been around a while. For example, the son of one of my wife's co-workers came home all excited a while back from a high school dance.
"Dad," he said breathlessly, "You gotta hear this new song they have been playing! It's called 'Stairway to Heaven' and it is so awesome!"
The same is true with long-range rifle shooting. It's been around a long time. It just changes faces to match the times.
My hard-start introduction came 15 years ago when long-range deer hunting was all the rage. Soon every rifle company had a gun designed to reach out and smack something. They were, for the most part, line extensions of their heavy-barreled varmint rifles chambered for powerful big-game cartridges. It seems the Texas theme was hot—Winchester called its version the Laredo while Remington's was the Sendero. Being a true gun nut, I wound up with one of each. But, they don't see a lot of use these days. New guns came along, and those long-range hunting rifles have been gathering dust in my vault for years.
What I need now is a long-range tactical target rifle for a lot of reasons, one being "just because." The trouble is, like most households these days, the economy has left Camp Towsley a bit short on discretionary funds dedicated for new rifle acquisitions.
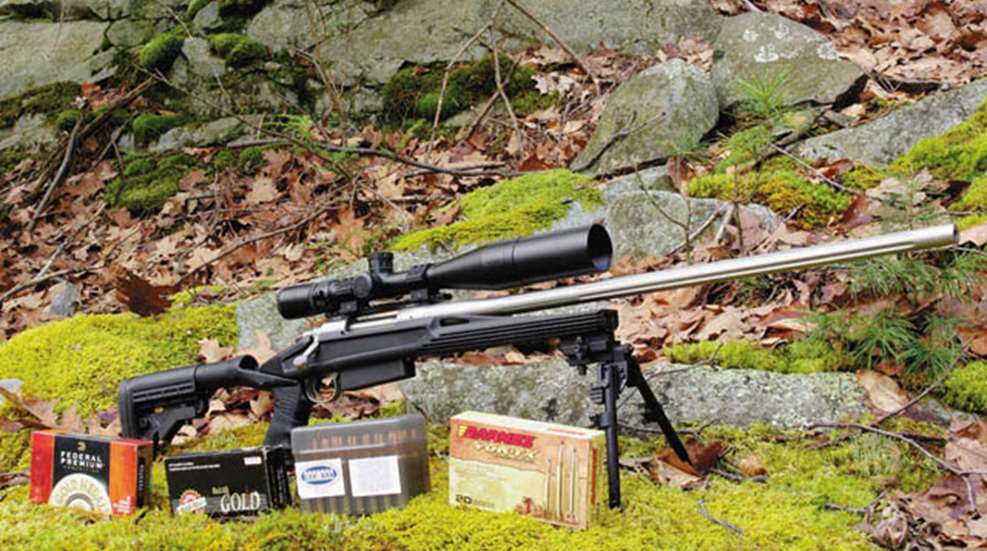
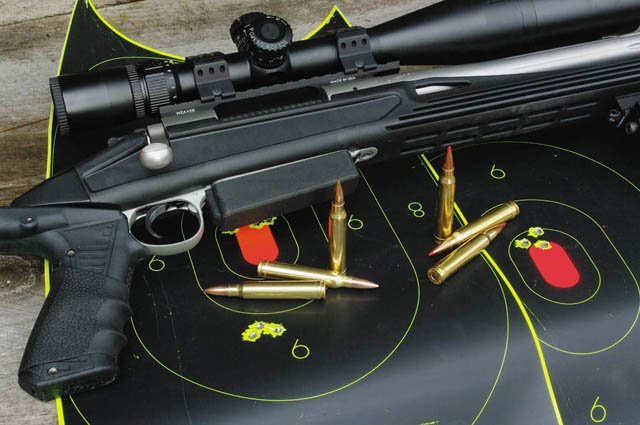
So, I dug out the Sendero, blew off the dust and started playing with it on some long-range targets. It shot well, as always, but it just wasn't "tactical" enough for today's shooting world. So, in discovering something great all by myself, I thought, "Why not turn this unused hunting rifle into a tactical-looking, long-range shooter?"
Trigger First
First, I made sure it was unloaded, then removed the stock, bolt, scope and mount from the rifle—stripping it for a makeover.
While Remington is capable of making some very good triggers, this rifle did not have one. I know the Remington trigger inside and out and have tuned dozens—perhaps hundreds—of them, but I could not make this one behave. So, the first step was to replace the factory trigger with one from Timney that is factory preset with a 1.5 pound pull weight.
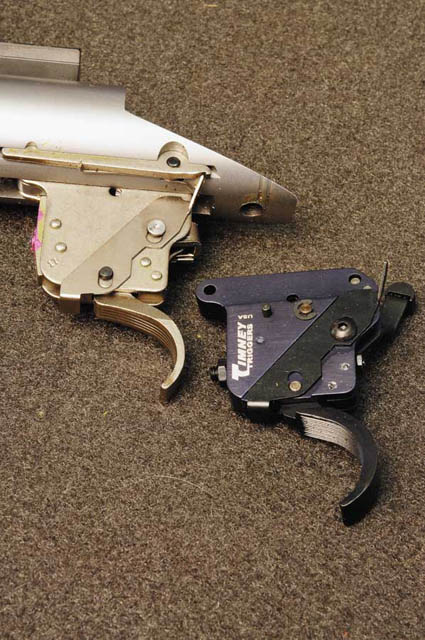
A pull weight, by the way, unattainable safely with a Remington trigger. If you want a light trigger pull, you must replace the trigger.
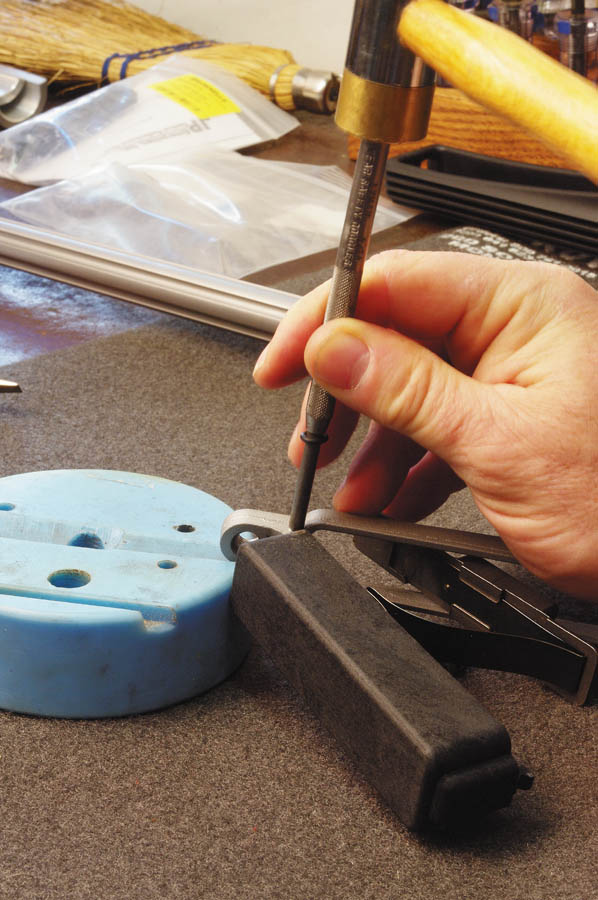
The Remington trigger is held by two pins. Make sure the safety is in the back position and gently tap out the pins. From the left side of the rifle, drive the rear one out first. Be careful to catch the bolt-stop spring as the pin releases it. Then remove the bolt stop and front pin and, finally, pull the trigger free. Reverse the operation to replace the trigger.
Install the Timney trigger with the front pin first. It has a short pin installed in the rear to hold the spring-loaded sear in place. Leave this pin in until you use the rear pin to push it out during installation. Notice, one end of the rear pin has a taper; that end goes in first so the flat end is on the left side of the rifle. You must capture the bolt stop and bolt-stop spring as you install the rear pin.
Replace the bolt and check the trigger for function, including the safety to ensure it works properly. Pull the trigger several times with the safety on, and push the safety off. The trigger should not release the firing pin on the empty chamber.
Added Capacity
My rifle is chambered for .300 Win. Mag., which is one of the finest long-range cartridges available. But, the rifle only holds three cartridges in the magazine. Rifles using .308 Win.-size cartridges have a lot of aftermarket accessories with high-capacity magazines as an option, but the .300 Win. Mag. does not. However, Brownells carries a product from Tactical Components called the Mag-Xtender. This extension replaces the magazine floorplate and adds two additional cartridges to the rifle's capacity. It's easy to install. Simply drive out the hinge pin holding the floorplate using a small punch, a bench block and a light touch with a hammer. Then drive it back in, with the Mag-Xtender replacing the floorplate. Remove the spring and follower from the floorplate and install them in the Mag-Xtender by working the spring through the slot in the bottom. Now, my rifle holds six rounds—one in the chamber and five in the magazine.
Stock Exchange
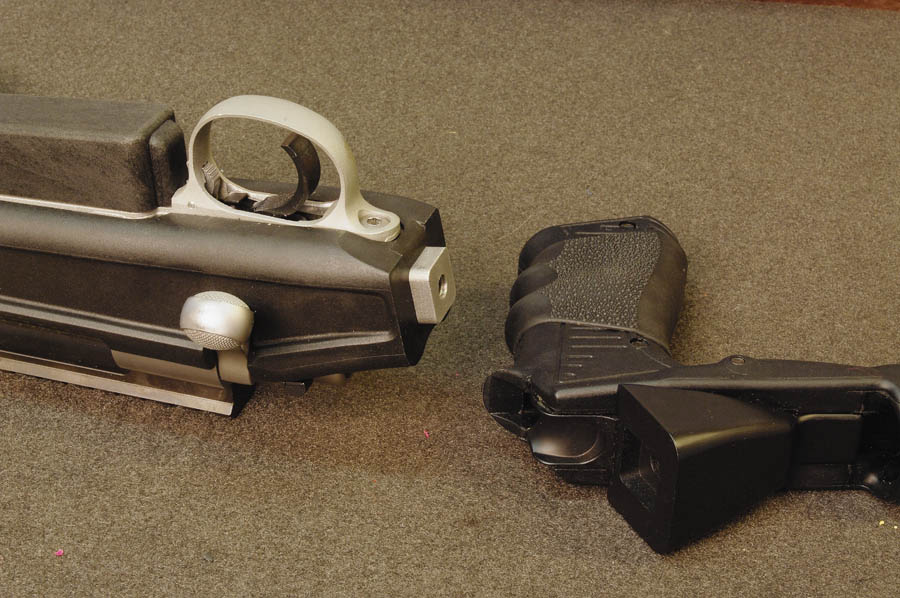
I replaced the rifle's stock with the Blackhawk Axiom Ultra-Light Rifle Stock. This unit has a spring-loaded recoil-compensation system to take the sting out of .300 Win. Mag. recoil. The stock is a fiberglass-reinforced, injection-molded polymer design with aluminum pillar bedding. Its adjustable buttstock has length-of-pull options from 11.25 inches to 15.25 inches, which alone makes this stock a great choice. The barrel is completely free-floated, so the stock fits all barrel diameters with zero barrel-channel fitting work needed. This means you can install it on that slim-barrel hunting rifle you have hanging around as well as on heavy-barreled guns like mine.
Don't be fooled into thinking a light barrel will not shoot well. When I was testing this gun at the range, I was also sighting in a .300 RUM for an elk hunt. The tactical rifle shot .5- to .75-MOA groups with ammo it likes. The slim-barrel .300 RUM shot groups averaging about 1 MOA with Barnes VOR-TX ammo, and the best of the bunch was .4 inch. A sporter-weight barrel might heat up a bit faster than a heavy barrel after multiple shots, but they can be capable of excellent accuracy. As for the heating, remember, long-range shooting is about precision, not rate-of-fire.
The stock required some work to make it fit. First off, the holes in the pillar bedding blocks didn't line up properly with the holes in the rifle's action, so I had to drill the stock holes out to allow the action screws to fit correctly. I started with a bit slightly larger than the existing hole and moved up progressively with slightly larger bits until I reached a hole diameter where my action screws did not contact the pillars. To check for contact, I marked inside the pillars with Dykem Steel Blue Layout Fluid using a Q-tip and assembled the rifle. Any contact by the screw will show up by removing the blue. Do not drill the holes any larger than the minimum needed to provide clearance for the action screws.
The Timney trigger would not fit in the stock, so I had to remove material with a Dremel hand grinder and a series of files. The key is to work carefully, check often and remove only enough material to allow clearance for the trigger.
Finally, the wider Timney trigger required removal of some metal from the original Remington Model 700 trigger guard with a flat file. Again, work slow and check often to ensure you remove only the minimum amount needed.When fitting the pistol grip on the stock, I used an optional Blackhawk rubber grip cover. I sprayed the grip and the cover with glass-cleaning fluid, which allowed me to slip it in place. The fluid evaporated, leaving the grip stable.
My only complaint with the stock was the comb. It was too low for a proper cheek weld with a correctly mounted, large, tactical-style scope. Blackhawk added an adjustable cheekpiece option to its line, and as soon as I found out, I ordered one. Unfortunately, I didn't receive it before this article's deadline, but from the looks of the photos, it will solve the problem.
Solid Footing
I wanted to use Weaver's new Precision Tactical Bi-pod on the rifle, but this bipod mounts to a rail and the stock only had a sling swivel stud. So I added the company's Swivel Stud Picatinny Rail Adaptor, which clamps on the existing swivel stud for mounting a tactical bipod. The Adaptor has an additional swivel stud on the rear for attaching a sling.
Railing
I picked a 30 mm Nikon Monarch X 4-16x50 mm scope with a mil-dot reticle. This is a high-quality, tactical scope with clear optics, solid, repeatable adjustments and lots of extra features for less than $1,000 retail.
The new Weaver Tactical Extended Multi-Slot Base is designed for the Remington 700. It features a recoil lug that mates to the action at the front of the ejection port to help keep the recoil forces off the mounting screws. With the heavy weight of tactical scopes and rings, this is a good feature. It also mounts the scope a bit lower than some other rails I have tried.
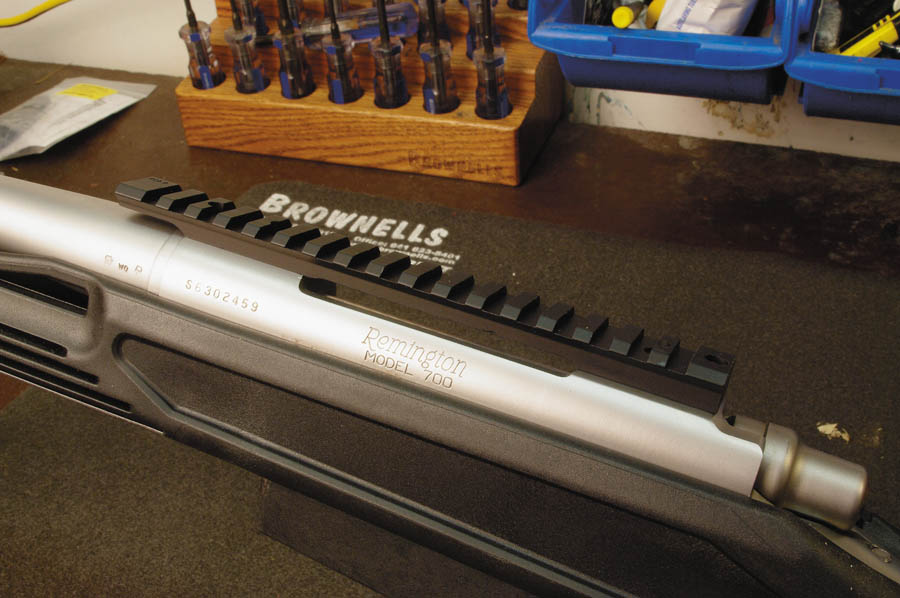
The first step in mounting the base is to put the screws in one at a time. Tighten the single screw down until it is snug and make sure the base will not move. This is especially important with the front screw. If it bottoms against the barrel threads and does not lock the base tight to the receiver, you will have major accuracy problems. If the screw is too long, put it in a drill press and remove a small amount of metal from the bottom using a flat file. Again, remove only enough metal to take the bottom of the screw out of contact with the barrel threads when the screw is tightened. Do not shorten the screw any more than necessary, as it only has a few threads to start with and the front screw takes the most force when the gun fires. Make sure all four screws can lock down the base, then tighten each one to 25 inch-pounds. I use a Warne Gunsmith Torque Wrench preset for that setting. There are a lot of fixed and adjustable torque wrenches on the market—Brownells lists nearly two dozen on its website—and it is a good investment for accuracy. I also apply a drop of blue #242 Loctite on every screw. This is a removable thread locker, so you can make changes down the road without firing up a blowtorch.
When mounting the Nikon, I selected a set of Weaver low 6-Hole Picatinny Rings. These rugged rings are made for tactical applications and feature six screws on each ring to ensure the big, heavy scope stays put. Again, I torqued the screws to 25 inch-pounds. To install the rings to the base, I used a Leupold Mark 4 Ring Torque Wrench. This tool is preset to 65 inch-pounds, which is correct for locking tactical rings to a Picatinny rail.
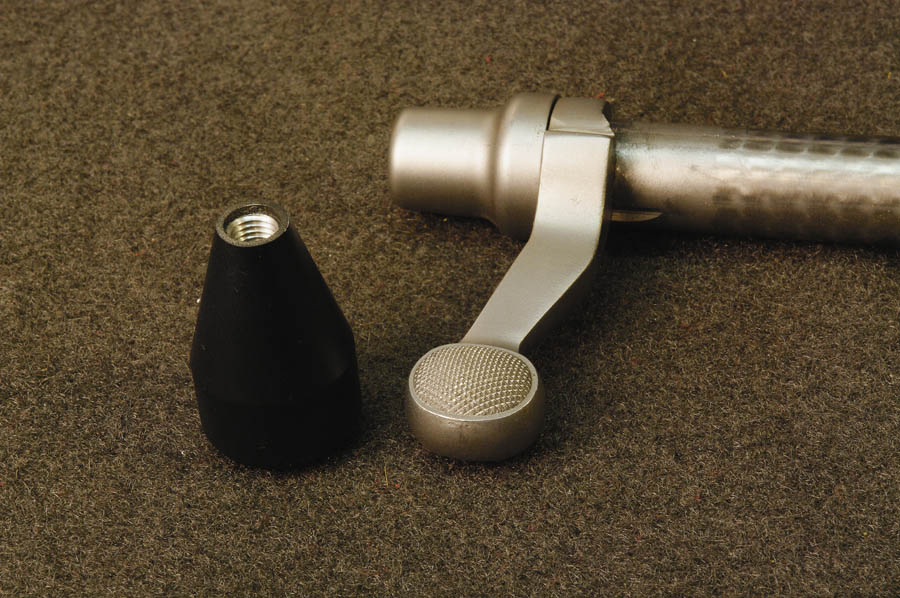
The rifle is now pretty much complete. But, I do have plans for a couple of additional tactical add-ons later this year. Both are outside of the purview of this article, which is bolt-on goodies for your rifle. First is to replace the standard bolt handle with an oversized tactical knob. Most of these aftermarket knobs require the old knob be cut off, the bolt handle turned to the correct diameter and then threaded to allow installation of the oversized knob, which is an advanced project for a hobby gunsmith. I just received a jig from Pacific Tool and Gauge that will allow me to chuck the bolt in my lathe and do the necessary work for the oversized handle.
The other change involves putting a cool-looking finish on the metal of the gun using Duracoat. This spray-on finish can air dry and the colors and patterns are limitless. I have been experimenting with a snakeskin pattern that looks awesome.
Test Drive
On my first day at the range with the made-over rifle, it was spitting snow and very cold. The wind was gusting a little and, with my deadline looming I was more interested in getting finished than in the process. This usually adds up to a bad day of gun testing. But, with self-defense ammo from Black Hills, Cor-Bon and Federal, my three-shot groups were averaging just less than 1 MOA. With the factory ammo it liked best, they were .5 to .75 MOA. I am just getting started with this rifle, and I'll return to the range later to work out some handloads and to formally test it with factory ammo. But, with my rifle fully capable of half-MOA groups, I believe this setup will do for now.
If you have a bolt-action rifle chambered for a cartridge suitable for long-range tactical use—pretty much any bottleneck centerfire—it's a candidate for a makeover. Instead of letting it squander its life away in your gun safe, why not give it a makeover? For a lot less than the cost of a complete new tactical sniper rifle, you can get into this long-range tactical shooting game and put a neglected gun back in service. Then you can excitedly tell all your friends about the great new shooting sport you discovered.