One of the big advantages of the AR-15 platform is that with certain stock designs, it can be readily adapted to shooters of various sizes. Not everyone is tall and lanky, and an adjustable stock can be a real boon. An adjustable stock also makes it more compact for storage or for transport. The latest are what are called “PDW” (Personal Defense Weapon) stocks, which collapse down to an even more-compact size than the originals. But, how do you install carbine adjustable stocks, and what are the costs of such compactness?
We’ll start by installing an adjustable carbine stock of the more traditional variety, and begin with a lower receiver that already has a fixed-length stock on it. (As with all things gun related, know your local laws before you go making such changes.) I will assume you are right-handed. Lefties, adapt as you always have.
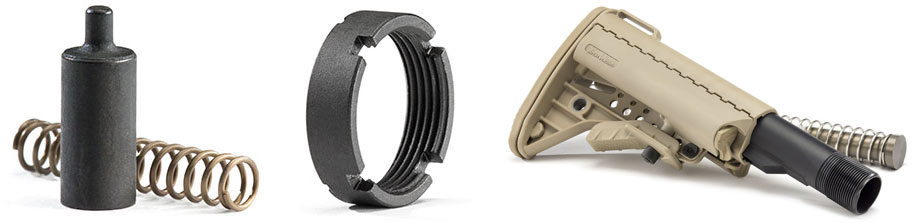
With the upper receiver off the lower, take a small, bladed screwdriver, and with one thumb over the buffer weight in the tube, press down on the retaining plunger you see poking up in the buffer’s path. When the plunger moves down enough, the buffer itself can—and will try to—move out of the tube. Restrain it, remove it and put it and its spring in a box where you’ll also be saving the old stock. These parts cannot be used with the new stock to come.
Now, with a larger screwdriver, remove the upper screw in the buttplate. Once it is off, you can slide the stock rearward off of the tube. Be careful. There’s a small spring poking out of the lower receiver. You want to keep track of it; maybe even pull it out now and set it aside, so you can replace it later.
Removing the tube will allow the buffer retainer to spring free, so keep that in mind and keep a thumb on the plunger when performing the next step. The original buffer tube might not need a wrench to unscrew it—many are on only hand-tight. First, try simply wringing it off with your bare hands. If that fails, place the receiver flat on its right side on the bench top, with the pistol grip pointing toward you. Use a crescent wrench to grab the wrench flats on the end of the tube. Press the receiver down with your left hand, hard, and then use the wrench to break the tube free. Once it turns, put the wrench down. Put your thumb back over the buffer retainer, and spin the tube off of the receiver.
Why use the bench for this and the later tube installation? Receiver strength, or rather the lack thereof. If you try to use one of the neat blocks that clamp in a vise that your lower receiver magazine well fits over to hold the receiver while you wrench on it, you run the risk of breaking your receiver. Flat on the bench, you reduce the chances of breaking anything to nearly zero.
With the tube off, set the receiver down. The new stock assembly will come with its own buffer and spring. When you unpack the new kit, set those aside—you’ll need them last. (Always read the instructions with any new parts kit.)
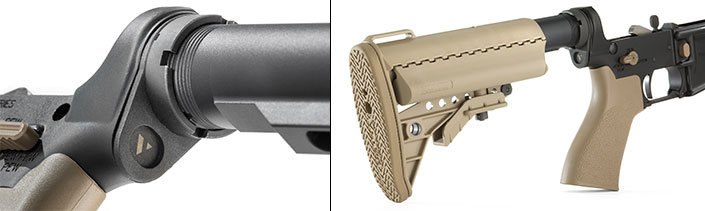
We’ll do the next step with a standard collapsible-stock design from Vltor, in part because it was the next one in line for a build I’m working on, and also because all PDW stocks will be variants of this IMod telestock. Assemble the tube hardware in the correct order. With or without the stock on it, the castle nut is the one with notches, and it goes onto the threaded part of the tube first, with the big notches to the rear. Rotate it all the way onto the tube. The receiver plate is the one that has the big lump stamped into it. Slide the plate onto the tube with the stamped lump facing the receiver.
Screw the tube into the receiver until it is just short of the retaining plunger hole. Put the spring and plunger in and hold them down with your left thumb. Screw the tube on until it does three things: It must trap the plunger, but still allow it to move up and down; the stock must be vertically oriented and the tube must not stick past the lower receiver “hoop.” If it juts in the way, you have a more-involved gunsmithing operation than simply installing a collapsible stock, which, unfortunately, is another subject entirely.
We’ll assume everything lines up. Find that spring you took out when you took the old stock off and push it back into the receiver. It drives the plunger that retains the rear takedown pin, and without it your carbine won’t stay together.
Press the retaining plate toward the receiver, and maneuver it a bit until the stamped lump on it nestles into the recess in the receiver. While you do this, you’ll be compressing the small spring, which will want to squirm out of the way. Don’t let it.
Once the plate is flush, screw the castle nut down until it holds the plate in place. Check the alignment and fit of everything again. Also, check that the stock is vertical. Install the upper receiver, and make sure the new buffer tube does not interfere. Then, take it off again for the next step.
Place the receiver assembly down on the bench, on its left side this time. Press it into place hard, and use a good castle-nut wrench to tighten the castle nut. My current favorite is the new one available from Real Avid.
Check alignment one more time. If it is all correct, use a spring-loaded machinist’s centerpunch to stake the retaining plate into the small notches of the castle nut. Reinstall the new spring and buffer into the buffer tube and you’re done.
PDW Stocks
More-compact PDW stocks sometimes come with a cost. One slight hassle is you cannot hinge the rifle open. You must disassemble it by pressing both takedown pins out, which isn’t a huge problem. Also, they come with a proprietary buffer tube and castle nut, but most still use a regular wrench for tightening the nut. Some will not use the original buffer weight and spring. The proprietary buffer and spring that comes with the stock kit do add cost. The bigger up-charge comes when the stock design is so compact that it requires a new carrier along with a new buffer and spring. But boy, are they compact when collapsed.
A note: using a PDW-style stock on a regular, 16-inch-barreled carbine creates a rather odd-looking firearm. To gain the maximum benefit from the compactness of the PDW stocks, you really need to be installing one of them on an SBR. (So, make sure you know and follow the federal and local laws concerning SBRs.) To stay over the 26-inch minimum overall length, you only need an extra 2.5 inches from your stock. All of the models covered here do that, so you can add a PDW-style stock to your carbine while your SBR paperwork is going through.
A few quick notes: All the PDW designs use a pair of steel rails along which the buttstock adjusts. When you telescope the stock down to make it more compact, these rails will slide alongside the lower receiver. As a result, PDW stocks may not play well with some custom, non-mil-spec lowers or lower components like extended takedown pins. If your lower has extra thicknesses for QD sling swivel sockets, if it has an ambidextrous selector or an ambi bolt catch, the rails may not clear. Even if they do, when the stock is collapsed, the ambidextrous parts may not be able to move or function properly.
A standard setup, like the Vltor with which we began, won’t have a problem. Check the manufacturers’ websites or drop them an e-mail asking about fit. It would not be fun to spring for a cool new stock, only to find it doesn’t like being attached to your cool new lower.
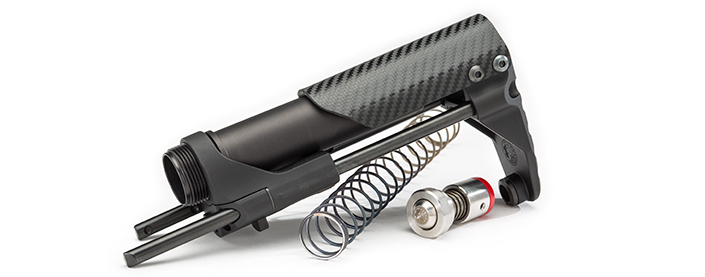
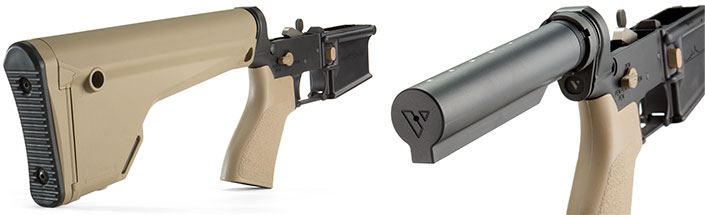
Battle Arms Development Vert PDW
The Vert PDW is high-tech to the max. The cheek-rest is carbon fiber, and the proprietary spring and buffer that come with it also get high-tech work. The buffer has its own integral spring built in, to further dampen the bottoming-out of the system. It is designed to work with a standard, full-weight M16 carrier and a direct-impingement gas system. The proprietary buffer tube has the castle nut wrench teeth built in, and the Vert comes with the wrench you’ll need to install it. The extension has four settings, in addition to fully collapsed. It is available in black or carbon-fiber finishes.
Weight: 17.5 ounces
Length Extended: 7.75 inches
Length Collapsed: 4.75 inches
MSRP: $399
battlearmsdevelopment.com

LWRCI PDW
LWRCI’s stock kit is the ultra setup. It uses a proprietary buffer tube, spring and a buffer weight that is pinned to the proprietary conversion carrier. Also, it uses a castle nut that is hidden underneath the attachment bolster, and you need a special (included) wrench to reach it. To tighten it, you do not use a castle-nut wrench, but rather a regular socket wrench that plugs into the back of the included wrench/socket. This stock only has two setting: open and closed. There is no cheekpiece on the stock—the rear bolster that encloses the buffer tube serves as a cheekpiece. This is due to the LWRCI PDW stock being the shortest of those tested when collapsed. It comes in two flavors: one for LWRCI’s piston-driven carbines, and one for the company’s DI carbines. Both stock kits use a proprietary carrier to work with the LWRCI piston or DI uppers.
Weight: 14 ounces
Length Extended: 8.2 inches
Length Collapsed: 3.5 inches
MSRP: $451
lwrci.com
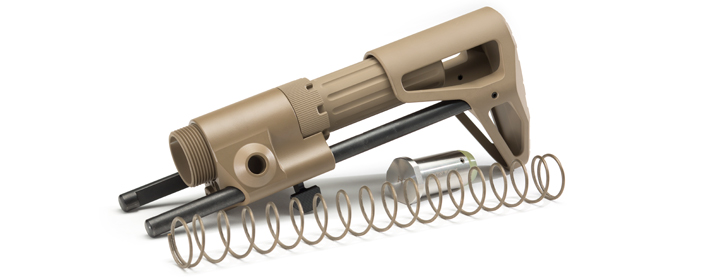
Maxim Defense CQB
The Maxim CQB uses a proprietary buffer tube with an integral castle-nut ratchet. It has three extended positions, and also locks in place when fully collapsed. It uses a proprietary buffer and spring (included), which are caliber specific. Be sure to know whether you want the 5.56 NATO or .300 BLK, and an H, H1 or H2 equivalent buffer. A bonus: the assembly body has built-in QD sling swivel sockets. It’s offered in black or FDE.
Weight: 23.7 ounces
Length Extended: 10 inches
Length Collapsed: 5.5 inches
MSRP: $395 to $550
maximdefense.com
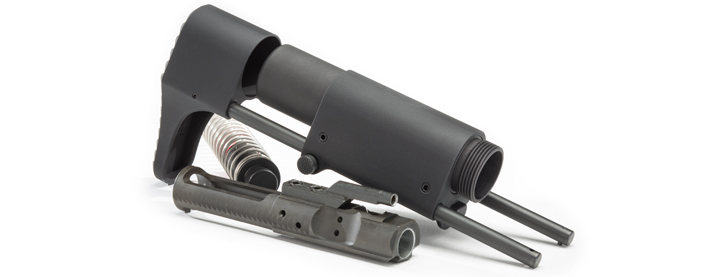
Safety Harbor KES-AR15
The Kompact Entry System stock for AR-15s can be had in two versions. One is an open or closed model, and the other offers four positions from closed to fully-opened. The kit consists of the stock and proprietary buffer, spring and carrier. The buffer tube is the cheek rest, and it also includes a sling-attachment bar. The buffer is not pinned to the carrier like some other designs. The KES does not use a castle nut, but instead a hex nut, and Safety Harbor includes a wrench to fit it. It’s available only in black, but will fit all AR-15 chamberings.
Weight: 20 ounces
Length Extended: 10.25 inches
Length Collapsed: 4.75 inches
MSRP: $350
safetyharborfirearms.com
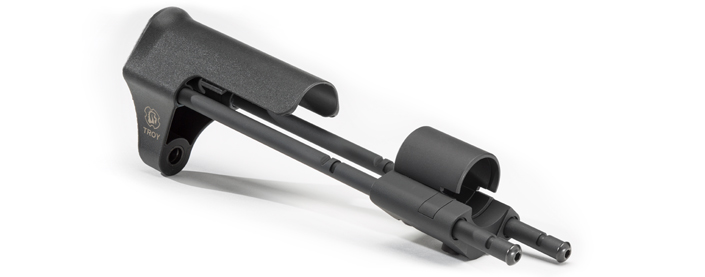
Troy Airborne Stock Assembly
The Airborne is the one that requires the fewest extras. It not only uses the standard carbine buffer tube that we’ve already installed (or may already be on your carbine), but it also uses the buffer weight and spring in that tube as well. You simply take the old stock off of the tube, and then assemble the Troy Airborne on it. Instructions are straightforward, and you’ll need the included Allen wrench. The cheekpiece is synthetic, so your face won’t be stuck to aluminum on cold days, and it has a QD sling socket. It is available in black only.
Weight: 20.4 ounces
Length Extended: 11 inches
Length Collapsed: 6.75 inches
MSRP: $199
worldoftroy.com
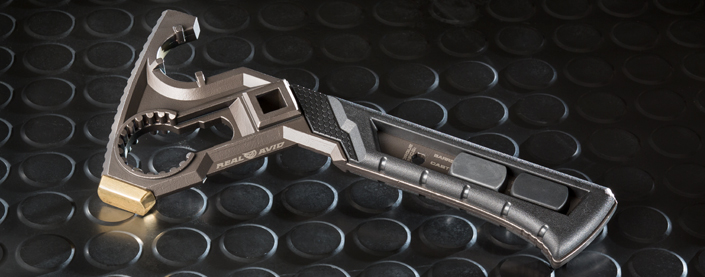
Real Avid Armor’s Master Wrench
When it comes to building or upgrading your AR-15, having the right tool makes a world of difference. When it comes to critical tasks like tightening the castle nut on a collapsible stock or properly torquing a barrel nut, having a stout wrench handy that allows a torque wrench to be easily used is paramount.
Real Avid’s Armor’s Master Wrench has three separate hammer heads (brass, nylon or rubber) for varying degrees of force needed. There’s a barrel nut wrench (compatible with either mil-spec or freefloat variants, depending on side), a castle nut wrench, slots for muzzle brakes and fixed-stock receiver extensions and a centrally located 1⁄2-inch torque wrench receiver, all in one tough tool. MSRP: $59.99; realavid.com