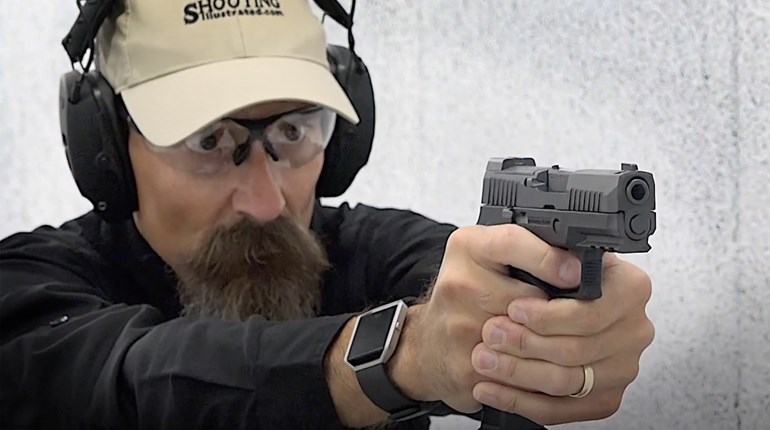
Professional 3 division Grandmaster shooter and firearms instructor Travis McCamish uses the term “shrink your cone” in his pistol classes to describe what’s needed to better your round placement control and your overall handgun shooting skills.
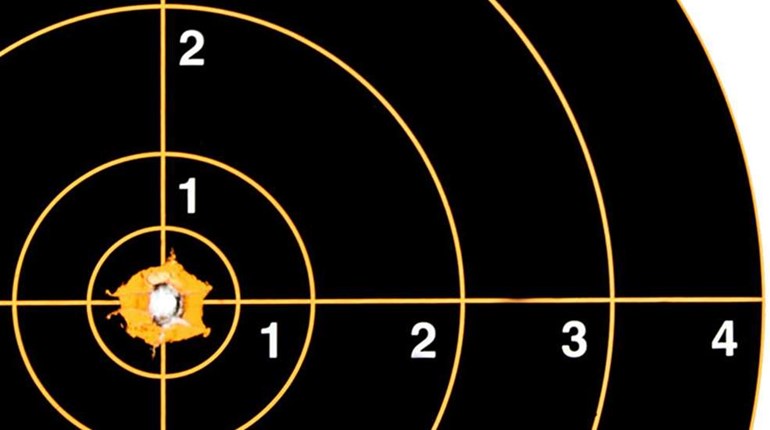
What he’s referring to is the measurable pattern of multiple rounds placement on target at a specific distance. Take, for example shooting at the A-zone (designated center mass area) of a target set at the fifteen yard line. After firing two five-round volleys you may find your “shotgun pattern” spills outside the A-zone with tight misses (C-zone hits) to the left, right, above and below the perforated lines.
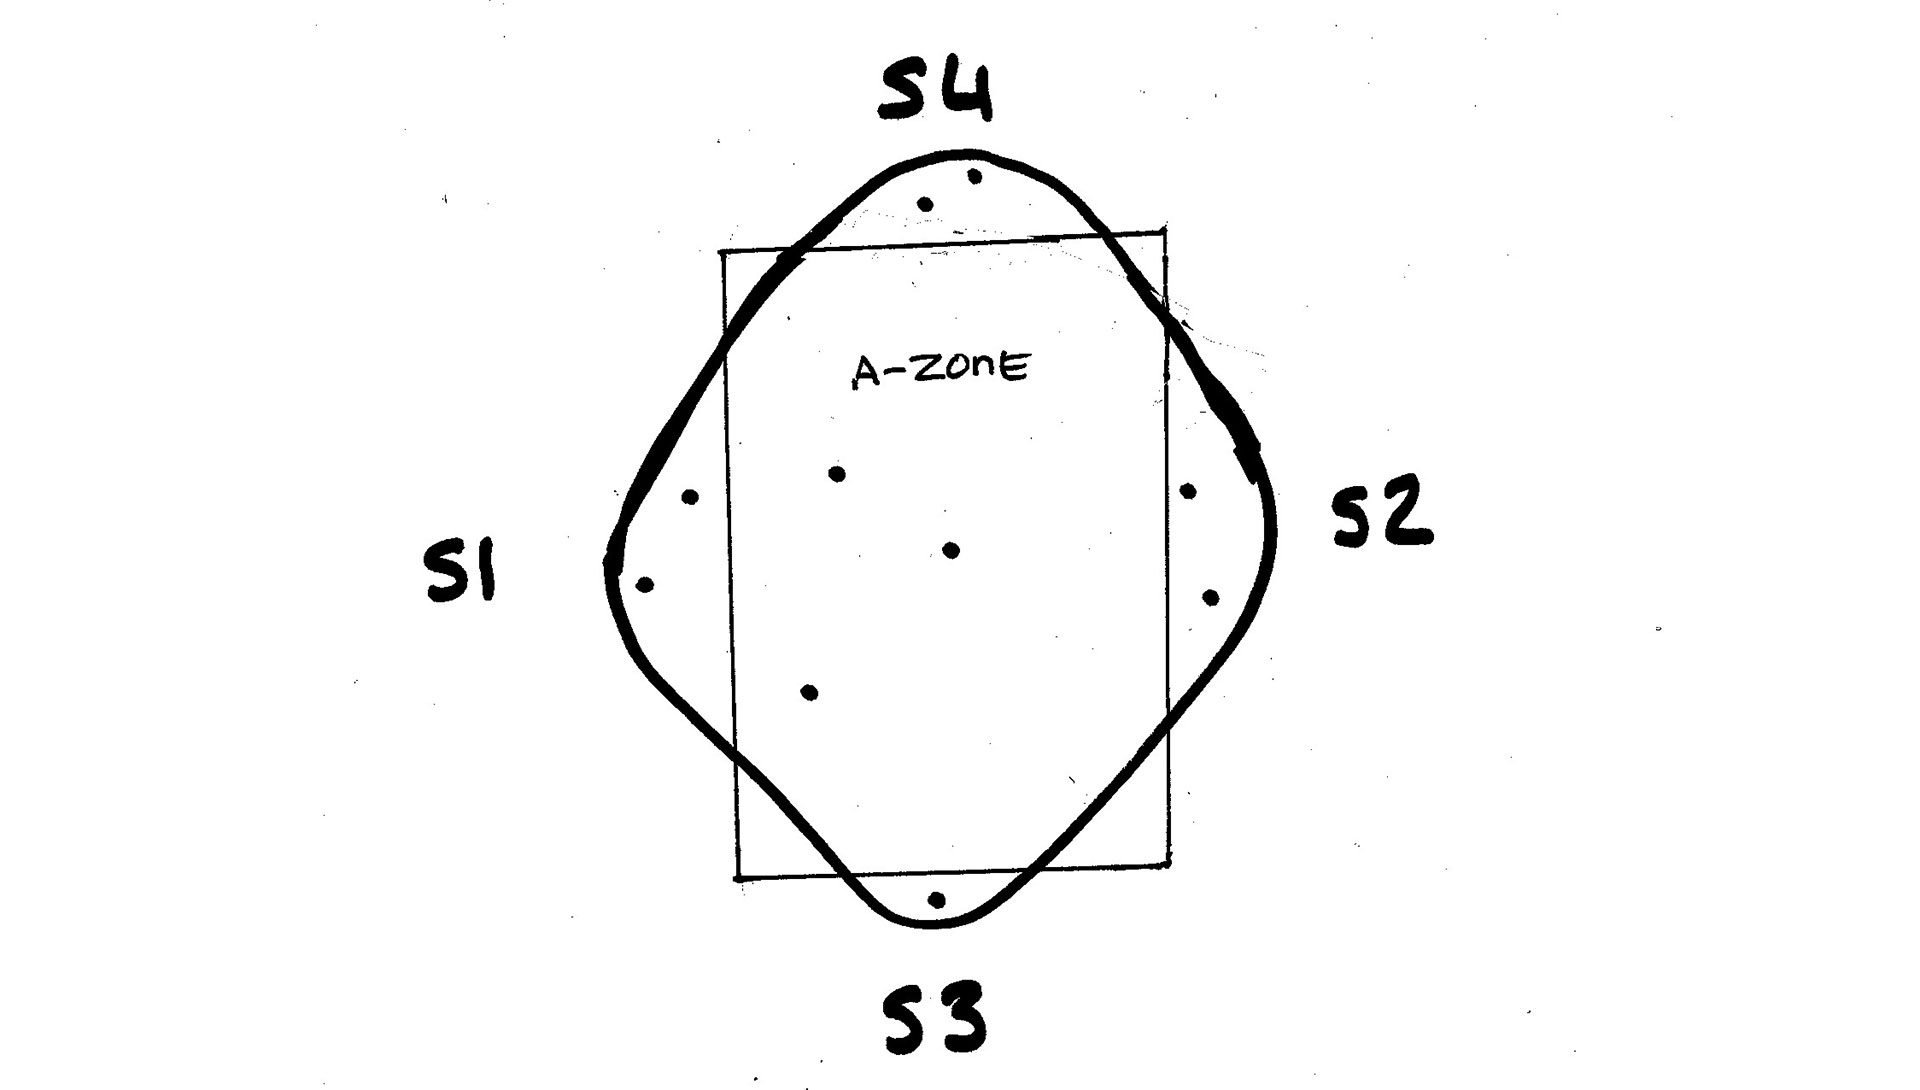
If you draw a rough circle around the entire pattern with a marker, Master Travis would call this “describing your cone.” Technically referred to as “a measurement of trajectory dispersion,” the cone is a graph of your shooting performance which can be diagnosed.
To shrink your cone means to tighten up your round placement resulting in a tighter circle, which means that you have gained greater fire control which translates to shooting better.
Sectors One and Two
The secret to shrinking your cone is to eliminate any hits outside the area you’re trying to hit (A-zone) in the center of the target. If you take the circle you just scribed and focus on those hits outside the perforations of the A-zone and inside your marker line, there are four positions or sectors of the target that may be addressed.
The first two are windage (as opposed to elevation) and that is left side of the A-zone and the right side of the A-zone (again – these are hits outside of the A-zone but inside the circle you’ve drawn). Affectionately referred to as “sectors 1 and 2,” these missed hits represent focal points for improvement.
If you are a right-handed shooter, the left section would be considered “sector one” (S1) and the right section would be considered “sector 2” (S2).
Your misses above and below the target are considered sectors 3 and 4. Regardless of dominant hand, sector three (S3) identifies the bottom misses (below the A-zone) and sector four (S4) describes those misses above the A-zone line.
The sector numbers reference clean up the priority for each area. In other words, you want to work on cleaning up S1 before S2, then work on cleaning up S3 before S4.
You can’t solve twenty-five problems at a time, so trying to fix all four sectors will fail to serve you best. If you want to shrink your cone, focus on cleaning up one sector at a time.
Starting with S1 there are a several potential diagnostics and to be accurate would mean to carefully watch the shooter (as opposed to glancing at a traditional shooting diagnostics chart) while they are shooting so you can see exactly what the gun is doing and how they are making the gun behave. You can’t fix something you can’t see.
S1 misses are usually grip, sometimes sight focus and possibly maintaining hold control as the muzzle is moving during the fire control sequence which means shooter input which in turn, could be any number of possible input-generating events. Once you eliminate those S1 inputs and you observe improvement (fewer or no rounds ending up in S1) then it’s time to move on to clean up of S2.
S2 is also generally grip slip (or grip pressure change) and perhaps sight/ target focus. Especially with a carry optic, if you start to shift your focal plane from the target to your dot, you tend to move the gun to where you’re looking – which is toward the dot and not at the target. You can liken this phenomenon to looking at the hood ornament of your car as opposed to keeping your mind and visual focus between the white and yellow lines on the road.
Upon completion of S1 and S2 cleanup you may then move on to clean up of S3 and S4.
Sectors Three and Four
Multi-time World Champion professional shooter and master firearms instructor Rob Leatham describes S3 as “novice misses” and S4 as “professional misses.”
What he means by this is that the S4 misses are a matter of timing whereas the S3 misses are a function of “driving the gun.” Master Travis describes ‘driving the gun’ as the shooter causing the muzzle to dip during recoil again with unnecessary inputs causing the muzzle to drop below the bottom (aiming) line of the A-zone.
Consciously tying to “allow the gun” to rise and recover will usually solve this problem, which, with practice, should eventually drop into the subconscious. However, this is much easier said than done.
Following your cleanup of S1, S2 and S3 you have one remaining area to focus on and that is your “professional” misses above the A-zone aiming line which is usually attributed to timing.
Appropriately predicting the return of the muzzle to the center of the A-zone is a matter of mental focus as well as timing adjustment. Once you have reduced the number of misses in S4, then you have gained better control of S1 through S4 and have attained measurable success because of your painstaking endeavors to shrink your cone.