In the process of defending one’s home with a pistol, several additional skills beyond marksmanship are useful and necessary. In particular, the ability to move through the home while holding a handgun and techniques to inform the all-important don’t shoot/shoot decision are critical.
When moving through a structure searching for intruders, holding a pistol in a shooting posture is probably not the best technique. Doing so will prove tiring, result in muzzling any innocents in front of the searcher, obscure any view of an intruder and provide an intruder with the opportunity to gain control of the pistol at close quarters. One possible solution to this conundrum was provided by retired LEO, trainer and gunwriter Dave Spaulding numerous years ago. He called it “Third Eye,” but we can refer to it more descriptively as “Depressed Ready.”
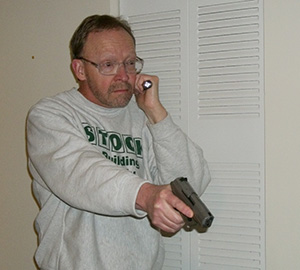 Taking this position simply involves bringing the elbows back when at Low Ready until the elbows touch the rib cage. This reduces fatigue, brings the pistol closer to the body so it is better protected from a gun grab, and allows a full view of persons encountered without muzzling them. It can be done with either one hand or both and can easily be presented to a threat in the event the “shoot” decision is made.
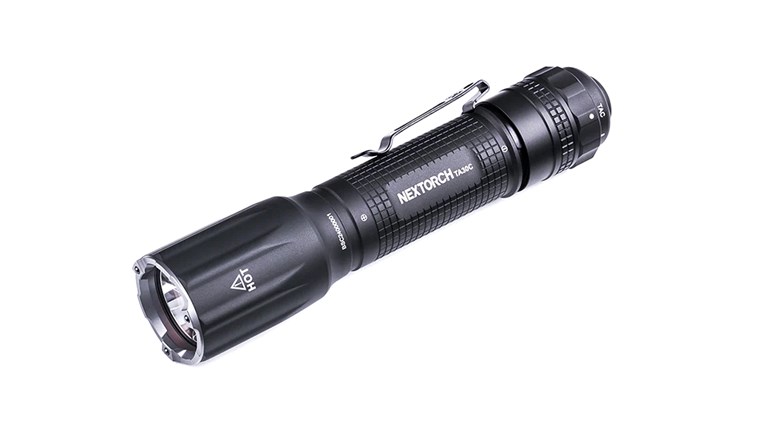
When searching one’s home, a significant possibility exists that another person encountered will either be an innocent or even a loved one. Accordingly, the need to identify the person encountered is paramount. Two methods of identifying the person can be used. Visually sighting them, possibly with a handheld flashlight, is one way. The other is by using a verbal challenge. Simply asking “Who’s there?” before making a “shoot” decision would prevent quite a few tragic mistaken identity shootings each year. If the answer is “Dad, it’s me,” the FBI calls that a “clue.”
Using the structure of the North Carolina Carry Concealed Handgun Permit Qualification Course, a shooter can practice all three of these skills at the range. The course consists of 10 rounds each at 3, 5, and 7 yards for a total of 30 rounds. Each skill can be practiced at one of the distances. A typical session could consist of:
- 3 yards – begin at the Depressed Ready position
- 5 yards – shoot while holding a flashlight in one hand, using the cheek technique
- 7 yards – give a challenge and consciously make a shoot decision before shooting
Any silhouette target can be used. Add a sheet of paper on the vital zone as an additional marksmanship task. The course of fire could be structured as follows.
Depressed Ready at 3 yards
- 10 rounds at 3 yards
- If your range permits it, start one step back from the shooting point, holding the pistol in a Depressed Ready position. If your range doesn’t permit this, simply start at the firing line at Depressed Ready.
- Step to the shooting point.
- Raise the pistol to eye level and fire one shot.
- Step back and repeat twice for a total of three strings of one shot each.
- Start one step back from the shooting point, holding the pistol in a Depressed Ready position.
- Step to the shooting point.
- Raise the pistol to eye level and fire two shots.
- Step back and repeat once for a total of two strings of two shots each.
- Start one step back from shooting point, holding the pistol in a Depressed Ready position.
- Step to the shooting point.
- Raise the pistol to eye level and fire 3 shots
- Step to the shooting point.
- Step to the shooting point.
- Step to the shooting point.
 Shooting With A Flashlight at 5 Yards
- 10 rounds at 5 yards
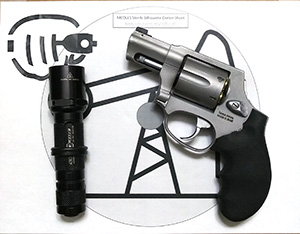
- Grip the pistol in the primary hand at the low or Depressed Ready and hold a small flashlight with a tailcap switch in the support hand using the cheek technique.
- Press the switch on the flashlight to illuminate the target (whether the light on the target actually can be seen is not important). Make a conscious “shoot” decision, raise the pistol to eye level, align the sights, and fire one shot.
- Return to ready, primary hand only.
- Press the switch on the flashlight to illuminate the target. Make a conscious “shoot” decision, raise the pistol to eye level, align the sights, and fire two shots
- Return to ready, primary hand only.
- Press the switch on the flashlight to illuminate the target. Make a conscious “shoot” decision, raise the pistol to eye level, align the sights, and fire 3 shots.
- Return to ready, primary hand only.
- Press the switch on the flashlight to illuminate the target. Make a conscious “shoot” decision, raise the pistol to eye level, align the sights, and fire 4 shots
Challenge Before Shooting at 7 Yards
- 10 rounds at 7 yards
- Start at Low Ready, holding the pistol with both hands.
- Give a challenge while at Low Ready; e.g., ‘Who’s there?’ Consciously make a “shoot” decision, raise the pistol, align the sights, and fire four shots.
- Return to Low Ready
- Give a challenge while at Low Ready; e.g., “Who’s there?” Consciously make a “shoot” decision, raise the pistol, align the sights, and fire three shots.
- Return to Low Ready
- Give a challenge while at Low Ready; e.g., “Who’s there?” Consciously make a “shoot” decision, raise the pistol, align the sights, and fire two shots.
- Return to Low Ready
- Give a challenge while at Low Ready; e.g., “Who’s there?” Consciously make a “shoot” decision, raise the pistol, align the sights, and fire one shot.
This course would then consist of 30 rounds, fired at three different distances, employing three different Home Defense skills. There are no time limit restrictions. North Carolina law requires a shooter to score 80-percent hits (24) on the silhouette but a more desirable standard for a home defender would be 100-percent hits on the sheet of paper.
To finish off a 50-round box of ammo for the session, shoot the NRA Marksmanship Qualification Program Defensive Pistol I for the Pro-Marksman Level.
It is shot from the two-handed standing position. For qualification, the NRA D-1 target must be used but for practice, any silhouette will do. Draw a 12-inch circle on the target. A pizza pan from a box store works very well as a template.
Place the target at 21 feet (7 yards). Starting position is with the pistol unloaded on the bench. Safely pick up the pistol, load it, and fire five shots in 30 seconds. The standard is that all five shots (100 percent) must hit inside the 12-inch circle. Repeat three times for a total of four strings of five shots each in 30 seconds.
In this 50-round session, a shooter will have practiced four important home defense skills. Three of the skills are gunhandling and decisional related while the fourth is shooting to a 100-percent accuracy standard. All are key components of successful home defense.