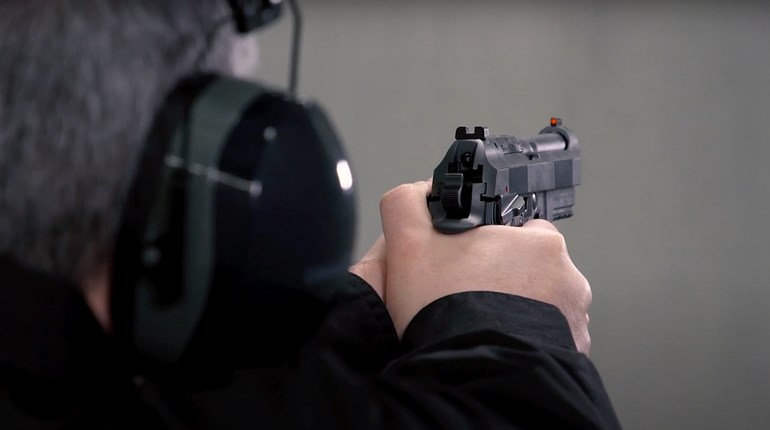
But, before the extractor or firing pin can be installed, the firing-pin stop must be fitted perfectly (meaning with as little play as possible). The reason for this is because in addition to retaining the firing pin and its spring in place, the firing-pin stop also holds the extractor firmly in place so there’s no room for it to rotate or “clock.” The extractor’s orientation is critically affect the removal of empty cases, so an undersize extractor can jeopardize the pistol’s reliability. However, should an undersize firing-pin stop be all that’s available, once installed peen the part’s edges with a punch to create the desired fit.
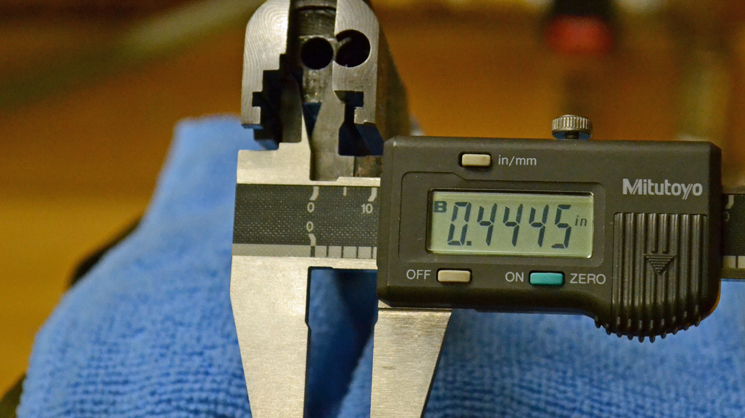 Otherwise, use calipers to measure the notch in the rear of the slide. Then, using a small file, sandpaper or a combination of both to remove and even amount of metal from each side of the firing-pin stop until the required dimension is attained (of course, you remembered to run the edges and back side of the part across sandpaper to remove any burrs for the part beforehand, right?) Once the part can slide with minimal effort into the channel in the rear or the slide, set the part aside and turn your attention to the extractor.
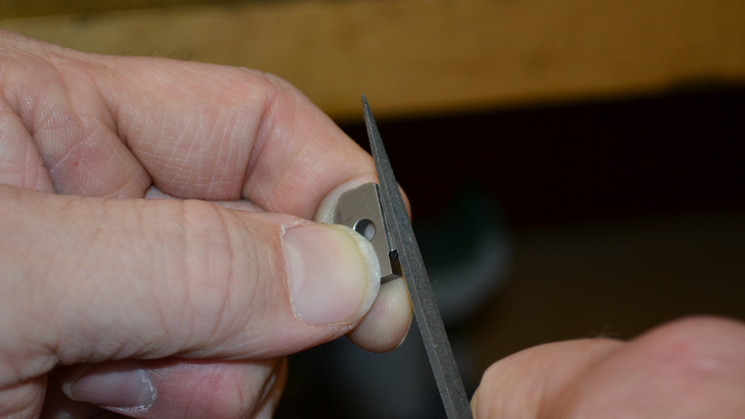
In Kukick and Oldham’s book, they write, “Installing the extractor is simply a matter is generally a simple matter of sliding the extractor into the tunnel provided for it in the slide.” Of course, there’s a bit more to it than that. The unique leaf spring has a fulcrum in the middle and a hook on one end. In addition to applying essential tension, certain areas of the hook must be lightly beveled to foster smooth feeding. In a nutshell, you need to “break” or bevel the outside edges of the extractor and the extractor hook: the bottom of the hook and the engagement flat just behind the hook. Doing so smoothes the entry points for the cartridge rim, thereby enhancing reliable feeding. It goes without saying that dealing with such minute angles will likely require a magnifying visor, a nearby bright light, jeweler’s files and, naturally, a steady (read non-caffeinated) steady hand. [Don’t ask me how I know that last part.]
 While prepping the extractor is more tedious and time-consuming than difficult, I opted to adjust the tension on the extractor for each pistol adjust the tension and forego the minute file work on the Caspian. Why? It’s not that I thought the task was above my skill level. Rather, I’d prefer to leave tuning the pistol’s reliability to a professional since the Caspian is destined to be a carry pistol.
The next entry will focus on how to prep the extractor for installation.