During Operation Desert Storm, we were bored enough to use excess desert fatigue material to sew gun chaps for our M16A2s. Fortunately things got busier and we got smarter as time went on, and we began using simple spray paint to break up equipment outlines. Today we have choices ranging from removable tape and paints to durable spray-on enamels and complex dipped-camo applications for our guns. I like them all, and so long as you adhere to the basic principles of concealment, they work well.
Without drilling deeper into the subject of camouflage, we can accomplish a lot by concentrating on the process of simply hiding our implements in plain sight. We do this by eliminating the three main camouflage violations: glare, unnatural colors and contrast with the background. Nothing screams, "Here I am!" louder than colors and shapes that don't match the terrain. I see great examples of bad camo choices during hunting season. Many hunters spend a small mint on the latest "Real-Super-Hidey-Special-Flage" hats, gloves, neck gaiters, jackets, pants and boots. Unfortunately, a large number also carry a blued, stainless steel or strikingly black rifle through the woods and in stands and blinds. A few dollars will buy the earth-toned spray paints needed to effectively eliminate any reflections while breaking up the color and outline of those rifles.
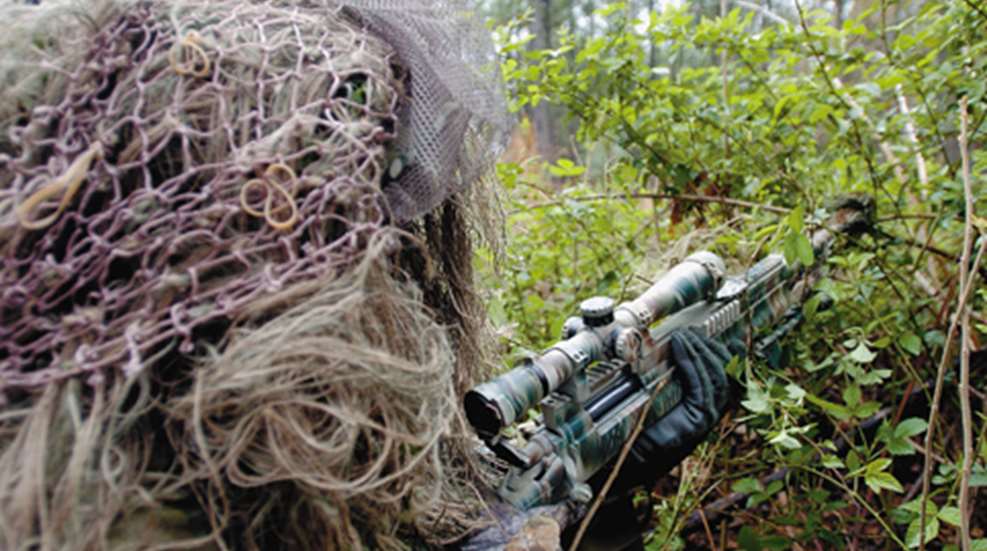
In sniper school, I was told the color black doesn't exist in nature. Setting aside the animal kingdom and anything struck by lightning or burned, the instructor was correct in that true black is seldom found outside of man-made products. Yet, we learn to consider any black rifle as a good tactical color. If you're sliding down fast ropes and clearing rooms, then black is about as stealthy as you need. However, if your aim is to remain hidden within a given environment, you'll need to wipe away most or all of that appearance. Over the years, I've found it's best to use a single-color base coat in one of the muted earth tones before adding other colors or patterns. Matte tans, light greens and grays are all favorites for this purpose.
I often leave a rifle alone once the base coat is applied, as that in and of itself can be very effective at removing the big black stick from my hands in the woods. If additional breakup is desired, vegetation can be used to add an easy and cheap pattern. Simply place small leaves, pine straw and other vegetation on a rifle's side and spray those areas with another color. Once dry, remove the leaves to reveal outlines contrasted in two colors. Repeat on the other side/surfaces or with additional colors. You can do this to your heart's content until you have a pattern that works. When forming camo patterns, it's important to avoid the continuation of a gun's existing shape. For example, don't paint lines on a barrel that run parallel to its long axis. Instead, use designs that run perpendicular or at odd angles to the barrel to reduce its visual signature.
If you prefer a more professional looking job to the backyard special, many gunsmiths offer durable, spray-on coatings. I use Lauer Custom Weaponry's DuraCoat on customers' guns quite often these days. Simple one- and two-coat finishes are reasonably priced, while complex patterns can run several hundred dollars. I attended a training course and invested in professional equipment to make my process more efficient, but you can do nearly as well with do-it-yourself kits that allow painting one or two guns with minimal investment. All in all, there are many options in this arena, and some phenomenally nice looking and durable finishes may be had on nearly any piece of equipment. Whatever method you choose to blend in with your surroundings, ensuring you eliminate the telltale signs of "man-madeness" will go a long way toward creating a successful camouflage job.
Here are some helpful tips to gussie-up your rifle• Degrease all surfaces you plan to paint• Extremely smooth surfaces may need to be roughed-up with steel wool or sandpaper• Plug or tape over the muzzle to prevent paint from getting into the rifling• Remove optics (if not camouflaging them)• If painting optics, seal all seams on the scope's body and knobs and cover lenses with caps and electrical tape—err on the side of caution and over-tape/under-paint if necessary• Tape over the action (or close the ejection port cover, if present) to keep the bolt and chamber clean• Tape over any other areas that will allow paint to enter the firearm's inner workings• Tape over any joints/seals on lights, lasers, etc.—most durable paints are petroleum-based and will penetrate and ruin O-rings